Before we begin, it is worth saying the following. It is no secret that many top bloggers resort to the fact that they buy their own design on specialized sites. But since we are beginner bloggers, we do not have the means to order a good hat for the channel. Therefore, we will use ready-made caps for YouTube, on the basis of which our unique design will be created.
Finding predefined templates
There are many sites and groups where you can get a ready-made design template. If we consider the groups, then entering in the search for the same social network “VKontakte” the sentence “caps for the YouTube channel” - a lot of groups will be displayed that regularly post free solutions in terms of design. Community administrators post truly useful content and, most importantly, absolutely free! We won’t advertise a specific group, but it’s enough to look through at least a dozen of such groups on your own, and you’ll definitely find for yourself a blank of the design that really suits you.
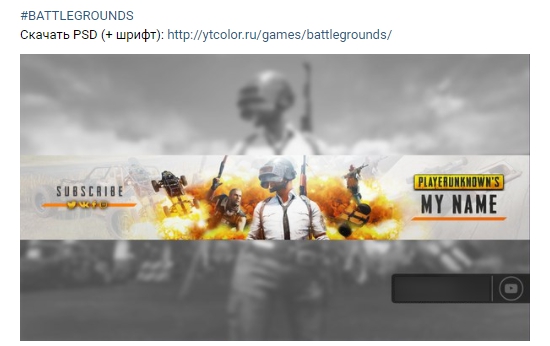
You probably already thought, why then read on this material on how to make a hat for YouTube, if you can just download and install a ready-made version for yourself? This is not entirely true, all the caps also need to be edited independently, since most texts are installed by default there. For example, in the picture above you can see the inscription “MY NAME”, which implies the name of your channel, this is the inscription that you must first change for yourself.
Install fonts
Before making a header for "YouTube", you need to pay attention to the fact that almost all ready-made templates use non-standard fonts, i.e. those fonts that you will not have in the system initially. Be sure to download all the fonts attached to the template and install them in the system. If you do not do this initially and immediately proceed to the template editing procedure, then the fonts will be replaced by those that are on your computer, and this will significantly affect the beauty of the design itself.
Installation takes place in a few short steps:
- Download the provided font.
- Double-click to launch it.
- In the window that opens, click on the "Install" button.
- After installation, close the window.
- Font installed!
Editing a template for your channel
Now you can proceed directly to the process of editing a template for your channel. On how to make a heading for "YouTube" for your channel, using a ready-made template, we will analyze in stages.
The first thing we need is a Photoshop graphic editor, through which further editing of the existing template will take place. As a basis in this example, we will use the template specified initially in the first paragraph of this material.
Open the finished template and see that it is necessary to replace only two words in it - this is “MY NAME”. On the left panel in Photoshop there is a tool “Horizontal text”, select it. Now just click on the inscription “MY NAME” anywhere, and enter the name of your channel there!
Saving and installing a template
Nothing complicated, right? Now after the header for "YouTube" is done, it must be saved and posted on your channel.
To save in Photoshop, select “File” / “Save As ...”, then specify the save path, file name and type. It is recommended to use the most popular graphic file type - “PNG”, as it is best suited for this kind of design.
Well, the last step is to post a picture on your channel. Since all ready-made templates have already been marked up for the YouTube channel format, no additional steps are required to position the image. The picture should be displayed on the channel in such an option that it is available in the preview.