Due to the fact that optical disks used as storage media or bootable devices are becoming increasingly obsolete, and removable USB devices are occupying this niche, questions about creating bootable media from ordinary flash drives with which it was possible would work like with regular installation disks. And for netbooks in which optical drives as such are not provided for in the design at all, these aspects become especially important. In the material presented below, we’ll just talk about how to make an image of an installation flash drive so that you can boot from it and perform certain actions. But first, let's see why such a device is called installation, and for what purpose it can be used. There can be many options for use, and this does not always apply exclusively to the installation of operating systems.
Installation flash drive: why is it called bootable and why might it be needed?
Immediately it is worthwhile to draw the attention of all users who intend to engage in such actions to what particular components should or may be present on this type of media. Some mistakenly believe that to perform such operations it is enough to simply copy the necessary files to the media, and then install it as the first boot device in the parameters of the BIOS / UEFI primary input / output systems. Absolute fallacy. Yes, indeed, in some cases this method works. In particular, we can talk about the installation flash drive with Windows 7, if the computer uses UEFI as the primary system rather than an outdated BIOS. Another point is related to the direct copying of removable media files of antivirus disk utilities under the general name Rescue Disk.
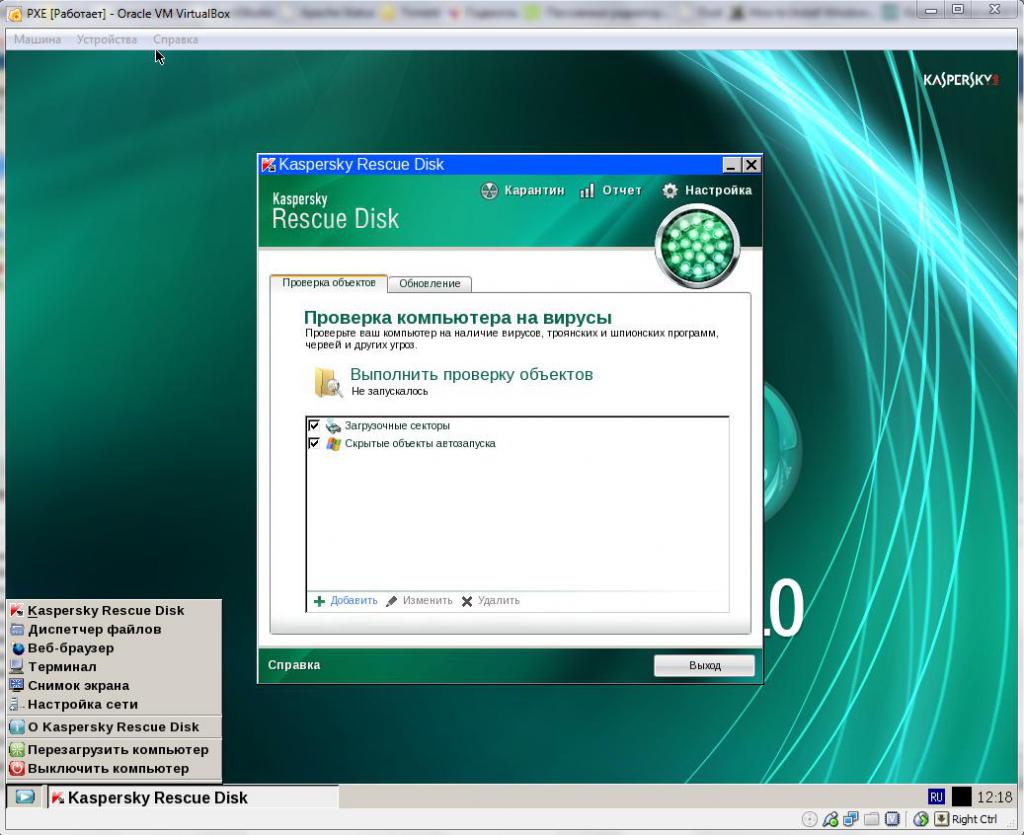
They already initially contain the bootloader files in the set, using them when you turn on the computer or laptop, and you can start from a removable device. Somewhat distracting from the main topic, it is worth saying that it is their use that is the last and most powerful means of neutralizing virus threats, which it is impossible to get rid of by any other methods, since such programs are able to detect even those viruses that are initially located in RAM.
Now a few words about what kind of files can be contained on a flash drive after turning it into a boot device. As an example, consider the installation distributions of some versions of Windows operating systems.
As a rule, in the root directory there is an autostart file (autorun.inf), which, by the way, very often when infected, like to modify some computer viruses and boot manager files (bootmgr and botmgr.efi). the difference between them is that each of them is used for a specific primary system, as well as for loading the Windows installer with different architectures. The rest of the components necessary for starting and installing are located in the appropriate folders, and we won’t dwell on them, since the detailed description will not tell the average user anything.
How to make an installation flash drive: basic options
Now let's move on to creating bootable media in the most direct way. Despite the fact that on the Internet you can find publications that indicate up to a dozen ways to create bootable USB-drives, in fact there are only three of them:
- regular file copying;
- Windows command line toolkit
- the use of special programs (both for OS distributions and driver packages).
Whoever says whatever, there are no other options! And when it comes to the large number of proposed methods, this is mainly associated only with the description of different applications, and more.
The program for creating the installation flash drive Media Creation Tool
First, consider the standard MCT program developed by Microsoft specialists to quickly upgrade an existing operating system. Immediately note that this program for creating a bootable USB flash drive, unlike third-party utilities, is designed to use distributions of only systems 8.1 and 10. In the seventh modification of the system, it can be used exclusively for upgrade, that is, create bootable media for installation Windows 7 will not work.
So, how to make an installation flash drive using this utility?
The program is portable and is presented in the form of a single EXE file, which you need to run as administrator, and after starting select the point of creating bootable media, rather than upgrading the computer, which is offered by default. After passing through the preparatory phase, you will need to select the media in the form of a removable device and follow the instructions of the program.
Note: the drive will be formatted in any case, so take care to copy important information from the USB flash drive to another place in advance. In addition, few people know that after starting the utility creates a special hidden directory $ Windows. ~ WS in the system partition, which cannot be deleted manually. To do this, at the end of all actions, you should use the standard system tool with the option to delete system files. For the described utility to work correctly, an active Internet connection is required, since the installation components will be downloaded from Microsoft resources.
Using a distribution image with a direct copy of the contents
Now let's figure out how to make an installation flash drive from the installation disk or from its image. In the first case, everything is simple: it is enough to display all the components on the disk, including hidden files and folders (if they are there), and then simply copy to the necessary media (well, or create a disk clone in some program, specifying as a storage device copies of your USB drive).
An installation flash drive with Windows 7 and higher for installation on systems with UEFI, but already from the image of the original disk, can be created no less simply. Only in this case, to process the ISO file, you need to use not the most specially developed programs for this, but the most ordinary archivers like WinRAR.
The actions are as follows: extract the contents from the image, as from a regular archive, and then copy the files and folders to removable media. It is not recommended to indicate unpacking directly to a USB flash drive in order to avoid glitches and errors.
Note: the flash drive must be 4-6 GB in size and must be formatted exclusively in FAT32, since NTFS does not recognize the primary UEFI system.
Command line tools
It's time to say a few words about how to make an installation flash drive with an XP distribution (or any other). Due to the fact that this version of the operating system is hopelessly outdated, although it is also popular and even has support from Microsoft, many modern programs do not want to work with it, but some can still be used. Nevertheless, if such tools are not at hand, it is easiest to use the DISKPART tool built into Windows of all modifications, which works exclusively from the command line and is not called in any other way.
Making an installation flash drive via the command line is quite simple. An ordinary user who is not particularly familiar with the use of such tools to delve into what each of the above commands does is completely optional. The main task is to correctly select the disk number corresponding to removable media, and when formatting, specify the desired type of file system (NTFS or FAT32).
Note: you can determine your flash drive by size, the value of which is indicated to the right of the number. The command line must be run with administrator rights, and not only when entering the system under the appropriate registration. The call is made through the menu "Run" (Win + R) by entering the abbreviation cmd. In Windows XP, admin rights are not needed, because their use is not provided at all, and in systems 7 and above, if there is no start point below the command entry field on behalf of the administrator, you can use the "Task Manager" to create a new task (there will be such a point) or run the desired cmd.exe file from the System32 directory with administrator rights through the RMB menu.
Rufus program
How to make an installation flash drive via CMD (command console) and using the two more methods described, figured out. Now we turn to the consideration of specialized programs specifically designed to create bootable media in the form of USB-drives.
One of the simplest and most understandable for any inexperienced user in installing operating systems, despite the English interface, is Rufus, which does not require any special knowledge. In the application, it is enough to select your drive and indicate through the browse button the path to the saved image file of the installation distribution and set the type of the preferred boot partition with the parameter “MBR for BIOS and UEFI”. The utility will perform all other actions on its own.
USB / DVD Applet Download Tool
Now a few words on how to make an installation flash drive in this application. It is also not particularly complicated.
The process of creating bootable media in this program for creating an installation flash drive is simplified even more. First you need to select your media, as usual, specify the location of the image file, and then twice agree with the warnings about the removal of all information present on the device.
WinSetupFromUSB Application
Before us is one of the undisputed leaders in the creation of multiboot media. How to make an installation flash drive with several OS? What is called, simple. Indeed, it is this program that allows you to record distributions of several operating systems from images onto removable media, not only of the Windows family, but also with the addition of some versions of Linux. Now, more on how to make an installation flash drive with Ubuntu and Windows.
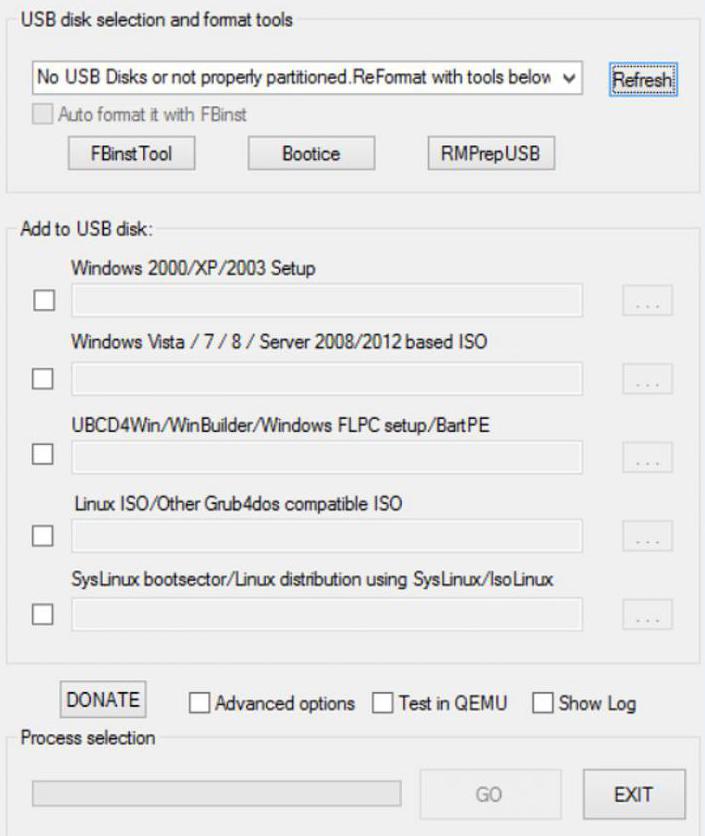
First of all, pay attention to the fields that indicate the supported types of systems. To the right are the review buttons, through which the location of a particular image is indicated. Creating a Linux installation flash drive boils down to selecting the image file for the corresponding fields that corresponds in format to the declared support (ISO Linux image, Grub4dos-compatible ISO image, bootloader files). Similarly, you should choose and images of Windows. Depending on how many distributions will be recorded at the same time, the required volume of the flash drive can vary within wide enough limits.
Software packages for working with images
Finally, let's see how to make an installation flash drive using narrowly targeted software packages designed exclusively for working with images (not only from ISO formats). A little distracted, it should be noted that ISO is a universal format, which is used by default with UltraISO. Other applications have their own types of image files, but by the so-called tacit agreement of the developers of such software, all applications have cross-support of third-party formats. As an example, we will dwell on the UltraISO utility.
In it, the actions performed are as follows:
- the program opens the necessary image file;
- in the boot menu, select the recording item of the hard disk image;
- removable device is indicated;
- USB + HDD recording method is set;
- the start of the process is activated.
Note: as already mentioned, any image formats are supported by different programs, so it is completely optional to use the described utility. Packages like Nero, Daemon Tools, Alcohol 120% and others work just as well.
Creating bootable media with drivers
To conclude all of the above, let's see how to make an installation USB flash drive with drivers. Of course, a specialist who knows how to work with the command line can easily create a bootable DOS media, write driver files to it, and then, after loading before starting Windows, install the necessary control software.
But what to do to the ordinary user who does not possess such knowledge? And here, as it turned out, everything is simple. DriverPack Solution package files can be written directly to a USB flash drive. If the program with the database is presented as an image, you can either write the image to removable media, or first unzip its contents, and then transfer it to the desired device.
If the software package itself does not initially contain the bootloader, you can use the special utility PortableApps.com Platform (the latest version 14.4.1), which initially makes the flash drive bootable and allows you to add dozens of third-party programs to it, including applications for installing drivers , which can be launched after starting from a removable USB device. Of particular note is not only adding programs to the main list, but also the ability to download additional applications from a special online repository in which they are sorted in several dozen directions.
Brief conclusions
Finally, it's time to take stock. Apparently, most users are interested in the most important question related to which of the above methods is best used. It all depends on the specific situation, the initial and final conditions for using removable media (such as the operating and primary systems, loading drivers or antivirus utilities, etc.). Of course, the application of special programs looks the simplest, which should especially please all those who are not particularly versed in the intricacies of the actions performed. But their use does not always seem appropriate, since they are not immune from the appearance of possible errors and failures. But the toolkit of the command console eliminates their appearance almost completely. In addition, if you use some additional attributes, the possibilities are expanded quite significantly. However, there is always a choice. So see for yourself what will be most convenient for you after a preliminary comparison of several options for actions and tools used.