Photoshop has earned worldwide recognition among designers, web developers, and just ordinary users. Thanks to a huge arsenal of various tools and settings, Photoshop is able to solve even the most complex graphic task. One of the most useful features of this program is a mask. In Photoshop, this feature compares favorably with all other features of the graphics editor.
Quick mask
In Photoshop, a mask has two functions: a quick mask and a layer mask. Let's consider one of them first. In the Photoshop program, the quick mask is activated by pressing the hot key - Q. The main function of this tool is to form a selected area. For example, we need to separate the background from the main part of the image. We turn on the quick mask mode and select the brush tool. We circle the area we need, while the palette should become black and white. The first color deletes the selection, and the second deletes. As soon as we have completed this operation, we exit the quick mask mode by pressing the Q key again. We now have a selected area. Such a mask in Photoshop allows you to quickly make changes to the desired part of the image. It is not necessary to work with a brush, you can use, for example, a pencil. When we are in quick mask mode, the selected area turns red.
Mask layer
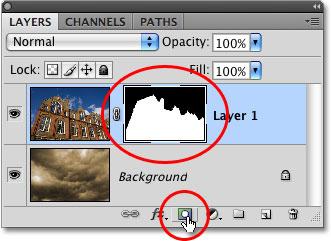
Much more extensive functionality has a mask layer. To create it, you need to select the circle icon in the layer panel in the box with the name “add layer mask”. After clicking on this icon, an additional blank sheet will appear near the name. In Photoshop, the layer mask has been used in many cases. For example, it is used to accurately isolate when they cannot determine a particular area. Especially when you need to change the color of your hair. It is impractical to select each hairline separately, and the mask layer allows us to quickly create the necessary area. This feature also allows us to make sequential changes without fear that they will become irreversible. If we work with a layer mask, the area of the image that will undergo any changes will be preserved. For example, we need to remove eyes from a photograph of a face. To do this, create a layer mask and simply paint over the area we need with the brush tool. From the main image, the eyes will disappear, and they will appear in the layer mask. Of course, this example cannot demonstrate the full functionality of this tool. But the meaning should be clear.
additional information
The layer mask in Photoshop has flexible settings that allow you to get as close to the desired effect as possible. Let's go back to the example with a change in hair color. We created a layer mask where we created a selection with a brush. The result obtained does not suit us, since most often a person’s bangs are not always perfectly laid. And to circle every hair is simply impossible. And here the “edge of the mask” parameter will help us. This is how the mask in Photoshop speeds up the whole process. The given example is parsed in a separate article. And the functionality of this tool is not limited to this.
Conclusion
As mentioned above, the mask in Photoshop is used in many situations. With its functions, you can get non-standard interesting images.