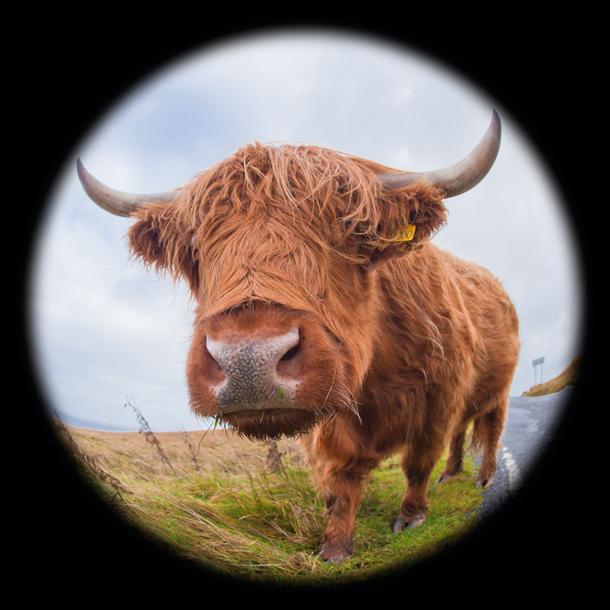
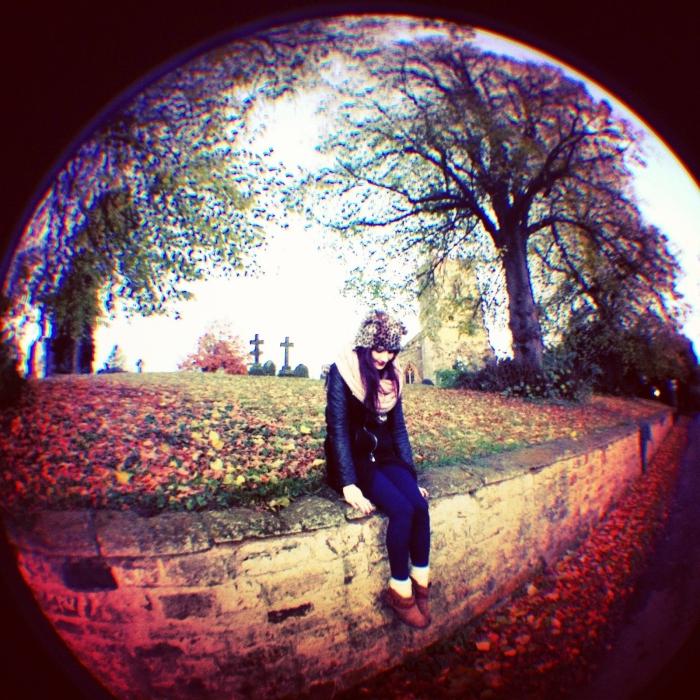
Today's article is dedicated to one of the most popular graphic effects called "fish". With your own hands, using the Photoshop graphics editor, you can achieve a similar visual trick. In some sources, there are other names for “fish” - “fish eye” or simply “lens”. Fish-eye - that's what its name sounds in English. In real life, “fish” is made using a special ultra-wide angle lens. But when the photo has already been taken, Photoshop comes to the rescue.
Necessary funds
In order to make the effect of “fish” with your own hands, you need a graphic editor Photoshop and, of course, the photo itself. It is best if the picture is captured on a high-quality device with high resolution. You can use any version of Photoshop to work. If you wish, you can use any other program, the main thing is to understand the main meaning of the idea.
Instruction manual
“Fish” in “Photoshop” is created using free transformation. And the main actions are made with this function. So, let's begin.
- First you need to open the photo in a graphical editor.
- Then remove the block from the first layer (background). To do this, click on the lock sign in the layers panel several times.
- Create immediately another new layer (Shift + ctrl + N). In the "Selection Tools" select the "Oval" (M).
- Right-click on the selected area and find "Stroke". You can specify any values in the properties, but I recommend that you select a width of 4 pixels, and the color is black, leave the rest by default. Remove selection (Ctrl + D)
- By pressing the “M” key, we right-click on the image. Select "Free transformation and deformation" (once again, right-click on the picture). It is necessary to do this in our initial image, where the photograph is located.
- Here the fun begins. To create the effect of "fish" with your own hands, you need to work a little manual control. As a result of the fifth step, we got a black frame, thereby we designated the visible area. Now it is necessary from all sides to uniformly “drive” the rest of the image under this frame. To do this, drag the control squares to the outside of the circle. Minor errors with unevenness are allowed. On this, the bulk of the work is done.
- Go to the second layer, where the circular frame is located. Fill the outer part with black. Click on "Filters" - "Blur" - "Blur at a shallow depth of field." Where you need to specify the source, select "Layer Mask". And set the following values: “Focal Length Blur 130”; "Radius: 17"; "Sheet curvature: 67." Click OK.
- At this stage, almost everything is ready. It remains only to eliminate the oversight that arose as a result of step 7. To do this, right-click on our photo and select "Free Transformation". We enlarge the image until the edges of the image go beyond the boundaries of the second layer, thereby eliminating all the bumps. You need to change the width with the “Shift” key pressed, which will save you from the disproportion of the changes.
Conclusion
The do-it-yourself fish effect in the Photoshop program is pretty realistic. But to receive an exact copy of a natural photograph, of course, will not succeed. There are automated plugins that allow you to make the effect of "fish". "Photoshop" has a lot of possibilities, thanks to which you can achieve the most interesting visual tricks. Therefore, do not miss the chance to transform the look of your photo with the help of modern technology.