Beginners to master the graphic editor Photoshop for the first time are lost in front of its rich functionality. One of the incomprehensible moments is working with layers. In this article, we will take a detailed look at how to resize a layer in Photoshop correctly.
Why does layer size change?
The main reason you might need to change the area of a layer is the conflict between the main background image and the secondary, which is placed above it as a separate layer. The insert can be larger or smaller than the background, so that the collage looks harmonious, it needs to be increased or decreased to fit into the overall picture.
We make a reservation that when explaining to the reader how to resize a layer in Photoshop, we use a formal, abstract formulation. All the manipulations presented by us will not affect its area in any way, they will concern only the visible part - the one that we need to enter into the picture. Therefore, it would be more correct to say that we change the size of the visible contents of the layer.
How to resize a layer in Photoshop?
Step by step we will analyze the whole process:
- On the right side of the screen, select the necessary one in the layers palette - left-click on it (LMB).
- In the top line, click "Edit", in the drop-down menu, select "Free Transformation".
- You will see that the layer is surrounded by a frame with markers. They will help us to change its visible dimensions.
- Work with markers (small squares on the frame) begins with hovering over one of them and holding down the left mouse button.
- How to resize a layer in Photoshop? Pay attention to the markers on the sides of the frame: drag one of them to the center of the document - the visible image of the layer from this side will decrease, from the center it will increase.
- Markers on the corners of the visible picture of the layer: pulling them to the center or from the center of the image, you immediately change the size of the two sides adjacent to that corner.
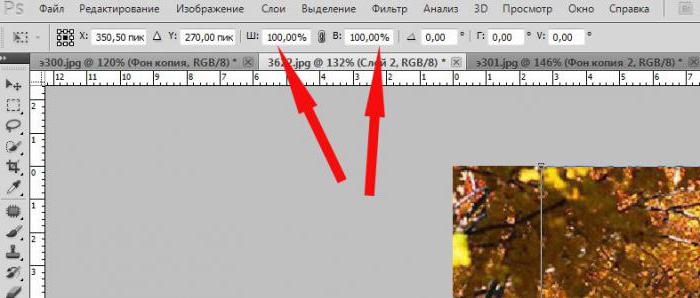
- If you need to set certain parameters for the width and length, then enter them in the "W" and "D" fields, respectively. Most likely, by default you have interest set here. Units of measurement (pixels, centimeters, millimeters) can be selected by right-clicking (RMB) on any of these windows.
- To leave the changes made, click on Enter. A checkmark on the toolbar will help save them.
- Discard changes - click on the crossed out circle, which is visible next to the checkmark in the same toolbar.
How to resize a layer in Photoshop: hot keys
Consider the "hot" combination, significantly speeding up the matter:
- Ctrl + T - call the Free Transform tool.
- Ctrl + "-" / "+" - decrease / increase the scale of the layer to be resized.
- How to resize a layer in Photoshop while maintaining aspect ratio? Hold Shift while working with markers - the sides of the image will increase / decrease proportionally.
- For the sides of the image to change proportionally to each other, you can click on the "Chain Links" icon on the desktop.
- Alt hold when working with markers - the length and width will change relative to the center of the image.
- Holding Shift and Alt while working with markers - the sides of the visible image will change both in proportion to each other, and relative to the center of the image.
- Esc - quick reset of the changes made.
Using the navigator
When analyzing how to change the size of a layer in Photoshop CS6 and other versions (by the way, this operation is the same in all variations of the graphics editor), it’s important to note such a moment as working with changing a layer that is too large. A sign of it is that after calling the "Free Transformation" tab, you do not see either a frame or node markers.
How to resize a picture in Photoshop in this case? To make it possible to work with a document, you just need to reduce its scale to such boundaries so that the tools for free transformation are visible. To do this, go to the "Navigator" and move the zoom slider to the desired position. Save the changes and return to the transformation.
Quality preservation
Before resizing a picture in Photoshop, pay attention to the fact that the quality of an enlarged layer can noticeably suffer. To prevent this from happening, we recommend converting it into a smart object before starting the transformation:
- Click RMB on the desired layer.
- In the list that appears, select "Convert to Smart Object."
- Follow the diagrams presented in the subheadings above, all the necessary transformations, save the changes.
- Right-click again on the layer that has already been changed - this time select "Rasterize ..."
As a result of these actions, all image data is copied to smart containers. Therefore, you can compress or enlarge the layer as much as possible - if necessary, the graphic editor will take information from there in order to qualitatively restore the image in case of enlargement. However, we advise you to add photos or pictures to the layers that do not differ much in resolution with the background - so they will look much more natural.
Change the size of the background layer
Speaking about how to change the size of a layer in Photoshop, it’s important to add that the Free Transform tool is suitable for the whole variety of layers, except for the only background. In the palette, you will recognize it by the characteristic icon "latched lock". If you did not change the order of the layers, then it will be at the very bottom.
You can change its length and width in two ways:
- Click on "Image", in the menu that appears, select "Image Size". Enter the required parameters for the length and width of the layer.
- Unlock the background. To do this, double-click on it with LMB, in the pop-up window click "OK". If everything is done correctly, the “lock” will disappear, and you can work with the background as with a regular layer - changing it with free transformation.
Resize multiple layers at once
Consider how to resize the layer in Photoshop in this case:
- If the necessary layers are located next to each other, select them with LMB, holding Shift. Another option: while holding your finger on this key, click LMB on the top and then on the bottom layer or vice versa. Both themselves and the layers between them stand out.
- In the case when the necessary layers are located in the palette at random, holding Ctrl, select each of them in turn.
- Another way is to put all the necessary layers in the group and close it (the arrow next to the group name will "look" with the acute side to the side, not down).
- After one of the above manipulations, you just have to call "Free Transformation" and resize according to the debugged scheme presented above.
We examined all the ways of resizing a layer in Photoshop for all versions using and without hot keys for a regular layer, background, and a group of several layers. A little practice - and you will perform this simple operation on the machine, without thinking about the features of its execution. Good luck in the creation and development of this wonderful graphic editor!