Are you going to make repairs in the kitchen? Already chosen a design, but don’t know how to install a tile apron? Today we will tell you how to do it yourself.
Why do I need an apron for the kitchen?
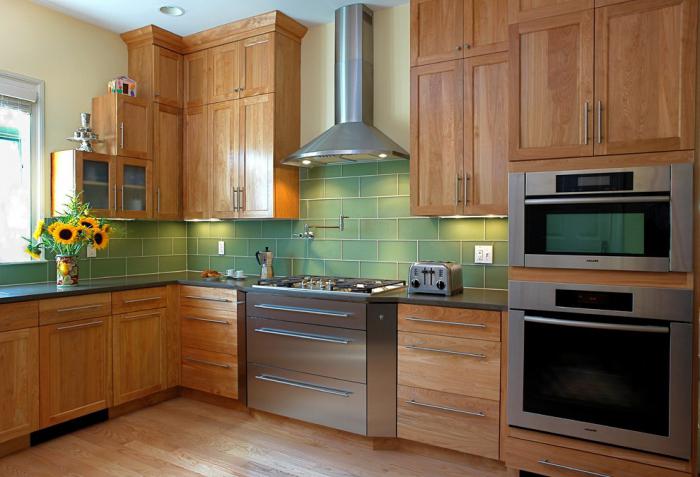
A kitchen apron is not just a wall decor above the table top, but a necessity. After all, it protects the walls from splashes of soot, dirt and grease. And this part of the kitchen, as you know, is polluted most and most quickly.
Many decades ago, the wall behind the slab was lined with strong material. No wonder. This place is the most vulnerable to absorb all that boils out of the pots during cooking. Therefore, plastering or painting the wall behind the stove is impractical.
A tile apron in the kitchen is ideal for protecting a wall near a work surface. For its installation does not require a lot of materials, tools and time. It is worth noting that, if necessary, it can easily be replaced without resorting to repairing the entire kitchen.
And one more significant remark. An apron for the kitchen (under tiles or glass - it doesn’t matter) will fit into any interior. It is only necessary to determine the color and pattern of the coating and perform its installation.
What material can a kitchen apron be made of?
The material on the wall surface in the working area of the kitchen should be lightweight and easy to wash. Based on this, experts advise to opt for glass or tile. But many often use laminated and metal panels as an apron.
All these materials have their advantages and disadvantages. So, for example, metal panels are strong, washed well, but only wealthy people can afford them. Glass is also great as a material for a kitchen apron, but it is not always found at a local hardware store.
Today we will focus on the tile and consider all its advantages.
Tiles as the most common material for a kitchen apron
Tile or ceramic tile has not lost its popularity throughout its existence. Most housewives give preference to this particular finishing material. Firstly, it is very easy to care for. Secondly, there are so many varieties and colors of tiles that everyone can choose a set in accordance with their tastes and capabilities. In addition, as already mentioned, this type of finish will be in harmony with any design. And the last argument in favor of such material as tiles: an apron for the kitchen (photo of the samples can be seen not only in the catalogs of stores, but also in any magazines devoted to the problem of arrangement and decor of premises), it can last you more than a decade. The only thing that needs to be provided is a means for puttying the seams. After all, they are the perfect environment for the propagation of fungi and are subject to rapid pollution. To avoid this, smooth grouting is usually done or the joints are varnished additionally.
How to choose tiles for a kitchen apron?
We already mentioned that before stopping on one or another version of the apron tile, you need to have an idea of the design and color scheme of your kitchen. In terms of shade, ceramics can correspond to a kitchen set or wall covering or differ significantly from them, while emphasizing all the attention on oneself. The only rule that cannot be avoided is that the wall covering should be in harmony with the furniture.
An apron of tiles in the kitchen is not just a tile. Today it is possible to get finishing material from glass and mirrors. The choice of this or that type depends not only on the design of the kitchen, but also on your financial capabilities. So, for example, glass and mirror tiles are several times more expensive than ordinary ceramic. Therefore, the latter is in great demand.
Ceramic tile
Before tiling an apron in the kitchen, let's look at all the advantages of this finishing material.
Ceramics is not only distinguished by its strength and durability, but also by a wide range of color and design solutions. Using various textures and shades, you can create a real masterpiece: mosaic, painting, abstraction - the work wall will sparkle with new colors and cause surprise or even admiration of friends! Anyone who loves everything exclusive can use the service of individual ordering photos on a tile. In general, the option - the mass, would be a desire, imagination and financial opportunity.
What else is worth paying attention to before finally deciding on a material such as ceramic tile? An apron for the kitchen (a photo of various design decisions is presented in the article), as mentioned above, is not a whim, but a necessity. Its main function is to protect the walls from pollution. Therefore, the surface of the cladding should be smooth. As practice shows, textured tiles, in spite of all their beauty and originality, are not suitable for such purposes.
Mirror tile
This variant of wall covering is perfect for small kitchens. After all, mirrors visually expand the space and give a certain lightness to the room. But there is one thing but! For all its high cost, this material is terribly impractical. Such an apron from the tiles in the kitchen will have to be wiped very often, in addition, you will have to make a lot of efforts to remove traces of fat from it and at the same time not leave stains.
And one more nuance. If you like to put all kinds of jars and pans on the table, then this option is definitely not for you. Mirror tiles will only aggravate the situation: it will give the impression of clutter. Thus, the considered wall covering above the working area of the table is suitable only for finishing the kitchen in the style of minimalism.
If you nevertheless decided to dwell on this option, trusting the installation of the "SLR" is recommended only to professionals. This is due to the fact that its thickness is half less than that of ceramics, which means that you need to work with it extremely carefully, because at any moment it can simply crack.
Glass
Glass tile is another way to lay out an apron for the kitchen in an original way. On the back side of it is a drawing that can be a completed composition, or be part of a large masterpiece, consisting of a certain number of elements.
It has been proven that for a wall above the working surface of the table, tiles in the kitchen (apron) are ideal. Spain is one of the first countries to start using this material in such a room. Europeans believe that the interior does not need to save. Thus, they also urge us not to skimp on quality materials.
Glass tiles can be of different colors and textures. Especially in demand is one that has special holographic effects.
This material is perfectly wiped. It is strong and does not fade, in addition, it does not require special skills for laying it. Thus, glass tile is an excellent material that is suitable for the apron of any modern kitchen.
Mosaic
Recently, not only Spanish tiles on the kitchen apron are in great demand, but also mosaics. Beautiful texture and overflow of colors make the wall elegant; the picture fits perfectly into the modern interior of the room.
Mosaic for aprons can be glossy and matte. One or another of its kind must be chosen based on the facade of your kitchen. Matte mosaic is ideal for wooden arrays, and glossy for glossy ones.
This tile looks luxurious. Often mosaics lay the walls of the kitchen, which is combined with the living room.
The only negative is the high price of this material and the scrupulousness in its installation.
Tile "wild boar"
The “boar” tile on the kitchen apron is an ordinary ceramic tile, and at the same time is not quite ordinary. It is slightly convex, voluminous. In addition, we separate it into a separate subspecies due to non-standard sizes. All this gives a completely different look to the wall covering and decor as a whole. It is worth noting that the "wild boar" is perfectly combined with other decorative elements: panels, borders and pencils. Thus, from your kitchen apron you can make a real work of art.
And one moment. Tile "boar" on the apron of the kitchen is an excellent solution for those who would like to design a room in fusion style. As for everything else, this material is as practical as ceramic. They lay it on the same principle as another similar wall covering.
Kitchen apron tile size
The method of laying the material will depend on its type. If you opted for ceramics, then the best option would be 10x10 tiles (for the kitchen). An apron in this case will look better, despite the fact that its design will take more time and effort. Another common option is 20x20 tile. These are the most common parameters of this material, but no one restricts you in the search for new solutions.
At what level is it best to lay the tiles? Experts say that before you measure the distance from the floor to the bottom of the apron, you need to know the exact height of the furniture (tables, sinks, all kinds of cabinets that are included in your kitchen). In this case, the boundaries of the working wall will coincide with the boundaries of the furniture. But, as practice shows, accuracy in this case is very difficult to achieve. After all, as a rule, they first make repairs and only then put new furniture. And to predict its height is very difficult. Therefore, it is better to lay the tile in such a way that it slightly goes over the table and the suspension.
We calculate the material
Typically, the height of the apron is from 60 to 90 centimeters. Here you need to take into account some points. Firstly, it is necessary to leave a supply of tiles (5 centimeters above and below), and secondly, pay attention to the height of the suspensions, or rather, how convenient it will be for the housewife to use cabinets, shelves, etc.
So, based on the area of the proposed apron, calculate the number of tiles. Do not forget those 10 spare centimeters! The consumption of material will also depend on how (diagonally, vertically or horizontally) the tiles will be laid in the kitchen. An apron will look different from all cases.
After you have drawn the boundaries of the tabletop and the bottom of the pendant, mark the frames of your future kitchen apron (with a level).
Preparation for installation
To get started, prepare the wall. To do this, clean it of old coatings: tiles, wallpaper or plaster. After this, apply a primer. It is worth noting that the smoother the surface of the wall, the less adhesive solution you use to install the tiles. Therefore, if you have irregularities on the wall, repair this defect with plaster.
After the solution has dried (usually it takes a day or two), it is necessary to prime the surface again. Only after the wall is completely finished and finished can ceramic tiles be laid in the kitchen. The apron in this case will hold on tightly and will not “cradle” in the future.
It will take you a maximum of 10 minutes to prepare the tile adhesive. To do this, dilute the mixture with cold water in the proportions indicated on the package, and stir it all with a construction mixer to a homogeneous consistency. Let the solution brew for 5 minutes. Then mix again. Please note that everything should be done according to the instructions. Otherwise, the quality of the glue is reduced.
Laying tiles
To begin, lay the tile on the floor - the way it should "sit" on the wall. This will help to lay out the drawing beautifully and correctly and once again check whether you calculated the area correctly. The easiest solution is a white tile for the kitchen, the apron from which looks spectacular and always fresh. In this case, even if the tile is laid a little incorrectly, the marriage will not be noticeable at all.
So, how to make an apron of tiles in the kitchen? We start work from the corner. It is worth noting that it is necessary to use only whole elements here. Only then will the angle look perfect.
The solution is applied simultaneously to the wall (2 mm) and to the material (about 1 cm) with a notched trowel. Lean the tile against a vertical surface and apply a little pressure. Use the building level. Correct irregularities with a light tapping with a rubber mallet.
After the first row of tiles is laid out by level, begin to lay the second. Do not forget to use construction crosses - they help to make the seams the same and even.
It is worth noting that the remains of cement should be removed as tiles are laid in the kitchen. The apron only in this case will be clean and tidy, not spoiled by the solution frozen on it.
Overwrite the seams
After the tile “seizes” well (in a day), it is necessary to raise all the crosses and wipe the seams again thoroughly. After that, we proceed to their processing.
To do this, prepare a grout mixture. Its shade should not differ much from the color of the tile and look good in the overall design of the kitchen. So, dilute the grout mixture with water and mix well to get a homogeneous mass. After 2 minutes, mix again and get to work.
To do this, use a special rubber spatula. You need to move it "herringbone". Only in this case, the seams will be sealed evenly. In the same way, remove the excess mixture from the ceramic surface.
At the end of the work, wipe the tile with a damp cloth. Carefully do this near the “raw” seams. Otherwise, you will have to redo the work.
As you can see, making an apron for the kitchen with your own hands is not so difficult. To do this, you need to choose the right finishing material, be patient and follow our tips. Have a nice repair!