Repair in an apartment or in a house is always a complex and lengthy work requiring knowledge, skills and material investments. Many hire specialists for this. However, you can carry out repairs yourself, knowing some aspects. This article will help you learn how to make your own kitchen, what mistakes should be avoided. Here are the drawings, the enrollment of the necessary materials for work and the process itself.
The atmosphere of the house will depend on the convenience of the kitchen. After all, if the kitchen is small and uncomfortable, then the housewife will be nervous. And this, in turn, affects the rest of the family. Therefore, making a kitchen with your own hands is a hot topic. Moreover, for a person who has certain taste preferences. For him, the finished kitchen may not be to his liking. To do this, there is an opportunity to equip it yourself.
What material to use?
A wide variety of materials are teeming with shops. However, wood is the most practical of all time. A self-made wooden kitchen has certain advantages:
- The kitchen can be of any size, type and configuration.
- Natural material that is not harmful to health can be used. In addition, such material creates a warm, cozy atmosphere. Also, one must not forget about the external beauty of the tree.
- It is easy to work with a tree, only having certain tools.
- And most importantly, a project using this material will be quite economical.
Among the materials there is a huge selection. There are more than thirty options for making a wooden kitchen with your own hands, for every taste and color. Materials are distinguished by their hardness and softness. Hard will be stronger, but harder to work with. They are suitable for making large plates. These are materials such as:
- Nut.
- Beech.
- Oak.
Soft materials, on the contrary, will be useful for smaller parts - shelves and cabinets. For example, these are materials such as:
- Poplar.
- Pine.
- Cherry.
You should also choose a color. The main thing is that the interior details as a whole fit together.
Tools for work
So, to get started, you need to know in advance what tools will be needed. Here are the main ones:
- Measuring square and tape measure.
- Grinding machine.
- Jigsaw.
- Hacksaw.
- Sandpaper.
- Clips and vise.
Beginners need to know how to use these tools if there was no experience. And start to try them better on unnecessary materials to avoid damage to the tree. When there is already a certain experience with wood and self-confidence, then you can start working.
Planning
When making a kitchen with your own hands, drawings are the first stage of work. To do this, you need to remove the size of the kitchen, taking into account all the bulges and crevices. The walls may be crooked. It is important to pay particular attention to this. For this, walls are measured in three levels:
- Ceiling surface.
- Over the baseboard.
- In the center.
After that, transfer all the numbers to paper. You need to think through all the details to the smallest detail. For example, what furniture, where it will stand, what household appliances will be, where to place them. The shape of the headset can be either along one wall or angular. If the kitchen is planned to be large and spacious, then here a multifunctional table with a hood is perfect.
A sketch is a drawing of a future room, given their location. When making a kitchen with your own hands, a drawing is needed in order to calculate the exact dimensions of each thing separately. This scheme is indispensable. So, here is an example of what should be on a drawing of a self-made kitchen:
- Wall cabinet - 800 millimeters vertically.
- Two more wall cabinets - 550 millimeters vertically, 400 millimeters horizontally.
- Countertop (550 meters horizontal).
- Cabinets under the countertop. Cabinets with two doors, 400 millimeters wide. On the other side of the countertop are four shelves with a width of 400 millimeters. Also, cabinets with shelves - 700 millimeters wide.
Some details may not be, because they are unique to each kitchen.
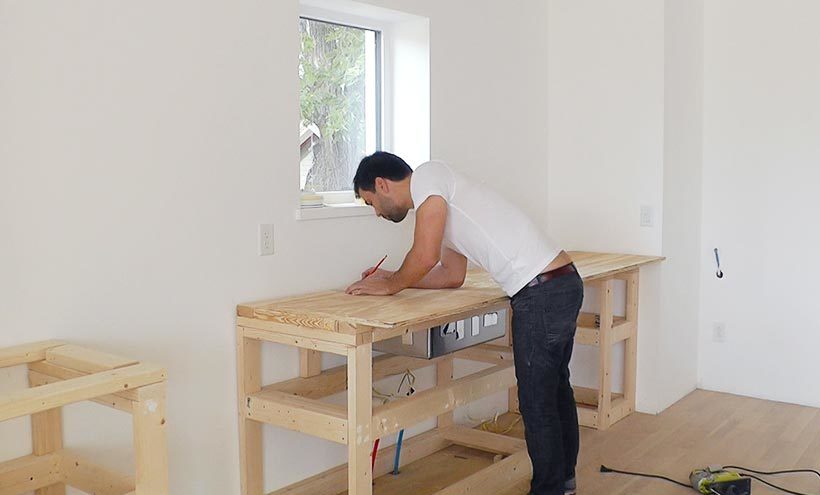
Working process
There are tools, the drawing is ready, you can get to work! How to make a kitchen with your own hands? To make it easier to work, it is better to have step-by-step instructions at hand. Making wooden facades for the kitchen with your own hands is of two options: paneled or made from a solid canvas. The paneled facade consists of only one part. But as a decor, you can use the detail "false panel". As for the second option, for this you need to craft six or more details. This option is the most difficult, but durable. Because it will not “swell” and deteriorate due to moisture, and this is important for the room under study. To make furniture for the kitchen with your own hands (there are photo examples in this article), you need to take only a few steps:
- Round up sharp edges and some selections with a milling cutter.
- When the part is ready, it must be painted and cleaned of dust.
- Then it is necessary to polish the surface.
- Caution is needed in order not to burn paint. Because in this case, the whole part will deteriorate.
- Change the circle to fur and make it as glossy as possible.
Another method of facade for the kitchen is the primer of wood. After that it should be varnished and polished. After that, it remains to assemble the frame, fix the hinges and install the door. Here is a kitchen made of wood with your own hands and assembled. Next, consider the option for a private home.
For suburban building
Creating a kitchen in a private house with your own hands is a good idea for those who like space. What do we need for this? First you need to draw a drawing of a beautiful kitchen with your own hands on paper. If you plan to place the furnace, then it is also worth noting and deciding which way the pipes go. You also need to pay special attention to the niches that are used for the installation of communication systems. Still need to deal with ventilation. Usually it lies deep in the walls or somewhere in the furnace. In private homes, there are usually too many appliances and various equipment. Given this, it is necessary to adhere to some rules when making a kitchen:
- It is better to place the gas stove and boiler close to the pipe entry into the room. This way you can avoid wiring at your site. But you need to remember that ventilation is connected precisely with these devices. Therefore, it should be closer to the column. You need to find the most convenient place to install the equipment. This is done in order to reduce the distance to the connection elements.
- Sewerage entry can be placed from any convenient side. But keep in mind that with further repairs to the kitchen, these pipes should be closed.
- Depending on the devices and devices, the required energy capacity is determined. After that, mark in the drawing all the places of sockets and switches, taking into account the convenience of the consumer.
Usually private houses have a large area, so there is no reason to save space. This is a huge plus, because everything can be arranged as your heart desires and enjoy it. There are several more rules in order to properly equip a kitchen:
- The room should have two zones: working and for relaxation. Therefore, you need to separate them and decide which one, where it will be located.
- Although the price of built-in appliances is quite expensive, it needs to be used for a more comfortable organization of the place, which is intended for cooking.
- In no case should not be installed next to the cooking panel and sink. It is inefficient for work and can ruin the technique.
Sometimes, despite the fact that this is a private house, the study room may not be too large. How to make a small kitchen with your own hands at home? Experts say that is very simple. Here are some tips:
- Small kitchens are suitable for calm colors and light shades.
- Since the headset will be light, you can add some more bright details to it. It can be a fruit vase or a wall mural.
- You can combine bright textiles with calm shades.
- There must be a chandelier in the middle of the room and a couple of lamps around it.
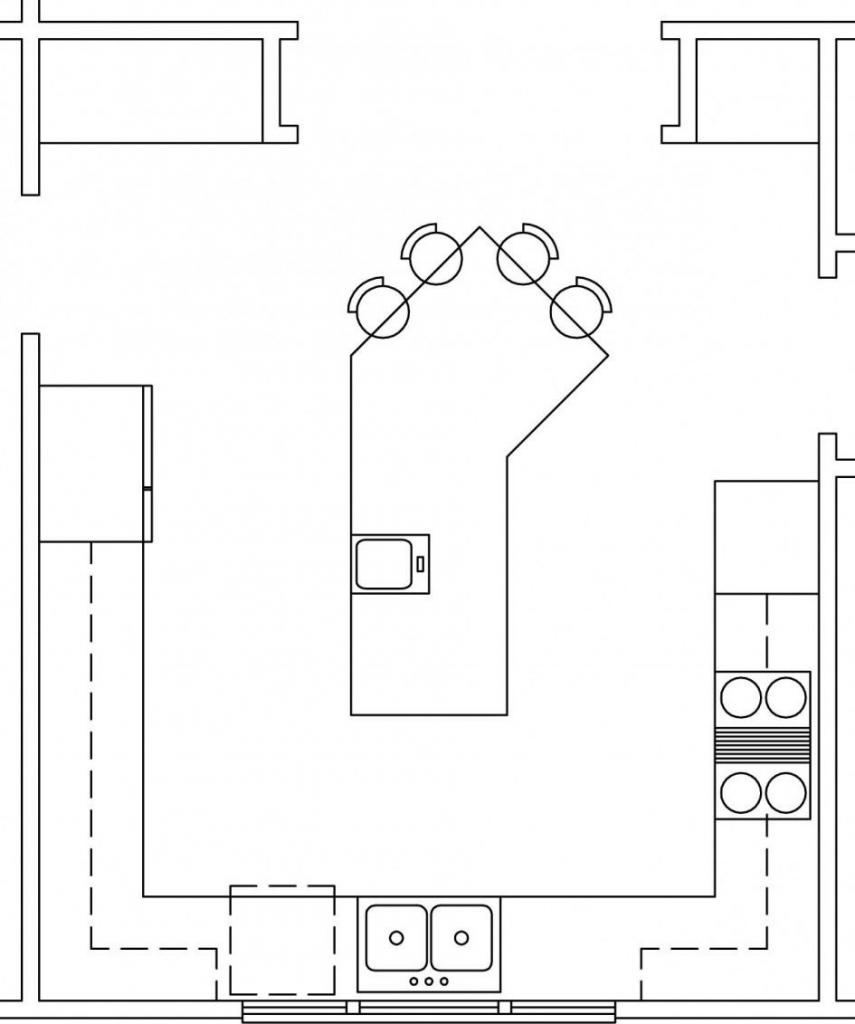
Kitchen layout
Countertop, refrigerator, sink: based on them, the layout of the kitchen is decided. They are necessary in order to cook food. The closer they are to each other, the more convenient the work becomes. The best distance from the sink to the burner is about 1400-2000 millimeters, and to the refrigerator - 2300 millimeters.
With a kitchen width of four meters or less, a U-shaped layout will be appropriate. With this design, the sink is next to the window, and many women like it. In this case, it is necessary to have a sufficiently wide window sill so that water does not get on the glass. If the kitchen is small, then this project will allow you to have more space for relaxation. This option is suitable for small families.
Linear layout
This way of planning furniture is perfect for those who do not like to eat at home. Because such a kitchen is a small part of the house and at the same time has everything necessary for cooking.
Kid's Kitchen
Children live in the world of adults, afraid of breaking something, ruining it or simply not being able to use it. Indeed, in the kitchen, many children are uncomfortable and uneasy. For this, designers came up with a children's kitchen. But parents often can’t afford it. Therefore, making children's kitchen with your own hands is the best way out in this situation. It is practical and economical. There are three ways to make a children's kitchen: from wood from scratch, from a ready-made cabinet and from cardboard boxes. Let's consider these options in more detail.
Children's kitchen made of wood
How to make it? To make a wooden kitchen with your own hands, you will need:
- Hinges.
- Wooden plywood. It is desirable that it be thicker than 13 mm. This is necessary in order to withstand all the toy dishes of the child.
- Espagnolette.
Before making a kitchen cabinet with your own hands, you need to decide its height in accordance with the growth of the child. Enough 70 centimeters. After all, perhaps children will play with her until elementary school. Width depends on the size of the room. The bigger, the better. A photo of a kitchen made by oneself can be seen in this article.
One of the simplest ideas is shelves without doors (open only). This design is convenient and safe to use. It is also easier to craft, especially if you do not have the necessary tools at hand. Now it's time to create a drawing of the children's kitchen:
- The kitchen as a whole will take 1 meter.
- The oven has a width of 40 centimeters. And its height should be a little more than 1 meter. It is suitable for children from one year and older.
Another drawing is provided for children over six years of age:
- The kitchen takes 2 meters.
- Oven and sink together - 1 meter. And the height can be starting from one and a half meters.
It is important to paint with safe paints. Or you can simply put a layer of varnish on a wooden surface.
Children's kitchen from cardboard boxes
In order to create such a kitchen, you will need a lot of cardboard boxes, of different sizes. A flat box will be used as a kitchen apron. Also, the stiffer parts of the boxes will play the role of shelf dividers. After the individual parts of the kitchen are ready, you need to wrap them with adhesive tape and secure with tape. On the countertop, you should mark the places for cutting for partitions and for the sink. In the place for the sink, you can put a metal container, similar to a real sink.
In order for the doors to close, several steps must be taken:
- Make a cardboard latch.
- Then you need two rectangles. They need to be connected to the future handle of the cabinet.
- Now you can open and close the door.
- The cooking surface can be made of glass and circles of colored paper.
- For the burner, you need three circles. All of them should be one centimeter smaller from each other.
- Then it all sticks to the glass. You can glue it with silicone glue.
- It remains to be painted with safe paint (for example, acrylic). Since this is cardboard, you can stick wallpaper to it.
Children's kitchen from an old bedside table
There was the last version of the children's kitchen. To create it, you will need a cabinet or a bedside table. The selected item must be strong enough to hold on to the entire arsenal of children's toys. It is important that everything is safe for the crumbs! How to make a wooden kitchen with your own hands? In just a few steps, the right thing will be ready:
- Sand the entire surface of the cabinet with sandpaper. It should be as large as possible to finish the job faster.
- Choose the color of the future kitchen and buy paint.
- It is best to choose an acrylic paint that has a minimal smell. Paint a nightstand or wardrobe. Wait for it to dry. This paint dries quite quickly. But just in case, you can wait about one hour.
- Now you need a pen or pencil. This is necessary in order to mark the places where the burner, sink, refrigerator and oven will be located.
- After the places are determined, you just need to cut them out. Instead of a hole from the sink, put a plastic container. Instead of the marks from the burner, you need to arrange a piece of paper with kruglyashami.
- The tallest part of the cabinet will turn into a refrigerator.
- The stove will be in place of the bottom shelf.
- The kitchen for the child is ready. It will suit both the girl and the boy (depending on what colors I will use). Despite their young age, more restrained colors will suit the boys.
Mistakes in planning a kitchen
For many, the kitchen is the most comfortable part of the apartment. Here the family spends time at lunch or dinner and communicates warmly. Therefore, even the most inconspicuous errors in planning can lead to some discomfort. These few tips will be useful for those who want to equip the studied room in the most convenient way. There are typical mistakes in making a kitchen with your own hands. These few tips will help you avoid them:
- The equipment should be at a comfortable height. It should not be too low or too high. For this, the housewife should focus on her height and place the equipment at the level of the belt. For example, shelves or cabinets that are often used, it is recommended to attach to the wall so that each time does not bend.
- Depending on how reliable the walls are, hang the appropriate cabinet weight. Too heavy cabinets on thin walls can not last long and be dangerous in the future. Storage systems can only be placed on load-bearing walls. And on drywall walls it is best not to hang anything but light paintings. But if there is no choice, then it is possible to use special supports for such fragile walls.
- The choice of sink may also be wrong. If it is expensive and beautiful, then this does not mean that the sink is practical. But you can choose any form. The main thing is that she was to her liking and pleased during the cooking process. How to identify a good sink? She should not be small. In addition, a quality sink should be at least 170–210 millimeters deep.
- Since the kitchen is square, it has at least four walls. Therefore, corners are present in it. They must be used with efficiency and not left empty. This is especially true for small rooms. All corners of the room should be clogged (also shallow). For example, in a corner cabinet you can place a rotary carousel for small items. This will help get rid of unnecessary boxes that only take up a lot of space. It is important to remember that fixtures inside cabinets are invisible at night. Therefore, you need to place small lamps there.
- Glass apron - looks very elegant and aesthetically pleasing. Under it, you can select any desired photo wallpaper. But we must remember that absolute tightness is impossible. Therefore, in this case, dust and dirt will accumulate behind the glass. And this already creates a lot of problems for the housewife. Also, when cooking food, over time, streaks of fat will appear. Glass should be handled carefully, as it may break due to careless movements. And in the end, it will look very ugly. However, if you still want to use glass, it is better to buy tempered. It is a little more expensive than usual, but it will last much longer. Also, do not buy glass from several pieces. Better buy one whole.
- Dark kitchen is a fundamental mistake in the interior. Especially if the room is small, then the lack of light will further reduce it visually. Even in such a kitchen, a sufficient amount of light is needed. If the furniture in the kitchen is dark, then the quality of the light is especially important. From the top in the middle there should be a chandelier, and next to it from different sides there should be small bulbs. It is especially important that there is amplified light above the table. It is also worth remembering the switches. It is necessary that they are in a convenient place (not at the end of the room, but right in front of the entrance). In any case, the amplified light in the kitchen creates more comfort and convenience.
- The base must be present. If you do not trim the bottom of the cabinets, this will create further problems that could be avoided. Despite the fact that it is beautiful, there are drawbacks. For example, it will be more difficult to sweep and clean the bottom of the cabinet. Also, items rolled there will be inconvenient to get. A basement is needed to cover the space under the bedside tables. It also protects against dust. In addition, if available, the kitchen looks more neat and beautiful. The usual height of this item is 8-13 centimeters.
- There should be buffer zones on the countertop. It separates the sink, stove and refrigerator from each other. The zones are convenient in that at first the products are removed from the refrigerator, and then put on the countertop. After that, they need to be washed in the sink and put on the burner. The oven and refrigerator should not be near each other. The fact is that the high temperature of the stove is reflected in the refrigerator, and he tries to keep his low temperature, but every time it rises. With time. The equipment begins to deteriorate from such pressure and temperature changes. The distance between the stove and the refrigerator should be no less than five centimeters. So they will not interfere with each other's work.
- Laminate in the kitchen is unacceptable. Now many praise laminate flooring, and it is really good, but not at all suitable for the kitchen. Since there is constant humidity in this room, the material will start to absorb it, sooner or later. And this leads to some inconvenience of an external nature. For example, walking on it is uncomfortable and noisy. This will be especially a problem at night. Moreover, such a floor does not create a cozy atmosphere, but rather (in winter it is always cold to walk on it). In addition, dishes may fall from time to time in the kitchen, and a laminate may not withstand such a blow. Instead, the optimal solution would be to choose the floor from the parquet. But it is not necessary to place it on the entire surface of the kitchen. For example, in the area where the dining table, you can arrange a wooden floor. This will give the kitchen not only comfort, but also warmth.
Conclusion
So, making the results, we can say that making a kitchen with your own hands is a pleasant task. At first glance, it seems complicated, but given all the recommendations that are given here, you can easily bring the project to life. It is also worth paying special attention to common mistakes in the manufacture of the kitchen, so as not to repeat them in the process. As a result, we get a quality, practical and functional kitchen. Good luck!