In addition to the well-known desktop versions of operating systems, there are also server ones. They are less popular in wide circles, but for some they become simply indispensable. Based on the name, it is clear that they are mainly used for server maintenance. However, no one forbids putting such an OS on your computer. In this article, we’ll show you how to install and configure Ubuntu Server. Immediately it is worth noting that version 18.04 LTS is parsed, however, the instruction applies to all others.
Install Ubuntu Server 18.04 LTS
Further on, the text will give guidance on installing the operating system, divided into stages for ease of perception. However, before you start installing Ubuntu Server 18.04, you should talk about system requirements. Due to the fact that the server version can run on almost every PC, it’s worth mentioning them:
- RAM - from 128 MB;
- processor frequency - from 300 MHz;
- Hard disk capacity - from 500 MB.
If your computer meets all the requirements, then you can proceed directly to the installation of Ubuntu Server.
Step 1: boot the system image
It is imperative that you download the operating system image. It is only necessary to do this from the official site of the project, it is there that the latest and most stable version of Ubuntu is located. So here is what you need to do:
- Go to the official Ubuntu website - Ubuntu.ru.
- Click on the "Download Ubuntu" button.
- Once on the download page, click on the link "Ubuntu Server 18.04.1". By the way, here you can choose the version of the installer (old or new). The article will demonstrate the installation with the old version.
After you click on the link, the loading of the operating system image will begin. Wait for it to complete and continue to the next step.
Step 2: write the image to the USB flash drive
If the download is completed, then it's time to prepare a USB flash drive to write the image of the operating system to it. Since we will be installing Ubuntu Server, any flash drive is suitable for us.
If everything you need is at your fingertips, you can start creating a bootable image. Insert the USB flash drive into the computer, install the UNetbootin program on it, and follow the instructions below:
- Launch applications to create a bootable flash drive.
- In the program interface, find the "Disk Image" item and set a mark on it.
- From the drop-down list next to, select "ISO Standard".
- Click on the button with three dots to open the file manager.
- In it, navigate to the folder where the Ubuntu Server image was previously downloaded.
- Double-click on the image with the left mouse button to select it for recording.
- In the Type drop-down list, select USB Device.
- In the "Media" drop-down list, select the name of your flash drive.
- Click OK.
Immediately after that, a warning pops up that all data will be erased from your flash drive. Accept this to start the process of creating a bootable drive. All that remains to be done is to wait for its completion.
Step 3: starting the computer from a flash drive
After the flash drive has been created, do not rush to remove it from the computer port. Now we need to run it directly from the USB drive. To do this, you need to select a USB flash drive as the drive to load. This is done through BIOS. But in order not to make a bunch of settings in it, you can use another way to call the drive selection menu to run. To do this, just start the computer, you must press one of these keys:
One of them will open the menu we need. In it you need to select the name of the flash drive and press Enter, after that the installation of Ubuntu Server will begin directly.
Step 4: Setting Up the System First
The installation of Ubuntu Server 16.04, as well as 18.04, begins with the primary configuration, during which you will need to choose the system language, region, enter a nickname and much more. So here is what you need to do:
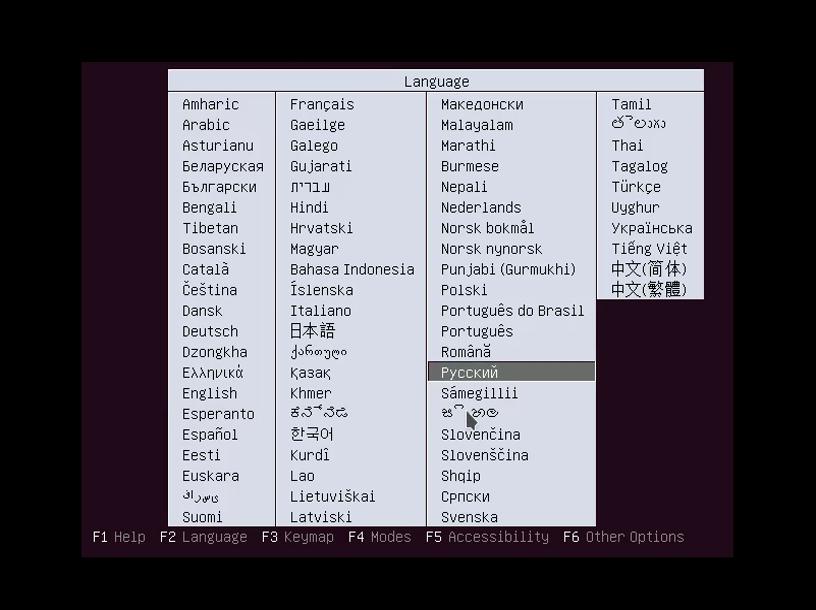
- A table called "Language" will appear on the screen. In it you need to choose the Russian language. To interact with the menu, use the arrows on the keyboard and the Enter key.
- After that, the installer main menu will open, in which you need to select an action. Since we want to install the operating system, select the appropriate item.
- A window appears with a list of regions of the Earth. In it you need to find your own and press the Enter button. If you have not found your region, click on the "Other" button and select from the full list.
- Now it will be necessary to determine the layout of the keyboard. Since the majority are Russian-speaking users, then select the term "Russian" and press Enter.
- Immediately after that, you will be prompted to select hot keys to switch the keyboard layout. Choose what you want. But if you are a Windows user, it will be more comfortable to use Alt + Shift.
- A series of downloads will begin, into which you must not interfere. Wait for the installer to load all additional components, determine the type of your network adapter and automatically connect to the network. If the Internet is delivered via PPPoE directly to the Ethernet connector, then you will also need to enter the login and password from the provider.
- Once the Internet is configured, you need to enter the name of the new user. If you are installing Ubuntu Server for home use, enter the name you want.
- Now you need to create an account. Everything is simple - enter a name with a small letter and then a password, then click "Continue".
- After that, you need to decide whether to encrypt the data on the disk or not. If you use your computer at home, we recommend disabling this option by clicking the "No" button.
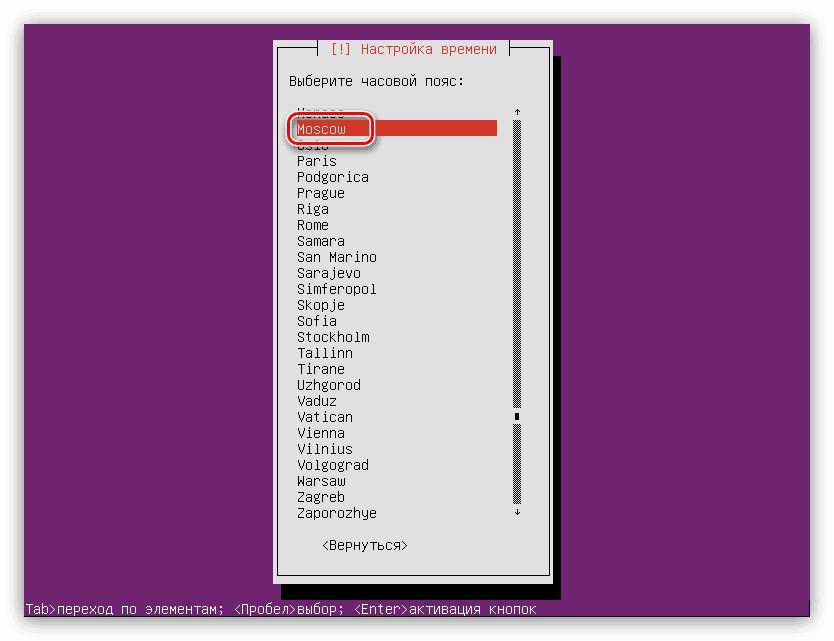
- The preset is almost completed, it remains only to select the time zone. Often the computer (if it is connected to the Network) independently determines it correctly, but if suddenly this does not happen, select the belt manually.
As soon as all the above steps are completed, the system will load all the necessary components if necessary, and then run the utility for marking up disk space.
Step 5: partitioning the disk space
It is recommended to perform disk partitioning in automatic mode. Since manual partitioning is pointless, the installer will create all necessary partitions on the disk. So, in order to partition the disk, follow these steps:
- In the main menu of the utility, click on "Auto - use entire disk".
- From the list, select the drive on which you want to install the operating system. If you have only one, then choose it.
- Wait for the partition to complete.
- Click the "Finish Partitioning and Write Changes to Disk" button.
After that, another window will appear in which you need to confirm all the actions that will be performed with the disk. To do this, click the "Yes" button. Markup completed.
Step 6: final installation
However, this is not the end. Now you need to complete the final settings of the future system. Let's go through each parameter individually:
- You need to configure the package manager to receive updates in the future. First, you will be prompted to enter a proxy server, if you have one. If not, or you don’t know what it is, then click on the “Continue” button.
- Download and installation of additional data packages will begin. Wait for it to complete.
- Now you need to decide how updates will be installed. You can choose automatic mode, but it does not guarantee system security. To do this, it is better to abandon the automatic installation and perform this operation manually.
- After that, you will need to select the programs to install. It’s better to leave it as it is and click on the “Continue” button.
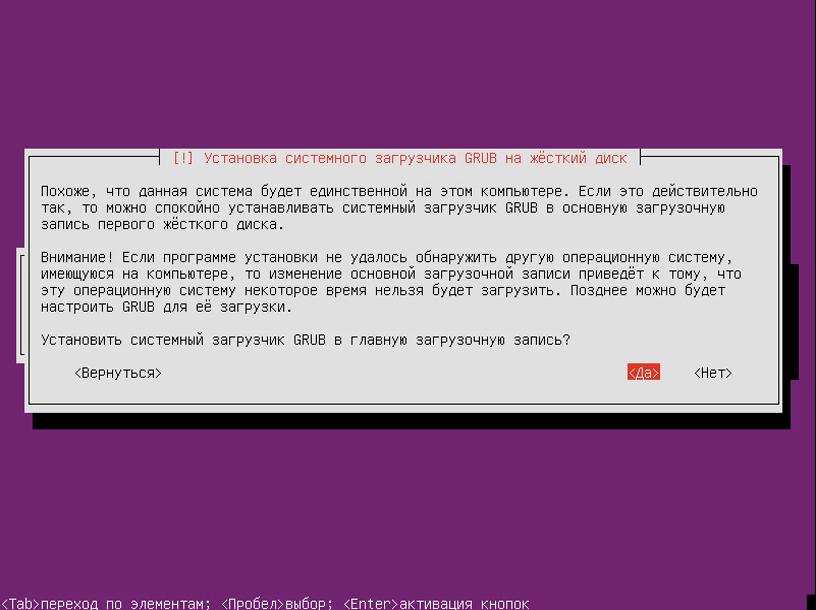
- It remains only to install the bootloader. You will be asked to do this in the main boot record, agree by clicking "Yes."
Everything is done - it remains only to restart the computer, after having previously removed the USB flash drive from the computer. Do this and click Continue. If you wish, you can read the video tutorial on this topic.
First run after installing Ubuntu Server
Now we proceed directly to the first launch of the installed operating system. We’ll tell you how to log in to it, check your Internet connection and much more.
Step 1: authorization
Starting Ubuntu Server, you will need to be logged in each time. That is, enter the username and password that you specified when installing the system. To do this, wait until “login” appears on the screen and enter your login, then press Enter. After that, you will need to enter a password. Do this and press Enter again. Note that when entering the password, no characters are displayed on the screen.
Step 2: Network Check
Now let's check the internet connection. This is done, like everything else in the server version, using commands. First, let's check the network interfaces. Enter:
ifconfig
If the network adapter is detected by the system, you can also check the connection by pinging some server, such as Google. To do this, do:
ping 8.8.8.8
After that, new lines should start automatically appearing. This means that the Internet is. To stop the stream, press Ctrl + C.
Step 3: Install MC File Manager
It is recommended that you install immediately in Ubuntu Server MC - this is a file manager that will simplify the work with files. Installation takes place by entering the following command:
sudo apt install mc
After its completion, the installation process will begin. Wait for it to finish, after which you can start and check the application itself. This is done by entering its name.
Step 4: exit, reboot and shutdown
Finally, we will tell you how to exit, restart, or turn off the computer, because it will not work for you constantly. So, to exit your account, you need to enter this command:
logout
To restart the computer, enter the command:
reboot
Well, to turn off your PC, you must do:
shutdown now
Conclusion
So we figured out how to install Ubuntu Server 18.04 LTS, moreover, now you know how to make the initial setup, for example, install the same file manager and check the Internet connection. It remains only to learn a lot of console commands to feel comfortable when working with the system.