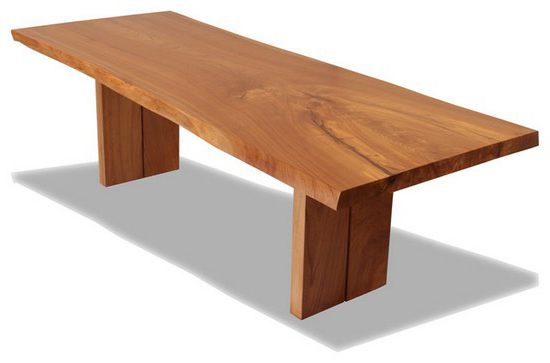
Wooden furniture has always been in great demand among consumers. This is understandable. Wood furniture has an attractive appearance, exclusive design and high environmental friendliness. Many homeowners are interested in the question of how to make furniture with their own hands. The wooden structure can, of course, be ordered. But if you create objects yourself, you can realize the most original and daring ideas. Let us further consider how do-it-yourself wooden furniture is manufactured.
General information
Making wooden furniture with your own hands can very well turn into a creative hobby. The masterpieces resulting from the work will be able to take their rightful place in the apartment or in the country. Created wooden furniture with your own hands can be a wonderful gift. The construction of objects for themselves is considered more a creative process than a technological operation.
Home Production Benefits
Do-it-yourself wooden furniture is not only the pride of the owner of the home. From simple bars and boards, you can construct many necessary things: from a stool to a bed or wardrobe. The most important thing is that self-made objects fit perfectly into the existing interior. It is also important that the manufactured furniture will be exclusive. After all, its creation will use its own schemes. Well, among other things, during the manufacturing process you can practice in the carpentry.
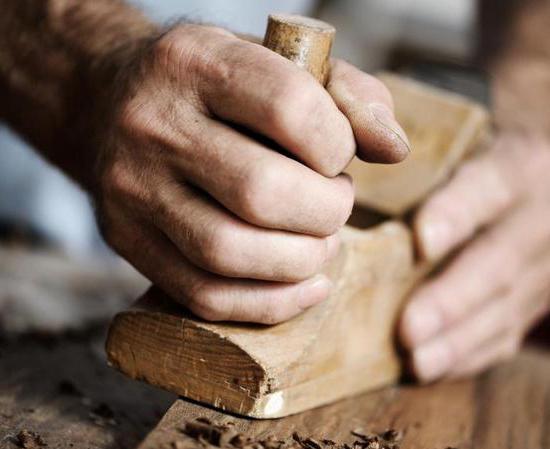
Tool preparation
There are various devices with which you can assemble wooden furniture with your own hands. Here you can not do with one hammer and a chisel. It will require a jigsaw, milling cutter, screwdriver, drill, planer. A high-quality and easy-to-use tool is necessary not only in the process of preparing elements. Special devices are also needed for decorative decoration of legs, front parts, and drilling for fittings. The final result of the work depends on how high-quality the used tool will be, namely, the appearance of the furniture. All devices can be divided into 2 groups: manual and electric. With their help, you can carry out not only assembly, but also repair of wooden furniture with your own hands. Consider them briefly.
Power tools
Do-it-yourself wooden furniture is assembled using the following appliances:
- Circular saws. This tool is used to create transverse and clean cuts. Wood is cut with a circular saw , elements and shaped blanks are processed and manufactured.
- Planer This tool is needed for surface treatment.
- Electric hacksaw. With it, you can cut thick and large bars, as well as metal profiles. This tool is needed for rough processing of material.
Hand tools
- The simplest is considered an ax. With its use, you can chop wood, trim, chop. The carpentry ax must be sharpened correctly. If the chamfer of the tool has a concave shape, it will bounce off the material, thus reducing the quality of work.
- The tongue and groove is used when sampling at the edges of the grooves.
- The end planer is needed for the processing of end elements, respectively.
- Humpback (a type of plane) is used when working with curly (oval, cylindrical, convex, concave, and other) surfaces.
- The stamp is used in the manufacture of gutters of different radius and size.
- A jointer is needed for planing and leveling a large surface.
- A set of chisels is used for artistic carving. Use a direct chisel for stripping the background, "kosyachku" - to perform geometric patterns. To create the necessary relief, klukarza is used. To make three-dimensional elements and cut through the contours, they use knife-jambs.
Work plan
First of all, you need to make sketches, according to which wooden furniture will be assembled with your own hands. Drawings should contain all the necessary dimensions for future designs. It is advisable to sketch the arrangement of objects in the interior. If you plan to assemble complex structures, sketches can be made in several projections. After drawing up the scheme, you need to start preparing the material. Do-it-yourself wooden furniture should look neat. Therefore, it is necessary to pre-process all the parts, their connection areas. Docking locations and dimensions must be accurate and consistent with each other. Fixing elements can be done using metal corners. A very crucial moment is the decorative processing of objects. Here you need to be extremely careful. Experts recommend first practicing on the samples, drawing the boundaries of the intended thread.
Console table
For the manufacture of this item you need plywood, the thickness of which is 1 cm. It is advisable to immediately glue the ends of the sheet with a self-adhesive film. It is possible to iron narrow strips with a flat heavy object (an old iron, for example). Before starting work, plywood should be carefully sanded. Its surface should be smooth and even. Drill further need to drill holes in the connection areas. Self-tapping screws will be screwed into them. The table will consist of 3 wide parts, composed in the shape of the letter "P". For greater stability, 2 narrow boards should be fastened to each element. For a better connection, two to three centimeters should be retreated from the edges of the plywood. A thin narrow lath is glued on the sides. She will hide the joints. For fixing, PVA or simple carpentry glue is suitable . On the underside of the countertop, pre-prepared metal corners should be fixed. They are fixed on self-tapping screws. After lubricating the joints with glue, attach the tabletop to the supports and pull both sides at a right angle. For greater convenience, rollers are screwed to the legs below. The shape of the wheel should be drilled a hole. The roller is fixed with bolts, which are usually present in the kit. Here you should try to fix the elements at the same level.
Overhead rack
To make its design light, it is better to use plywood. Shelves are prepared in accordance with the estimated quantity. In each element, 4 holes are drilled at a distance of 2-3 cm from the edges. After this, the shelves must be coated with water-repellent paint. Its color is selected in accordance with the gamut of the interior. To fasten the shelves together, you need two strong and long ropes. They are threaded through holes, crossed at the top. Tighten the knots under the lower shelf. Next, you need to prepare a small sized wooden sticks. They are needed to maintain the same distance and fix the shelves at the same level. Sticks are inserted between the threads of the rope. The hanging rack is ready. You can hang it on the wall and store various objects on the shelves: flower pots, books, vases, photographs. The design fits perfectly into almost any interior. Such a rack can be of any size. But at the same time, the design does not take up much space.
Do-it-yourself wooden furniture restoration
Sometimes you need to refresh the items in the house, breathe new life into them. Do-it-yourself restoration of wooden furniture is carried out according to a specific plan:
- Elimination with the subsequent replacement of old fasteners, hinges and other things, if they become unreliable.
- Removing the old coating. You can use special compositions for removing paint. With the help of such a solution, the coating is quickly removed from the surface. If there are metal parts in the structure that were touched by rust, they should also be treated with special cleaning compounds. If necessary, you can clean the surface with a stiff brush. After removing the coating, all parts must be rinsed quickly under running water. Do not keep wooden elements under the stream for too long. Otherwise, water is absorbed into the parts and they are deformed.
- Drying out. It should be carried out if possible in the open air. In this case, do not place elements under scorching rays.
- Putty. It is not needed in all cases. For example, when restoring oak structures, putty is not used.
- Painting. As a coating, you can use acrylic. This composition, among other things, will protect parts from destruction. DIY wooden furniture can be painted with a brush, roller or spray can. As a rule, the coating is applied in 2-3 layers, each of which should dry well.