The process of creating a radio is to build a radio transmitter or device that simultaneously combines the functions of a radio transmitter and a radio receiver. A radio transmitter is an essential part of any such device. The presence of the receiver depends on the tasks being solved.
Before you make your own radio, you need to make sure that the current legislation is not violated. Broadcasting requires a special license. In its absence, it is allowed to broadcast only within the unlicensed ranges or at low power in the FM band.
General information about radio transmitters
Each radio transmitter has two main parameters, according to which it can be attributed to one or another category: transmit power and frequency range. Power is measured in watts. The range is the extreme values of the frequency of oscillations of the radio waves in which the transmitter is capable of operating. Usually it is indicated on the scale of the regulator in the form of digital divisions. On older models, instead of the digits of the range (for example, 107.7 FM), the wavelength was indicated. The wavelength directly depends on the frequency.
There is a third parameter of the device - modulation. Any radio wave can be given amplitude, frequency or phase modulation. There are more complex types, for example, SSB or phase with simultaneous amplitude modulation.
What are the uses for radio?
Before you make a homemade radio, you need to decide for what purpose it will be used. This can be a broadcast transmitter (home analogue of a broadcast station), or a device for maintaining radio communication between several devices.
All home-made radios are divided into two groups: broadcast and connected transmitters (a receiver may also be connected). Receivers collect those who wish to receive information from the air from open service communication channels.
Transmitter Receiver
The most important tuner is the receiver. This product can be purchased at a specialty store (except when the assembled radio transmitter does not fall within the standard range). Therefore, before you make your own radio, you need to buy a device to work in the right range.
If we are talking about broadcasting transmitters, then it is better to start practicing with equipment operating in the medium wave range. Such devices were installed on old receivers, and are currently being put on modern Chinese radio sets. They have two advantages:
- make the transmitter easier;
- It will not interfere with the operation of other devices.
In the medium-wave range (with the exception of large cities), a small number of broadcast radio stations operate.
But there is a drawback - poor sound quality. With careful tuning, the radio will be suitable for transmitting speech, but not for music broadcasts.
The choice of the source of oscillation (radio waves)
In order to make a simple radio, you need a source of oscillation, radio waves. It is called a reference oscillator, a master oscillator, or a frequency synthesizer.
There are several options for its manufacture:
- Purchase of quartz (a metal crystal with two leads) and its soldering into a circuit. The option is simple and convenient. The main parameter to choose is the frequency of quartz, 27.777 MHz is suitable.
- Buying a quartz oscillator (same as regular quartz, but has four contacts).
- Assembly of a parametric generator (coil winding). Used by beginners, but when working on the FM band, such a device is not reliable.
- Construction of a generator on lamps. A popular option in the past, but now rarely used. Working with lamps is not recommended for beginners, as it is associated with the use of high voltage. With the help of lamps you can assemble a very powerful transmitter.
- Buying a finished frequency synthesizer. The easiest, but also the most expensive option.
- Purchase or use an existing device (for example, a Chinese FM transmitter). This option is recommended for beginners.
The selected oscillation source must be connected to the amplifier and antenna, which you can do yourself. It is advisable to install a filter (P-loop) between the amplifier and the antenna.
Transmitter Circuit Selection
The main rule for beginners is to take only ready-made and tested schemes. They are posted by radio amateurs on the Internet, commented on thematic forums. You can see in the magazine "Radio".
To decide how to make your radio at home, you need to choose a radio microphone circuit. The best solution is to use a classic wireless microphone, which can be assembled in your own case or from similar devices.
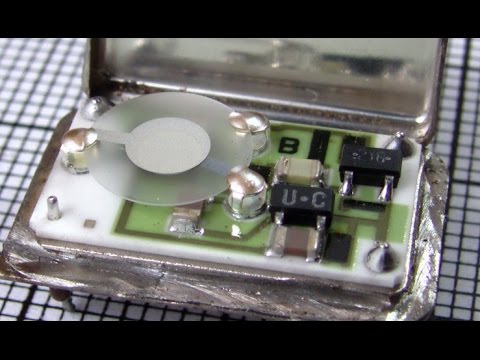
Radio microphones or bugs are the best option for your radio. These devices are analogues of commercially available FM transmitters. The main difficulty is to ensure the miniature of the product. A common mistake is to try to “squeeze” a radio microphone to the size of a coin. On this scale, they often do not work, so the board must be made in standard sizes.
Production of radio headphones
In the radio headphones, the transmitter is located on the sound source, and the receiver is located directly in the headphone housing. Before making a radio headphone, it is necessary to assemble both devices, but provided that the receiver is made of a ready-made module.
A module is a microcircuit with a board (kit designer), which must be built into the headphones, connected to the button and the battery. The following miniature FM headphone modules are popular:
- AR1310 - is smaller than a ruble coin and has a 32-ohm headphone output (the most common model).
- AR1010 - a module the size of two peas and push-button control, which does not require a second chip.
- The TEA5767 is the smallest module to fit into headphones.
- RDA5807 - Chinese FM module without digital control.
- Si4703 is a convenient module with a connector, but larger.
It is better to choose options that do not require digital control. Working with them is easier than with a wireless headphone receiver.
A transmitter for wireless headphones is best done on its own. You can consider the option of purchasing a ready-made module, but then valuable experience will not be gained on how to make a radio at home. Self-assembly is recommended as it will cost less. Transmitters are much simpler than receivers and easier to assemble and tune.
DIY radio transmitter assembly
Assembly is recommended to be carried out in the classical way - use a printed circuit board, to which to solder the components of the circuit. After that, set everything up using special devices and place it in the case.
Do-it-yourself PCB manufacturing will require chemicals and a bath. It is undesirable to use ferric chloride because of its marbling. Instead, hydrogen peroxide and citric acid are used. Hydrogen peroxide is better to get concentrated for the pool or perhydrol.
The drawing on the board can be drawn with a marker or printed on a printer. To give the radio the appearance of a professional device, you can use a photoresistor.
It is recommended to use a ready-made board drawing for the selected circuit. For independent development, you can use specialized programs.
Soldering, radio transmitter assembly
When soldering the device, do not allow overheating of the components. This is especially critical for transistors and microcircuits, the soldering of which can not be carried out for more than 2-3 seconds.
A soldered electronic device needs to be set up. It is forbidden to connect power to powerful transmitters until they are cascaded.
Homemade Radio Tuning
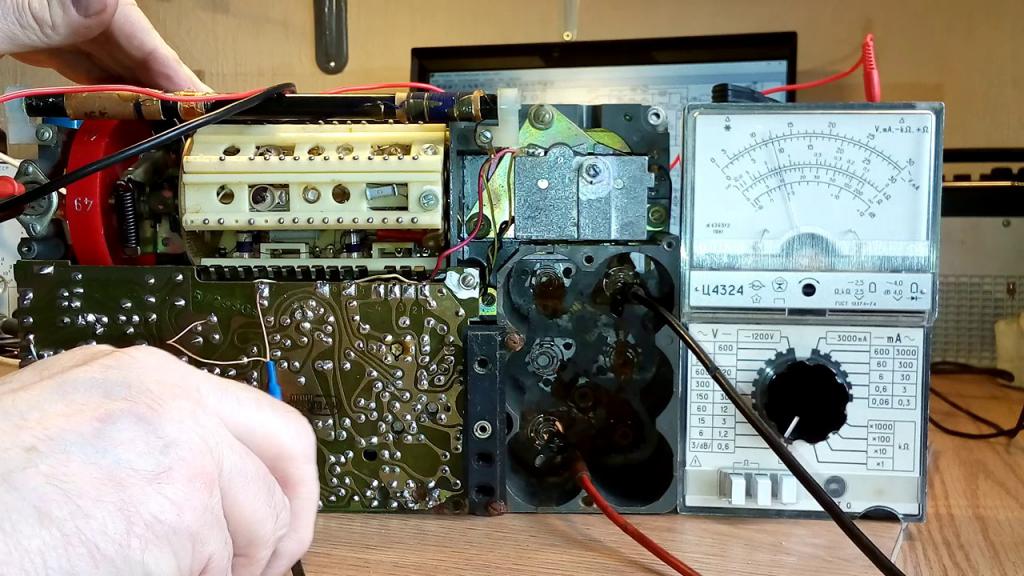
Setup is the final and most difficult stage of manufacturing. Before you make the radio yourself, you need to purchase special devices for its adjustment: a tester and a receiver. A sample tuning algorithm is as follows:
- First, the tester checks all the electrical connections of the soldering, current consumption, voltage drop in the circuit areas. The operation of each transmitter stage is checked.
- A wave meter is made to the tester in voltmeter mode. The probes are connected to the same coil that is installed in the transmitter. When connecting the power, the arrow should show voltage pickups through the air. Between the coil of the wavemeter and the tester, it is necessary to install a microwave diode, which is sold in stores for amateur radio.
- The receiver tunes to the frequency of the radio transmitter. After receiving the broadcast signal, the frequency and power are adjusted. You can check the "communication range".
To improve the tuning quality of receivers and transmitters, you can use the following devices: frequency counter, microwave oscilloscope, wave meter, power meter, wattmeter. If interest in how to make your own radio grows into a professional hobby, you can gradually increase the complexity of the assembled devices.