Having decided on self-assembly of the system unit, many are faced with a number of issues. One of them is connecting the motherboard. For those who do not quite understand the internal structure of the computer, let us recall it. The main element of any personalization is the motherboard.
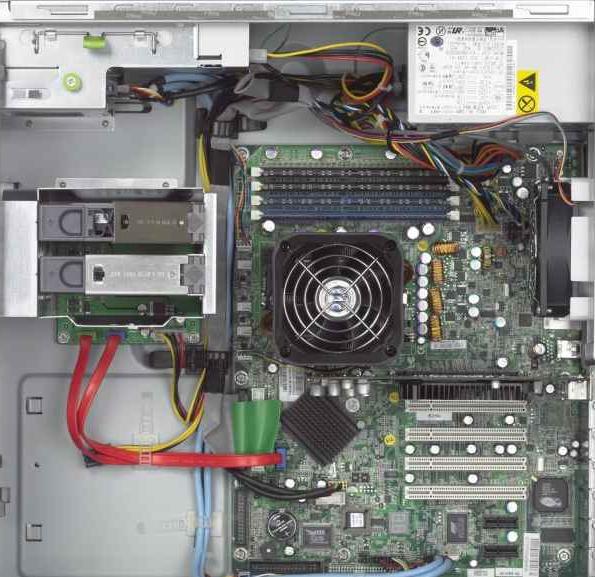
This is a large sheet of rectangular or square multilayer PCB, on which electronic components are soldered - transistors, microcircuits, diodes, etc. All of them are connected into a single system by a network of conductive tracks. It also houses slots for connecting expansion cards - a video adapter, RAM modules, and other components. Since the topic of our article is the connection of the motherboard, we note one important point. Sometimes - with visible damage to electronic elements - it may be crazy to simply replace them using a soldering iron, ignoring the service center. Although sometimes this approach is effective, you need to understand that the PCB sheet of the motherboard is multilayer. That is, it is not limited to two visible parties. Therefore, when soldering, quality and accuracy are important.
Connecting the motherboard begins with its fixation in the
body of the system unit. Some manufacturers stamp special protrusions in the metal around the mounting holes, making it virtually impossible to accidentally touch the conductive elements to the housing. Others leave this moment "on the conscience" of the user himself. First, the board is carefully applied to the inner wall of the case, the required holes are marked - usually there are more, since the manufacturer does not know the dimensions of the board used. The
copper sleeves-adapters are screwed into the holes
. The board is attached to them with the help of small bolts. For fixing, you can also use special plastic latches, fungi, in this case, bolts and sleeves are not needed. In fact, it is not so important how the connection of the motherboard to the chassis is performed. The main thing is to ensure that the protruding soldering is not shorted to the conductive housing. A small recommendation: if the board bends somewhere (“plays”) due to the lack of a hole for fixing, then between this section and the metal you can place a stationery eraser.
Further connecting the motherboard is to use the pads. On any case there are buttons, port connectors. To connect them to the board, the latter contains combs of pin contacts. The polarity and placement order are given both in the instructions and indicated on the textolite. You need to combine matching labels. For example, the block at the end of the wire is indicated by RST “+” and “-”, so you need to find the same designation (Reset) on the board and connect the leads.
Next, the power supply is connected to the motherboard. The block on the board and the plug from the power supply cannot be overlooked. When connecting, it is important not to exert much effort, since the shape of the connector does not allow you to make the wrong connection - it is impossible to make a mistake in this case.