Before you draw a gnome, you should carefully consider the drawings with its image. In fact, the drawing process is not as complicated as it seems at first glance.
How to draw a gnome with a pencil?
It is best to start drawing with a face image. It should be noted that the main features in the image of gnomes are their large cheeks, ears, noses, eyes and feet.
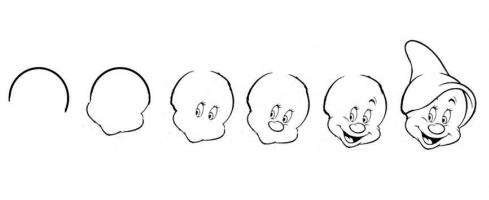
First, a semicircle is applied to a sheet of paper.
Cheeks and a chin are attached to the lower part of it.
Then we mentally divide the face in half with a horizontal line and on it draw huge oval eyes with long rare eyelashes.
Since you need to draw a gnome with a large fleshy nose, an oval is depicted just below the eyes, which in the upper part has another bulge.
Then a broad smile of the gnome looms, wrinkles under the eyes, eyebrows are outlined.
And how to draw a gnome without its main attribute - hats? It must not be forgotten. It is necessary to depict the cap almost in the shape of the head, adding folds and a tip sticking up. Although for some dwarves, this tip of the cap hangs down.
The next step is a sketch of the shoulders of the figures of a fairy-tale character. Do not forget about the neck and collar of the free robe of a small creature.
The design of the abdomen, the gnome's sleeves is the next stage of drawing. Patches, buttons should also be carefully drawn in the picture.
The lower part of the robe should hang freely under the belt or rope that ties the gnome's clothes.
Since you need to draw the gnome with huge feet, you should depict them protruding from the bottom of the robe. According to legend, the gnomes wore soft comfortable shoes that resembled tight socks in some ways, so it has folds that emphasize softness.
The last step in drawing a gnome is to depict the character’s huge ears. You can draw trees, grass, sun, birds, birds around the gnome - everything that will please an aspiring artist.
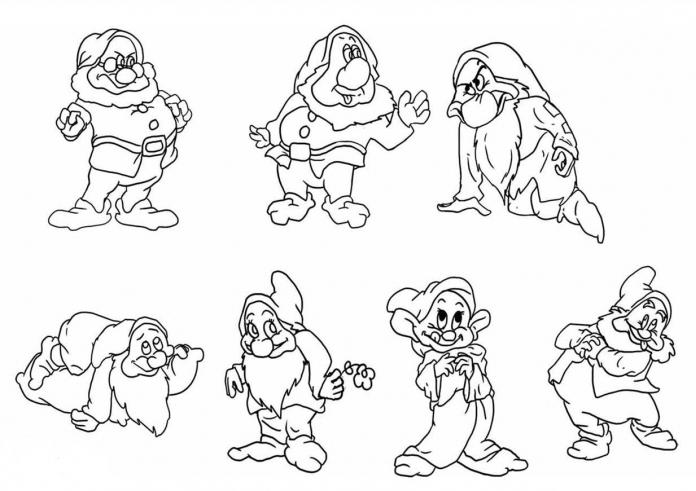
Master class drawing all seven gnomes
Since you can draw a gnome in stages not only one, but all at once, here it will be described and shown how to do it.

First, a sketch of all the figures is made on paper, which consists of circles suggesting the image of heads, bodies, limbs - with the help of dashes, palms or fists and shoes. On the faces should be applied auxiliary lines: one vertical, dividing the face in half, and two horizontal lines, the first of which divides the face in half, and the second - in half the lower half.
The eyes are located on the upper horizontal auxiliary line, and the mouths on the second. Between them, the artist should put fleshy large noses. The ears should also be quite large and protruding. Some dwarves should outline beards. Here you should draw your legs and arms, giving them volume.
The next stage includes drawing unique caps of the gnomes, drawing some details of the garments of fairy-tale characters: belts, collars, buttons. Do not forget about the fingers of the characters and the folds on the shoes.
The last step is to apply strokes to the clothes, which are an important point, as they emphasize folds, depict patches on the elbows. Extra lines should be removed from the drawing with an eraser.
If you wish, you can colorize the images of the dwarves with bright colors. They will look very organically on the wallpaper in the children's room as original stickers, can serve as templates for applications on children's clothes or on rugs, cloaks, curtains.