Everyone knows that the floor is of great importance in different rooms. This is not only comfort of movement, but also the durability of any floor covering. Therefore, after building a house, everyone tries to pay due attention to this. And many are trying to change the existing floors. To do this is not so difficult, you just need to find a method and adhere to technology. Only then will leveling the floor give the desired result. There are enough techniques, and each process has its own characteristics.
Concrete application
The first stage is the creation of the floor, and only after that does it level out. There are enough ways to deal with irregularities. The process is built up depending on the existing rough and finish coating. In addition, you need to consider how the floor surface will be operated in the future.
It is clear that the most suitable option for concrete paving is a cement screed. As a result, the surface is smooth and durable. Screed leveling is often done. It is really possible to lay on it:
- Tile (any orientation).
- Laminate board.
- Parquet.
- Linoleum, etc.
There are enough advantages. It is also important for many that waterproofing and heat are under such a coating. Place it quite real.
Wet screed
Not so long ago, a person could use only one option - a concrete structure. Today it is divided into wet, dry and semi-dry. The first is a classic, which is composed of cement-sand filler. The implementation process is simple, but it will take a long time to complete the work, and also wait until it dries completely. The result is a highly reliable design that withstands any mechanical stress.
Consider how floor leveling occurs with the help of a classic flooring:
- Work is being done with the surface. It will take to completely eliminate dust and dirt. The spots are cleaned. If there are differences on the floor, they are cleaned to a minimum. But the hollows and holes are pre-silted with the same solution. We'll have to wait until these improvements dry.
- When the initial stage is completed, you will need to go through the entire surface with a primer. It will create a more durable adhesion of materials and remove the remaining dust. When work is carried out in a room where the humidity level is high, a deep penetration mixture is taken. Today, there are many different tools on sale, so it remains to choose the right one.
- You can’t do without waterproofing. For this, a ruberoid or a film with a high micron index is used. They are stacked with a margin on each other and a little on the wall. Strengthen protection is possible with other materials.
- Leveling the floor is done in stages. Next are the measurements. It is required to evaluate the unevenness and to understand in which place there will be more mixture. It is necessary to measure the zero level, and then with the help of equipment to spread it around the perimeter. As a result, all points should be on the same line relative to the horizontal surface (but not the floor - this is the main reference point).
- Further, it is easy to find the differences: the distance from the point relative to the floor is measured. Here it becomes clear where the error is higher. The screed should stop at the highest point, bay the rest. Do not be lazy - you need to make a lot of measurements. Then the accuracy will be high. Such a screed is one-and two-level. The first is poured in a single layer and creates a perfectly smooth surface. And the second is the work in two rooms, which should lead to the fact that on the threshold of the surface are equal. When working, much attention is paid to precisely calculations and measurements.
- Next, it's time to install the beacons. These are metal profiles. To make them in place, alabaster or fixing components are used. The minimum distance between these parts is half a meter (but may be more, depending on the size of the room).
- The next step in leveling the floor is laying out the fittings. If the room is small, then this is not necessary. After all, the reinforcement allows you to make the screed as strong as possible. Most often this is a grid. It is stretched and neatly filled so that there are no voids.
- Leveling the floor does not occur without insulation. This is expanded clay. It is better to purchase a composition of various fractions. So the maximum effect is achieved. From expanded clay, an embankment is made that reduces the height of the walls, so it is not recommended to use it at low ceilings.

- After the mixture is prepared for leveling the floor. It is necessary to apply sand and cement in a proportion of one to three. Today, special fillers are on sale that can improve the performance of such a coating. It is good when the solution quickly appears in its place along the entire perimeter. It is better to work at least together - one makes the composition, and the other distributes it on the surface.
- Start moving towards the exit from the opposite wall. Having laid the solution, you need to draw it out with the rule regarding beacons. When the surface is completely flooded, the control sticks are removed, and the grooves are filled with the same composition.
- After the construction is left for four days. Periodically sprayed on it with water. If moisture goes away quickly, then cracks cannot be avoided. After that, a plastic film is spread over the entire surface. In order for the top layer to finally dry, one week is enough for this.
- Do not rush to the finish, because the work can be started only after 28 days, not earlier. This is exactly the big minus of the classic wet screed. Not everyone has that much time.
- Some subsequently use polymer formulations to make the surface perfectly smooth.
This is all the technology that is required in creating a wet screed. Everyone can do it on their own, without resorting to the help of professionals and without overpaying extra money.
Dry and semi-dry
Since the concrete screed dries for a long time, she has an alternative. As a result, do-it-yourself floor alignment is done with dry formulations. Drying time increases because there is a lot of liquid in the composition. If its volume is reduced, then time will be reduced. That is why modern compositions have become increasingly attracting attention. In this case, the surface is smooth and without errors.
How is the operation performed?
The main stages of work:
- It is necessary to remove the old screed, even if it is reliable. This process will take a lot of time, create noise and discomfort. You need to be prepared for this.
- It is clear that, removing the old structure, you will need to get rid of dust and degrease the surface. If necessary, a new waterproofing is placed (by the way, when leveling the floor with plywood, then this is an obligatory step).
- The probability of a drop is checked by the building level to determine the thickness of the embankment.
- How is the concrete floor leveling done next ? Thermal insulation is laid on the waterproofing. A composition of expanded clay is considered good. But today, plate material is more widely used - expanded polystyrene and stone wool. There is much more in stores, the difference is only in price.
- Reinforcement is not required. To ensure the reliability of the entire plane has become maximum, special additives are used. This allows the material to not crack during drying.
- You can fix the beacons in the same way as in the previous version of the screed. Then the classical scheme of work is repeated. The only difference is the amount of water in the solution. The consistency of the solution is loose so that a small amount of water appears when squeezed. You will have to make sure that when leveling the surface, the rule does not form spools.
- It is necessary to begin to stretch the sand-cement composition over the area. It is worth considering the lighthouses, which are equal.
- When the whole process is finished, it is worth covering the floor with polyethylene and leaving for a day.
- After 24 hours, the film is removed, the beacons are removed, and the surface is thoroughly wiped. In a day it will be possible to walk on it. If this is the leveling of the floors under the laminate, parquet, etc., it is allowed to lay the finish coating only after four days. You can fill in and corrective compositions, but this is at the discretion of the owner.
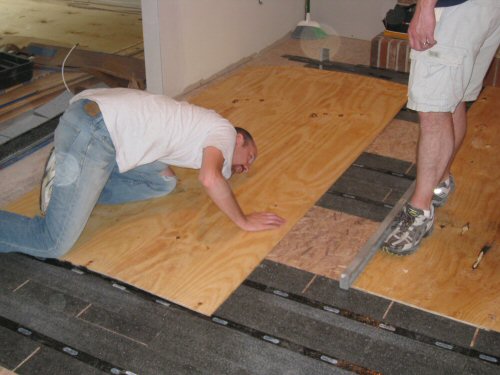
Today there are completely dry floor screeds. As a result, the presence of concrete is completely excluded. This design is lightweight, but no less reliable and complete. Many also make plywood floor alignment. This option is quick and quite suitable for small rooms. In addition, modern masters speak of other effective compositions that allow you to create evenness and beauty in the room.
Self-leveling compounds
Those who do not want to wait long have the opportunity to use more modern formulations. This floor leveling is a self-leveling mixture. The main advantage is that it is easy to start finishing after a couple of hours. In terms of strength and durability, this finish does not lose to analogues. However, some compositions do not even require cladding or decoration.
pros
The main positive aspects of floor leveling with a self-leveling mixture:
- High level of durability and reliability.
- Long service life.
- Easy to create.
Features
Such a layer will have a thickness of five millimeters. If the room has low ceilings, and it is necessary to level the floors, then this option will be the most advantageous. You can always find a couple of minuses, even with an abundance of positive aspects. This is the preparation of the cover. Thus, the presence of irregularities, depressions and cracks is completely eliminated. In addition, there should be no dust or dirt. And the cost of modern materials is high. Therefore, often people, trying to save money, sacrifice their time.
Today there are several mixes for leveling the floor. You need to make a choice not only from your desire and capabilities, but also taking into account the surface of the base of the processed floor, as well as the finish coating. Below we list what formulations are on sale.
Cement based
This is a budget option, so its service life is three years. As a result, there is no shrinkage, and adhesion to any surface is high. Such a coating cannot be decorative and will dry for more than 14 days.
Gypsum plaster
They are suitable for dry rooms. Gypsum mixtures themselves create a warm base. They are completely environmentally friendly for the body, do not shrink. A dry surface must be created before application.
Epoxy
Ideal bulk floors that help remove any inaccuracies and bumps. You can not lay them in the bathroom, because when they come in contact with water, they become slippery. The most suitable room can be considered a living room or bedroom.
Polymer
They are always available in stock. They are used depending on how important the performance and cost. But the polymer composition will have an undeniable advantage - it is the most reliable surface that can withstand weight and mechanical stress. Such a coating can be found on loggias and cellars, because it does not respond to temperature changes and is not afraid of humidity. There are not many disadvantages - a relatively high price and the need for surface preparation.
It is important that the alignment of the concrete or wooden floor is carried out strictly according to the instructions, otherwise it will not work to achieve the desired result.