Remember the school biology classes in which we examined iodine-stained onion cells under a microscope? How mysterious it seemed then to penetrate this mysterious invisible world!
It turns out that each of us can make a real microscope from a webcam with our own hands. For this, special knowledge is not needed, just a few items that can be found in any house are enough. At the same time, we won’t spoil the webcam, it will be able to work in the same way as it worked before. So we need:
• USB webcam;
• adhesive tape;
• scissors;
• a stand (a rod mounted vertically on the base) that can work as a tripod;
• a subject table on which we will lay out the objects of our future research;
• backlight - any light source of sufficient brightness, you can even use the flashlight of a mobile phone.
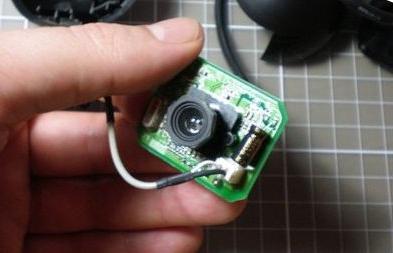
So, let's begin! The first step is to turn the camera itself into a microscope. To do this, simply unscrew its lens and insert it back, but on the other side. It turns out an amazing increase effect. It’s good if the camera for the microscope is at least megapixel. You can take less, but the increase ratio, respectively, will also be less.
The next step is a tripod. The more stable it is, the easier it will be to set up a microscope from a webcam. It is better to choose a rigid rod for it, which must be fixed on the edge of the base of a sufficient size, with a side of about 20 centimeters.
On a tripod, at a height of about 10 cm, we make an object table the size of a pack of cigarettes. In its center, you need to make a hole for the backlight. Thick cardboard is suitable for the table, which is easy to fix on a tripod using the L-shaped corner and adhesive tape. The corner can be taken ready or cut from a thin tin, such as a can.
It remains to fix on a tripod, in fact, the microscope itself from the webcam. Note that the lens should be free to approach the subject only a few mm, so if the shape of the front of the body does not allow this, then it must be removed. The webcam microscope is attached by analogy to a stage, but not to the tripod itself, but to a ballpoint pen or something similar. And after that we fix the handle on a tripod so that it is possible to move it up or down a couple of centimeters to adjust the focus. Can be fixed with a thin copper wire.
Our webcam microscope is almost ready. Now you definitely need to highlight the subject table from below. If you did not find anything suitable, use a small mirror. Arrange it under the table at an angle so that it casts the bunny from the light source onto the object table. The light source may be a
table lamp or a flashlight.
Now you need to focus the camera. Plug her in. On a subject table, put a sheet of paper with printed text and adjust the sharpness by moving the webcam on our impromptu slide. Now you know the approximate
focal length of the lens. This is our new webcam application. The microscope is ready to work.
Of course, the design is imperfect, and it was made in haste. If you get carried away, you will probably come up with a much more perfect option. Good luck with your experiments!