Despite the variety of materials, many prefer to use the classic options, proven over the years. If we talk about flooring, tiles come to mind right away. This material has high performance properties. But for it to last a long time, you need to know how to lay the tiles on the floor. We’ll talk about this today.
Tile: all the pros and cons
Why is this material in high demand? It is popular for several reasons:
- Resistant to water (therefore ideal for the bathroom).
- Lasting.
- Wear resistant.
- Resistant to chemicals.
- Not afraid of ultraviolet rays.
- Easy to clean.
- It can tolerate extremely low and high temperatures.
- Great for underfloor heating.
The material is universal. You can safely lay the tiles on the floor of the balcony, bathroom or hallway. Also today there is a wide range of tiles. You can choose a material of different colors or even with imitation of parquet. Tile is a good decoration element. Recently, black and white tile has become relevant. It is used both in the bathroom and in the bathrooms.
But you need to remember about the negative sides of this material:
- High rigidity. If such a coating is used in the kitchen, in the event of the fall of dishes, it instantly breaks.
- Slippery surface. This applies to enameled tiles. Therefore, this type is better not to use in the bathroom. Models with a frosted surface are better suited here.
When a decision is made to use this finish, you need to get to work. How to lay tile on the floor? Let's consider further.
Preparation of tools and materials
It does not matter what thickness of the tile for the floor will be chosen. The set of tools and materials will be the same. So, you should prepare:
- Glue or cement mortar for tiles.
- Cord for marking.
- Building level.
- Tile grout.
- Measuring roulette
- Rubber spatula.
- Tile cutter.
- Notched trowel.
- Rubber mallet.
- Capacity for mixing the solution.
Training
In order for our floor to be strong and even, it should be prepared qualitatively. First you need to get rid of all the equipment and furniture that is in this room. The room should be empty. If the tile is laid in the bathroom, it is advisable to dismantle the toilet, after shutting off the water supply.
How to lay tile on the floor? To do this, you need to dismantle the old (if any). It is necessary to destroy the tiles to the base, together with the old cement mortar. Also note that in the future it will not work to correct irregularities by using a large volume of solution. Therefore, after removing the old tiles, a screed is necessarily made. Waterproofing will not be superfluous (especially if repairs are done in the bathroom).
The screed itself can be done in two ways:
The first assumes the presence of a concrete base. Commonly used if tiling is installed in the bathroom. By the way, when installing tiles on the wall, you need to use an additional reinforcing mesh. But in our case (when laying tiles on the floor), this grid does not need to be used. However, all platbands on the doorways and all skirtings should be removed.
Markup
To do this, we need to draw a line of the spaced part of the first row of tiles. If it is colored and with a pattern, the location of the tile is marked in those places where the pattern will differ.
Stacking Whole Parts
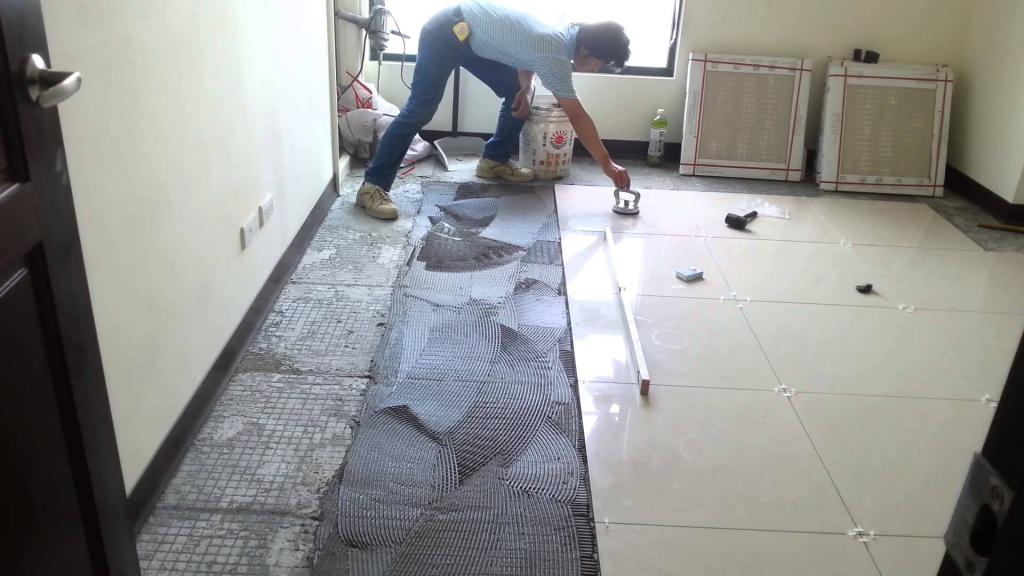
What to do after markup? Then you can proceed with the installation process. What do we need for this? Here you need glue for tiles. Which is better to choose, we will consider a little later. The glue solution can be both dry and ready. In the first case, we will have to dilute it ourselves until the desired consistency is achieved. Ideally, tile adhesive should be similar in consistency to sour cream. Using a notched trowel, apply the composition in small portions to the surface. The layer should be thin. Then we lean the tile. Strong pressure is not necessary. But in order for the solution to completely envelop the tile, you need to slightly rotate it along the axis. It is important that the glue completely covers the back of the tile.
But you need to remember that in the future it is rather difficult to dismantle such a tile. therefore, when installing it on the floor, you need to be sure that this tile is chosen for many years to come and fully meets the needs. By the way, when laying tile, you can use a rubber mallet. Using it, you can give greater adhesion without damaging the tile itself (although it is more difficult to damage the floor tile, since its thickness is several times higher than that intended for the wall). But it is impossible to press hard on the tile, since part of the glue will come out along the edges. All joints must be clean. It is necessary to leave a small gap - here grout for tiles is further installed. Its colors may be different, but classic white is usually chosen. This grout helps prevent moisture from getting inside, which will cause destruction and mold in the cavities.
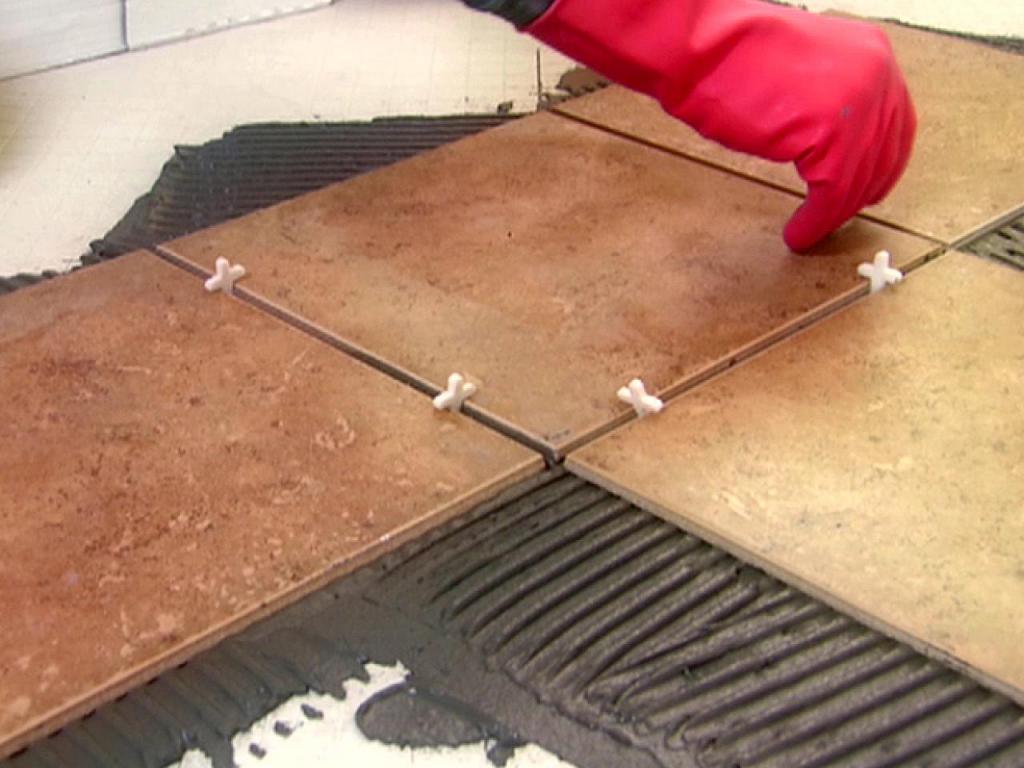
Is it necessary to install the tiles one at a time? If you already have experience in such work, you can install several tiles at once. In this case, each tile must be pressed down for better adhesion of the adhesive solution. Moving to a new row, you need to use the level. It is necessary to check whether the new tile has gone to the side. Experts say that when laying tiles such deviations should not be. And for the evenness of the gaps, crosses for tiles are used. Sizes may vary. This parameter is from 0.5 to 6 millimeters. But usually the size of the crosses for the tile that is mounted on the floor is from 1.5 to 2 millimeters. This is the best option for floor tiles.
Laying floor tiles is recommended to be done without delay. If necessary, pauses should remove the adhesive solution at the edges. Otherwise, the solution will dry out and the strength of the connection will remain in question in the future.
Installation of the missing tile
How do I do the laying of tiles on the floor with my own hands? When the whole tile is completely laid, we proceed with the installation of the missing pieces. To do this, cut the material. This is done using a tile cutter. It can be manual or electric. If there is no tile cutter, you can use a grinder with a special circle or a glass cutter. But you need to remember that when cutting material, a lot of dust is formed. Therefore, be sure to use a respirator and open the windows in the room. In case you need to make a curved line, manual wire cutters for tiles are used.
Grouting
This is an integral stage when laying tiles. But this operation is performed only after the adhesive solution has completely dried. This requires a minimum of 24 hours at room temperature. At the same time, it is not allowed to walk on such a tile and produce any other loads on it. After the solution has dried, take out the crosses and grout. As the latter, you can use the following compounds:
- Silicone
- Epoxy
- On a cement basis.
Which one to choose? It depends on the shade of the tile itself. Also, unlike the first two, cement grout is sold dry. It must be prepared independently (diluted with water). But the best option is to buy compounds in tubes (for an assembly gun).
Before applying the grout, thoroughly clean the seams between the tiles from dirt, dust and adhesive residue. Otherwise, the grout will be of poor quality. When using the first two options, you will have to additionally glue the tile with paper tape. Removing epoxy and silicone grout will be difficult, unlike cement. The latter is removed with an ordinary wet chopper.
Then, using a rubber spatula, grout should be applied to the seam, squeezing the composition a little inside. Excesses are removed with a damp cloth. If this is an enameled surface, the grout should not be allowed to dry. Otherwise, it will be difficult to get rid of it (even from cement). It is necessary to process all the seams, including hidden places. Then wait time until the grout hardens. It usually takes 24 hours. After that, the entire surface of the floor is washed with a damp cloth. At this stage, the laying of tiles on the floor was successfully completed.
Cutting nuances
Before laying the building material, you need to find out the volume of solid and trimmed parts of the tile. Material must be taken with a margin (+10 percent of the desired volume). It must be remembered that when cutting tiles can be deformed. Many people prefer to use glass cutters.
The cutting wheel of the glass cutter is installed on the surface of the tile and is drawn along a pre-marked line. After scrapping is performed. But if the material is too strong or thick, in this case you need a tile cutter or a special circle for the grinder. Due to the larger diameter of the cutting wheel, the tile cutter will provide a high-quality cut of the material. The work itself is done in several stages:
- The tile is placed on the limiters with a marking line. The material must be set so that the cut line is in the middle of the tile cutter.
- At the top of the tool there is a carriage with an emphasis and a wheel. She moves along the guides. We need to take it aside (from ourselves). Then a wheel is attached to the tile and the material is cut.
A more complicated procedure is to make curly lines or a semicircle. This must be done if the tile closes any communications on the floor - in this case, it is necessary to outline the cut shape on the front of the material in advance. And then the cut is done on the tile cutter. The unnecessary part of the tile must be bitten off. But the edge after that will be uneven. Therefore, for greater smoothness, we need to file a part with a file.
Installing tiles on an old tile
Is it possible to lay the tiled floor without dismantling the old tiles? As we said earlier, the floor must be trained before installation. But often the owners want to save time and install directly on the old tile. What do experts say about this? You can install tiles in this way, but not in all cases. First you need to make sure the adhesion of the old tiles to the floor. This can be done with a rubber mallet. If the material trembles upon impact, you cannot install a new tile on it. Otherwise, soon you will have to do the repair again. Also, experts do not recommend installing the coating if the old tile has cracks. You can start installation only after making sure that the old tile is firmly held on the floor.
How to lay tile on the floor with old tiles? There are several options. You can make notches and use a grinder to cut off the icing. But it’s better not to do this, but simply apply a special primer. It is applied using a roller or brush. But in order for the clutch to be of high quality, the tile surface is degreased first and the slightest dust is eliminated. On average, up to 3 liters of such a primer takes up 10 square meters. Since the composition contains sand, cement and special fillers, the surface will become rough. You need to wait until the material dries. It takes about three hours of time. Then you can lay the tiles on the adhesive solution. The installation procedure is no different from the above instructions. Lighthouses are also installed.
Recommendations
To make the process of installing tiles in the bathroom or kitchen as simple as possible, you should follow a few tips:
- Try to fit the tiles in a row without cropping as much as possible. Or you need to shift it so that the last tile remains solid. And in the gap, you can simply lay wide pieces of tile.
- You must read the instructions on the packaging of tile adhesive. Some companies produce formulations that are applied only to a damp surface. This point needs to be considered.
- Before cutting the tile, it must be placed in the water for an hour. Wet tile is easily cut with a glass cutter and breaks along the line. The latter should be applied no closer than one centimeter from the edge of the tile.
- The holes in the tile are made with a special drill (ballerina).
- It is forbidden to completely cover the entire surface of the floor with mortar.
- The grout should have a thick paste consistency.
- At the finishing stage, the floor is always polished.
Tile adhesive: which is better to choose?
Specialists recommend the use of specialized adhesive for floor tiles. It includes a large amount of plasticizer. It fills all the voids under the tile when glued. Also note that it cannot be used for walls - tiles can float. If you install tiles in the bathroom, you can purchase water-repellent glue. It is also used for decorating pools.
Dry mixes are produced on the basis of cement. To obtain a solution, it is enough to dilute the composition with water in the desired proportion. What brand to buy glue for a square tile? There are several good manufacturers:
- "Mask". This glue gets good consumer reviews. Available with different markings. Can be used for heavy tiles.
- Knauf. This is German glue. It is considered the best among those that are produced in dry form. It can be used both for floors and for walls. It is also used if tile is placed on a wooden floor. It dries slowly. It is applied to the tile with a thin layer. The glue consumption is minimal.
- Eunice. It has high adhesive properties and dries quickly. Three hours later, you can walk on such a surface. The glue tolerates temperature extremes and high humidity. But you need to work with it quickly, since in a couple of hours it crystallizes.
- "Ceresite." Pretty famous manufacturer in the Russian market. The company produces mixtures for various purposes. Glue can be used on any uneven surfaces. Also, this company produces grout for tiles (colors can be very different).
About the consumption of crosses
It is not necessary to accurately calculate exactly how many crosses for the tile you need to purchase. Definitely there should be a lot of them, so at least two packages will be required for one room. Given their penny cost, you can buy with a margin. As for the use of crosses, they are installed vertically. Two crosses are mounted on each face of the tile. If it is an elongated tile, up to four crosses can be applied along a long edge. But in no case should you install them flat. It will be difficult to remove them, and the gap may be uneven. Therefore, you need to install crosses only as indicated in the photo below.
As for the consumption of dry mix, this parameter depends on the quality of the tile itself. If it is well absorbent, with an enameled surface, and the installation will be done on concrete or masonry, it is better to use Cerezit SM9 glue for internal work. The glue consumption will be from two to four kilograms per square meter. The exact figure will depend on the evenness of the surface and the teeth of the spatula used.
If it is a weakly absorbing tile (from 3 to 10 percent), which is intended for internal cladding, “Cerezit CM11” can be used (it is universal and suitable for internal and external works). At the same time, its consumption will be from 1.7 to 4.2 kilograms per square meter of area. In the case of using large tiles (size - 40 x 40 centimeters) made of natural or profile stone, use a mixture of CM16. It has a higher viscosity and better adhesion. Material consumption per square meter - from 1.7 to 5.6 kilograms.
To summarize
So, we examined how to lay the tiles on the floor in the room. As you can see, the process is quite complex and painstaking. Therefore, you need to be patient in advance and prepare all the necessary materials. To ensure that the rows do not shift, markup is mandatory. Also, do not mount the tile on the old one, if it has cracks and other deformations. For evenness of the gaps, it is recommended to use plastic crosses, installing them along the edges of the tiles on each side.