This material will describe the connection algorithm and software configuration of the TP-Link TL-WR741ND router. Following the instructions below, anyone, including the least trained user, will be able to properly prepare this network device for operation.
Network device niche
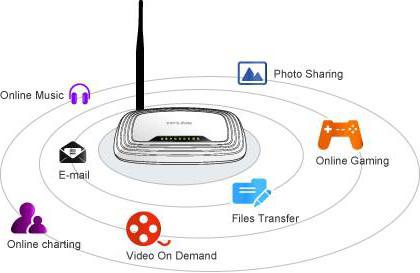
The router of this model is focused on the creation of small local networks. It allows you to create a small wired segment, which can include up to 4 devices. It also supports 802.11 wireless data transmission technologies of different versions (b, g and n). This allows you to connect almost any modern mobile device to the router. This router is most suitable for creating small home or office local area networks.
Specifications
As noted earlier, this router supports 802.11 wireless technology (b, g and the fastest n). In the latter case, the speed can reach 150 Mbps. Coverage in this case provides only one antenna with a signal gain of 5 dB. As a result, the maximum diameter of such a wireless coverage will be limited to 10 m. In turn, one input wire port with the designation WAN is limited to a speed of 100 Mbps. Somehow to exceed this value does not work. The other 4 wired ports marked LAN1 - LAN4 have a similar speed. Configuring the TP-Link TL-WR741ND router does not allow changing the input port. That is, for these purposes only one blue RJ-45 with the WAN marking is provided. Also in this model of the router there is no integrated USB port. Therefore, it is impossible to use this network device as a file server or print server. For the same reason, it is impossible to connect a modem to it and provide a backup way to receive information from the Global Web. But the earlier technical specifications of TL-WR741ND are enough to create an entry-level compact computing network, and it is perfect for this.
Contents of delivery
First of all, the router itself with one removable antenna is included in the delivery package. To this in this list are added a power adapter and a network computer wire with a length of about 1 m and crimped from both ends, which is used in the process of its software configuration. An impressive list of documentation is included with this network device. Separately, it is necessary to highlight several advertising booklets at once, in which, in addition to this router, other equipment produced under this brand is described. In detail, the user manual, which is also available in the boxed version of the delivery of this router, describes the configuration of the TP-Link TL-WR741ND router. The instruction has been translated into several languages, and in this list it will not be difficult to find the one in which it will be convenient for you to deal with the switching, configuration and operation of this network device. Also in the delivery list there is a warranty card and a disk with electronic versions of the attached documentation and application software.
Choose the installation location
With the right choice of installation location, the TP-Link TL-WR741ND router setup begins. Operation tips indicate that it should be as close as possible to the center of the building or building that needs to be covered by a wireless network. Another important point is the absence of various metal surfaces or objects near the installation site of the router, which will degrade the signal quality. Near the installation site of the router there should be a 220 V outlet to organize the power supply of this network device. The last important nuance in this situation is the ability to easily extend the wire from the provider to this very place.
Connection
Configuring the TP-Link TL-WR741ND router begins with its correct connection, which consists of the following actions:
The computer, router, and other network equipment must be turned off.
We wind the antenna onto the connector on the back of the router.
We install the power adapter in the nearest free outlet, and the reason for it is in the round socket on the back of the router.
The input wire from the Internet service provider is connected to the blue port marked WAN.
All network devices that must be connected using twisted pair are connected in series to the yellow LAN1-LAN4 ports.
Without fail, at the initial setup, at least one stationary PC or laptop must be connected to the TL-WR741ND. The location of all necessary ports on the back of this network device is shown in the figure below.
Customization
Programming TL-WR741ND consists of the following actions:
Check the correctness of the previously assembled circuit.
Turn on the Power button. We wait 60 seconds for the network device to boot.
We turn on the computer or laptop connected via wires to the network. We are waiting for the end of its download.
We launch on the computer any available browser. In the address dial line, enter 192. 168. 0. 1 and press Enter.
In the next window, type the name of the administrator of the router and its password. By default they are absolutely identical - admin. Then, after filling in both fields, click on the Ok button.
In the setup menu, select "Quick Setup". In the next window we confirm our actions and click "Next".
Then, in the list of proposed items, select "Auto Detect" and again click on the button that says "Next".
Then the router will automatically detect the type of connection and ask for additional information. This is a password with a username for accessing the Global Web, and a network address, and a subnet mask. All this information is provided by your Internet service provider. As a rule, it can be found in the contract for the provision of services. If it is not in this document, then we call the provider and find out it.
Then we set the parameters of the wireless connection. In this window, you only need to specify the network name, encryption method (it should be WPA / WPA2) and password. All other values are left unchanged.
In the next window, click on the "Finish" button to end the process of configuring the software component of the router.
Next, you need to restart the configured router. To do this, click on the appropriate button. After that, the router is ready to work.
This completes the software configuration of the TP-Link TL-WR741ND router. How to properly configure a wireless connection from any mobile gadget will be described later.
Testing
After all the previously performed manipulations, the TP - Link TL - WR741ND router configuration has already been completed. How to use Wi-Fi technology to connect from a smartphone or tablet in this case? We give an answer to such a question. And the procedure in this situation is as follows:
With the router turned on, go to the smartphone settings and start the search for wireless networks. After its completion, we find the name given earlier and select it.
In response, you will be prompted for a password. We recruit him. We are waiting for the inscription next to the network name “Connection Established”. Close all open windows at the connection setup stage.
We launch any email client on a mobile gadget and check the appearance of new letters on the email inbox. After that, the list of received letters will be updated and new ones that have been received since the previous connection to the electronic mailbox will be added to it.
But the wired connection does not need to be checked, and it was already done at the stage of setting up the router.
Reviews and cost of the router
Today, you can become the owner of such network equipment for 1500 rubles. Given its technical specifications and reliability, we can say that the TL-WR741ND is an excellent solution for creating a small local network. In turn, the reviews of the owners indicate that it is very, very easy to configure the TP-Link TL-WR741ND router with your own hands. The program setup wizard’s menu is simple, convenient and intuitive, and the Auto Detect procedure significantly simplifies this seemingly difficult operation.
Summary
As you can see, setting up the TP-Link TL-WR741ND router is not such a complicated operation, and even a novice user can afford it.