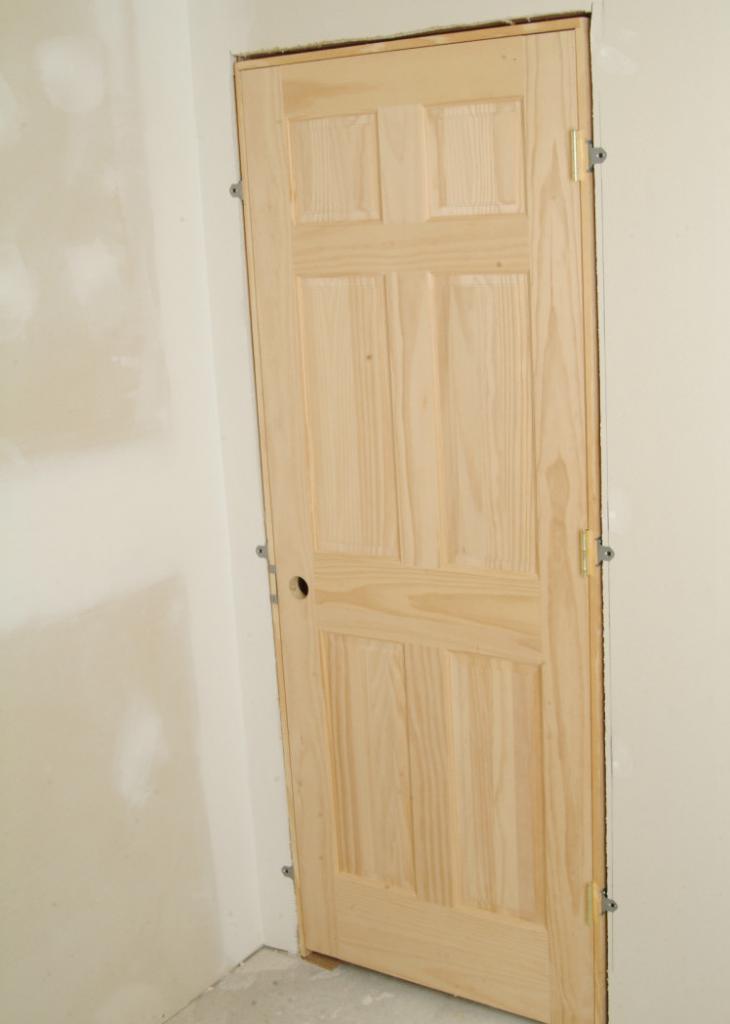
When performing repairs, many factors must be considered. After pouring the floors and decorating the walls, they always start installing the doors. Neither in the house nor in the apartment can do without them. Doors allow zoning the room. There are two types of them - entrance and interior. Installation of the latter is complicated by the fact that you need to install the platband correctly. There are several ways to do this. How to install a platband on an interior door? Photos and descriptions of this process are described later in our article.
What are the platbands for?
First of all, you need to find out for what purpose these elements are installed. And they are needed to perform an aesthetic function. The task of the platbands is to create a frame that closes all the cracks and construction defects that exist between the door frame and the wall. Also, with the help of platbands, you can give the room a unique design. For this, special capitals are used (we will talk about them a little later).
What to look for?
Before installing the platband on the interior door with your own hands, you need to pay attention to its structure when choosing. So, the color and shade of the bar should match what is available at the interior door itself. Materials may vary. This is wood, plastic, MDF. Outside, in addition, the casing can be varnished, laminated with a film or glued with veneer. When buying a product, it is important to check it for curvature and curvature. Platbands should not have defects, as this will entail large gaps.
Some platbands may have capitals. This allows you to make the appearance of doors more expensive and unique. Usually such platbands are made of wood or from MDF sheets. If you need to give the room a twist, it is quite possible to use such capitals.
Methods
There are several ways to install a platband on an interior door:
- With clipping under the degree.
- At a right angle.
Each method has its own characteristics. Next, we will consider how to install a platband on an interior door in different ways.
45 degree installation
This method involves trimming individual parts at a certain angle. This is the most popular way to install a platband on an interior door. This method is suitable for platbands with any configuration.
What tools come in handy?
In stores, there may be different facing elements. Their front part can be smooth, carved or represent a curved arc. The difficulty will be to trim these angles. For a high-quality result, a miter saw is useful. In the absence of this tool, it will be difficult to work, especially if it is veneered or laminated colored products. An accurate and clean cut will be difficult even with an electric jigsaw. Therefore, without special devices can not do. Among them it is worth noting:
- Miter box. This tool is cheap, simple, but not very accurate. It is a kind of template that is made in the form of a groove. There are slots on the top that define the cutting angle. When used, the cutting tool will clog the slots, and then the quality of work is reduced. Therefore, the miter box can be attributed to disposable tools.
- Rotary hacksaw. Experts advise to opt for this tool. It allows for clean and precise trimming. Working with a manual rotary hacksaw is quite simple. It is enough to turn the saw at a certain angle and manually make a cut, performing back and forth movements.

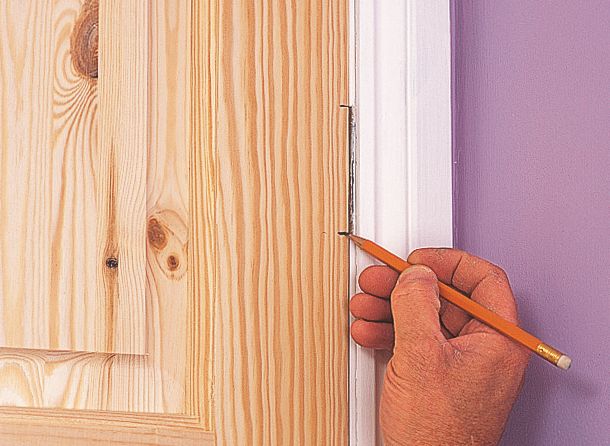
What is the essence of manual pruning? To do the work, you need to draw a line yourself, having maintained a strictly specified angle (45 degrees). Next, using a hacksaw for metal (in its absence, with an electric jigsaw), make an exact cut. But in order to get a quality result, you need to have some skill. To perform a cut without chips and other defects, tape must be applied to the decorative surface. It will serve as protection against chips.
Please note: as an auxiliary tool should be a ruler, square, plumb line, level and pencil.
Right angle trimming installation
In what cases is it recommended to use this method? It is relevant when installing rectangular moldings or with small rounding of the edges. What is the essence of this method? Here, the connection of the strips is performed at an angle of 90 degrees. And the upper clypeus is inserted between the side. This makes it easier to fit and trim joints. However, to get a quality result, you need accurate measurements and a clean cut. Ideally, you can only dock platbands that have an even rectangular shape. If the elements are rounded (even small ones), it is necessary to calculate the length of the top rail and the height of the side platbands with high accuracy.
Here the usual direct cut will not be enough. Due to rounding, when cutting directly, the ends of the upper clypeus will be visible. But what about in that case? To do this, perform an inclined cut. In this case, the slope should be from the front of the rail to the wrong side. The docking as a whole will remain at an angle of 90 degrees.
How to install a platband on an interior door? Please note that for elements with a carved or rounded configuration, this method will not work. In this situation, you need to install only at an angle of 45 degrees.
Installation technology
So, let's figure out how to install the platbands on the interior door ourselves. This operation is performed in a certain sequence:
- How to install extensions and platbands on interior doors? The first thing they take is the dimensions from the door frame. Measure the height of the rack of the groove from the floor and to the site of its intersection with the upper beam. This size must be recorded.
- Take one of the long slats and set aside the result from the most even section of the clypeus. In case there are none, you need to draw an even line closer to the edge with the help of a corner. If the installation will be carried out at an angle of 45 degrees, another 3 millimeters are added to the resulting size. This is because the door canopies move the platband away from the edge of the door frame. When installing at right angles, you also need to make a 3-mm margin, but in addition the width of the mounted platbands is added.
- Depending on the selected installation method, the upper edge is trimmed according to the markup.
- The first bar is installed. It must be mounted on the side where the awnings are located. The bar is fixed with small nails. The hat of the latter must then be bitten off with pliers. And so that nails do not stand out on the surface, it is advisable to buy copper. This metal darkens over time and the dots become unremarkable.
- The following side bar is trimmed in the same way. Then it is installed in place. However, during installation it is important to pay attention to the length of the clypeus. She may be different. This indicator will depend not only on the evenness of the floor, but also on the correct installation of the door unit. Therefore, measurements are taken separately for the second bar.
- Proceed to install the upper clypeus. The complexity of the work here is that you need to cut two ends. First cut one edge and make a preliminary fitting. If all is well, you need to measure the place of the second cut and make a cut.
That's it, the installation is complete.
How to get rid of gaps?
After installation, unsightly gaps may form in the docking areas. They can be eliminated in only one way. To do this, the gap is distributed on two sides of the door block, and then masked with wax paste, which is designed to combat chips on furniture. Such a paste has various colors and shades.
How to install telescopic platbands on interior doors?
The work is carried out in several steps:
- First, the trim is trimmed and trim rail. It is necessary to cut the platband one by one or two sizes - fit under the doorway and the box. The main thing is not to make a mistake in size. Even millimeters are important here. If they are not taken into account, gaps can form as a result, which will ruin the view.
- Additional strips are selected. At the same time, the clypeus itself does not need to be touched yet.
- Installs an extension. On the back of the door frame there is a selected quarter. It serves as a seat for an additional level. This is where it needs to be installed. The part is inserted and wedged in the area of the selected quarter with pieces of slats (or wedges). It is important that the wedges do not extend beyond the wall.
- After this, the area between the doorway and the extension must be filled with mounting foam. If it is not planned to burst additional strips with jumpers, you can choose a polyurethane sealant. It does not expand during drying, like polyurethane foam. But the sealant also comes in different grades. It is worth choosing one that has low pressure in the process of solidification. One of these is Macroflex-65.
- Proceed to install the clypeus. This work is not as complicated as previous operations. The main thing is to precisely cut the length so that there are no gaps in the connection areas of different slats. How to install platbands on interior doors? To do this, they must be inserted into the groove of the door frame. Sometimes it is required to install a platband on the interior door extensions. How to do it? The element is inserted quite tightly. Attach additionally not worth it. If the mount is still unreliable, you can use glue such as "liquid nails". You can nail them with small nails. But then the hats will stick out.
Here's how to install platbands on interior doors. In Mogilev, 11 rubles per linear meter are required for this work. But as you can see, the operation can be performed with your own hands. Separately installation of platbands is usually not ordered. This work is carried out together with the installation of the interior door itself.
Expert Advice
There are situations when platbands of the same size cannot be used, since cashing can not be set in width. Here you can cut platbands in width no more than ¾. This rule should be known to every master. The upper clypeus should be installed only after two vertical ones have been fixed.
Conclusion
So, we figured out how to install the platband on the interior door. As you can see, the work is not too difficult. But for the result to be of high quality, it is necessary to take measurements correctly.