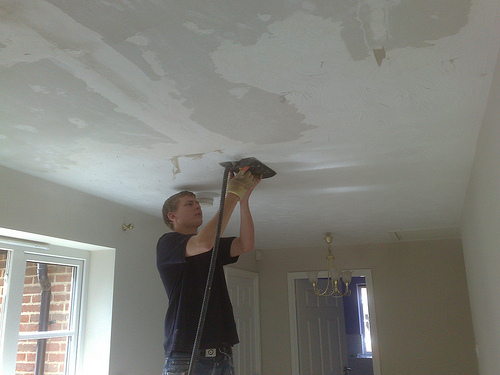
Decorating an apartment is always hard work. Puttying the ceiling is a rather complicated operation, including. But in order to make the surface smooth, you just can not do without such a finish. Often the owners use the services of a team of masters, the cost of which is sometimes high. If you know the algorithm of work and have the right tools at hand, difficulties will not arise. But the question of whether it is necessary to putty on the ceiling is always relevant.
Everyone approaches this issue in their own way. Some invite a team of professionals, others take up the matter themselves. To get a good result, you need to understand how to apply the start and finish layers. The reasons for such actions are enough.
What is this procedure for?
The need for ceiling decoration appears for various reasons:
- New house. People get finished apartments with rough finish, so a lot of work is required.
- Dismantling the coating. The need for such a situation is the wear of the old, deformation, etc.
- Removing bumps.
If the old coating acquires defects, the reasons for this process are as follows: differences in humidity and temperature, the movement of furniture, at which the ceiling was touched. If you need to paint the entire area, you will have to putty. Do not forget that if the roughness is large, more than ten centimeters, then it is difficult to remove this defect with putty. In this situation, other techniques are used.
Causes
Finishing in a new house is necessary for the following reasons:
- The house shrinks after a while. Due to the change in temperature indicators, the foundation sits. The seams between the panels are fixed more tightly. As a result, cracks appear. Here you can not do without putty.
- The finishing was done in draft form.
- The surface is rough.
When puttying is carried out for painting (finishing application), the surface becomes smooth. You can apply anything to it: not only paint, but also wallpaper, as well as mount a suspended ceiling.
How to putty the ceiling? The question interests many owners of residential premises. Starting putty is always carried out with a solution with large lumps. Therefore, the surface is not suitable for perfect decoration.
Drywall
Some mistakenly believe that if hemmed with drywall, then you do not need to carefully putty. When such a finish is applied, the sheets should fit tightly together, and the rough lining will not allow this to be done qualitatively.
Even after the seams are putty, a building mesh is laid out under them so that the composition does not spread. Before you putty the seams on the ceiling or apply paint to such a coating, you need to remove all lines and differences. Otherwise, they will be clearly visible.
What do you need to have on hand?
Putty for painting requires a flat surface so that nothing is visible. Before starting work, it is worth preparing the necessary components:
- Spatulas. A few pieces, because each procedure will require its own.
- Metal half meter.
- Paint roller or brush for applying primer.
- Bucket to create a composition.
- Electric drill, screwdriver or construction mixer. Any option will help to quickly mix formulations.
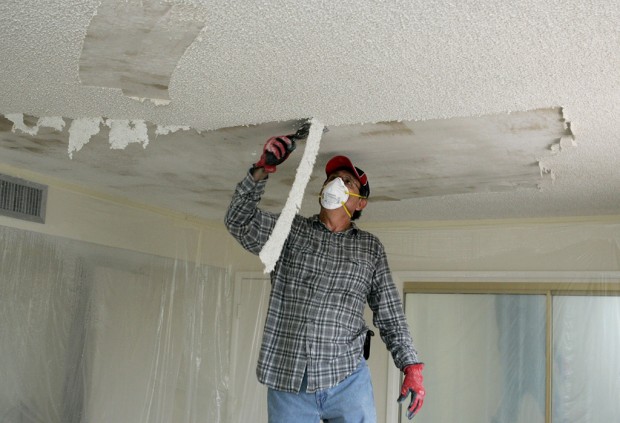
- Personal protective equipment.
Such tools are a minimum. But everyone in the process of finishing may need their own requests. It is important to select only those compounds that will be needed during the work. Purchasing any mixtures and liquids, it is worth reading the instructions. It is necessary to look where this or that composition is applied. Putty removes all irregularities, but it will not work to overcome large cracks and depressions.
Types of Mixtures
Going to purchase, everyone will find two options for putty mixtures:
- Finished. They can be in a container - soft and hard. Putty is not bred, it is ready for use after purchase. So, some tools are not required.
- Dry formulations. This is a powder that is in bags of various weights. To obtain the finished composition requires the use of water. The plus is that you can independently decide how much to dilute. The cost is lower, but in the process you will need to have additional tools for mixing the compositions.
How to putty the ceiling? In order to create a flat surface, a number of mixtures are used:
- The composition is coarse. This is the first layer. Without it, it’s difficult to properly level the ceiling. This is work with cracks, large chips and holes.
- Finishing putty on the ceiling. Easy to work with such formulations. They are soft and easily mask any surface. The product dries well and a uniformly smooth surface is obtained.
The whole process will take place in several stages. According to the masters, it is worth waiting until each layer dries well and only after that the next stage begins. Before you putty the ceiling, it is worthwhile to carry out preparatory work.
What needs to be done initially?
There is a statement that, if possible, it is better to immediately putty the entire area of the ceiling. So that the process is not delayed and there are no differences, preliminary preparation is performed:
- Depending on the condition of the ceiling, a method is selected. If the entire surface is flat, then the old whitewash, wallpaper is removed. It is necessary to moisten the entire area and after the water has been soaked deep, remove part with a spatula (preferably wide). So that the water does not dry quickly, you need to do work in small areas of the area, doing everything gradually. It will not be too dusty, but dirty, so do not forget about personal respiratory protection.
- Remove old putty. Pre-check how tight it fits. If everything is fine, then do not dismantle it. You will have to check the entire perimeter of the ceiling. Do not forget about it, otherwise everything will crumble.
- After applying the primer mixture in two layers, so that the adhesion is complete. The method of application varies: one across the other in the opposite position, crosswise. Application - accurate, without gaps and smudges. In order for the brush to distribute the composition correctly, there is no need to press it strongly. People who do not have building skills should use a small pile roller. If there are differences in the ceiling area, then they are removed before starting work. The construction level is applied for complete control.
The soil mixture should have an adhesive base. This condition allows you to make the surface smooth and remove small cracks. This is especially true if puttying is done under the wallpaper. Masters say that sometimes it is required to walk across the area more than once in order to create a high-quality coating before finishing application.
note
Choosing a primer for any surface of the ceiling, you need to carefully read the composition, and also take into account the application method. Masters believe that without experience it is not so difficult to do everything smoothly and efficiently. After all the preparatory work is completed, the putty itself begins. We will describe further the technology of its application.
How is putty applied?
After all the work at the initial stage is completed, you can proceed to the main actions. How to putty the ceiling? It matters the material, which will then be applied as a finishing decoration. For example, putty for wallpaper has its own characteristics. After all, all the irregularities and differences are clearly visible under them. So, the surface should be perfect.
How to putty the putty on the ceiling? This question will have to be answered at the planning level of repair work, since the set of tools and the time spent on the procedure will depend on this. As already noted, it is better to putty the entire surface in one day. When there are assistants, you can buy a dry mixture and dilute it according to the instructions, in the absence of time, the finished composition will do. The decision is up to the employee.
Main steps
How to putty the ceiling with your own hands? There are several main steps, so the procedure will be performed sequentially. The operation is performed in several steps:
- So, when choosing the finished mixture, you can get to work. If the composition is dry, putty is made of it using water, a container and a construction mixer (screwdriver or drill).
- Then you can apply the product on the ceiling. It does not matter what is involved in the process - dry putty or finished. A small amount of the composition is applied to a large spatula, evenly distributed over it.
- Gently, with smooth movements, we begin to rub the composition over the area of the ceiling. This is done in small sections. If something remains, then it is put back into the container. And so on around the perimeter of the work surface.
- As soon as the ceiling dries, you need to remove all the bumps with sandpaper or with the same spatula. These steps are to ensure that the rest of the layers lay flat. Dust will appear in the process, so it is best to have personal protective equipment.
- How many layers should be? The answer to this question is individual, depending on the presence of defects and gaps. How to putty seams on the ceiling? Each time a layer of putty is applied, the ceiling should become smoother. This is evaluated using a building level. A simple rule - each subsequent layer is applied only after all previous ones have dried. A thickness of not more than ten centimeters may be applied putty.
- The last application should be as thin as possible. In this case, only a wide spatula is used, with one movement of the hand. And the second tool will help to remove all unnecessary. When the putty is applied neatly and correctly, then even under wallpaper this option is quite suitable.
- After applying putty, with a lamp it is worth looking through the entire surface for defects. This is true if after the ceiling is painted.
Finally
Performing all the steps correctly, you can make repairs yourself and at the same time save a serious amount of money. The use of putty for ceiling decoration is a standard version of construction work. Even a novice can handle this.