For the holidays, I want to arrange a room in a thematic style. And some people like to decorate the room according to their mood or the time of year. Such experiments are often carried out by mothers with children, occupying the kids with a useful game and at the same time developing their motor skills. In this article, you will find the most diverse ways of decorating glass, which you can use to create a new style in your room.
Colored paper
One of the elementary ways to transform glass is to seal it with colored paper. You can create a beautiful picture both on the window and on the transparent insert of the interior door. Decorating glass with paper does not take you much time. Where to start? Draw a sketch on an A4 sheet, and then copy the picture onto a tracing paper adapted to the size of the glass. Cut out the stencils of the parts of the picture and transfer them to the colored paper. When all the blanks are done, you can proceed to the decor. To facilitate the work you need to stick a paper sketch on the back of the glass. According to the figure, attach the paper to the PVA glue. You can use glue stick, but the likelihood that the application will fall off after drying is almost 100%. Therefore, it is better to use a more reliable adhesive. When the paper application is ready, you can complement the resulting collage with a stroke. Use a thick black marker to make the separation between the details of the picture. A stroke will help make the application tidier.
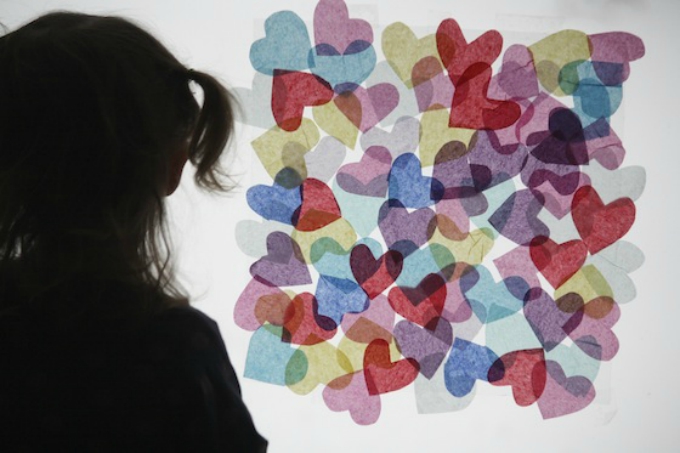
Film
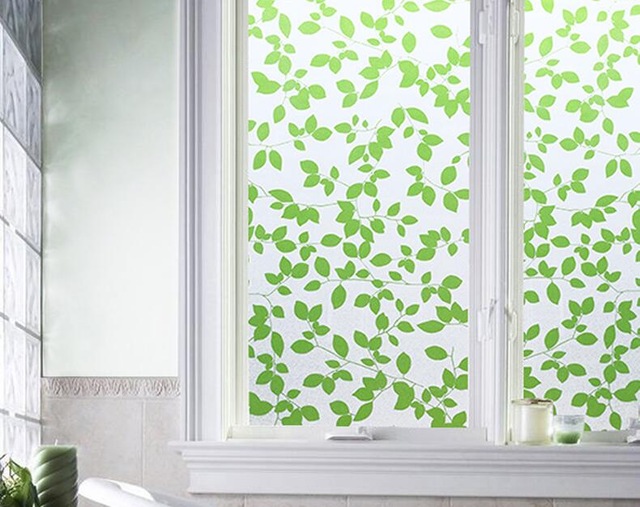
Glass decoration is an interesting process. The lesson can be fun if you use color films rather than color paper to decorate smooth surfaces. The result of your activity will turn out brighter, and the transparency of the glass will be higher than if you decorated the surface with plain paper. What is the process of decorating glass with a film? You need to draw a sketch of the future application on paper. Break the picture into blanks and transfer each part to films. Cut out the details and place them on the glass according to the previously planned plan. Working with transparencies is easier than working with paper. The process of creating an image will be similar to gluing color stickers. Separate the colored portion of the film from the backing and stick it in the space provided. The finished drawing does not need to be supplemented with anything. If you do not plan to peel off the self-adhesive film from the glass in the future, then you should heat the resulting image with a hairdryer so that the adhesion of the glue and the surface becomes more reliable.
Toothpaste
New Year is coming and you want to decorate the windows? One of the easiest ways to do this is to spray a toothpaste solution onto the windows. How to make a beautiful image on the window? To do this, you need to draw or print a stencil of festive themes. You can draw a snowman, Santa Claus or a winter landscape. Then you need to cut out some parts of the picture. The image should be as simple and minimally detailed as possible. When the stencil is ready, use tape to attach it to the window. In a small bowl, dilute white toothpaste with a minimum amount of water. Now you can do glass decoration. On the old toothbrush, collect a little solution that has been prepared, and fill the voids in the stencil with spraying movements. The thicker your toothpaste solution is, the brighter the picture will turn out. When all the gaps are filled, give the drawing time to dry. After that, you can remove the stencil. A beautiful picture will be ready.
Gouache
Does your creativity tell you that you can draw complex images without a stencil? How to do the process of decorating glass with your own hands using gouache? You will need a pencil for glass. Using a wax pencil, draw a sketch on the window. Subject can be any. You can depict everything - from landscape to portrait, from multi-figured composition to something abstract. The image is ready, now you need to colorize it. Get gouache and brushes of different sizes. You do not need water to paint glass. The paint will lay down in a thick layer, and in the drawing on the glass it is very important that there are no gaps. Fill the outline of the image. Try to fit in one layer. It is undesirable to apply a second coat of paint to glass. The lower color layer is deformed and drains. Therefore, immediately mix the desired shade and draw with confident strokes. Gouache should be written as if you were writing in oil. Confident wide strokes will give the picture a unique flavor.
Stained glass paint
A good artist will not paint glass with gouache or toothpaste. He will pick up stained glass paint. In this technique, you can arrange not only glass in windows and doors, but also household items. For example, glass vases for decoration or simple glass plates are great. Billets can be purchased in specialized art stores or find dishes in a hardware store.
How to work with stained glass paint? The process of painting is similar to decorating glasses with gouache. You need to use a wax pencil to draw a sketch, and then fill it with specialized stained glass paint. After the color pigments have dried, the artist must use the contour to separate the details of the picture. This can be done before applying the color, but the thing will look neater if you apply the contour after the paint. The final stage is the coating of the product with varnish.
Acrylic paint
Types of glass decoration are different. The main ones are drawing, bas-relief and applique. Another way to decorate glass with paint is to use acrylic. Universal paint can be applied on various surfaces. It is great for ceramics, wood, plastic, and glass. Acrylic goes well with acrylic paste. Using these two components, you can make not only a flat, but also a three-dimensional image. What will the work process look like? You need to draw a sketch on paper and then attach it to the back of the glass. After that, take an acrylic paste and use a thick brush to lay out the volumetric parts of the picture. Give the paste time to dry. When the substance is seized, you can start painting. Apply light shades first, and then apply darker colors. Do not mix paint layers. First let the bottom coat dry before applying the top. The finished image should be varnished.
Sea salt
Window panes can be decorated not only with paint. Sea salt can become an unusual decorative coating on your window. How to apply it in jewelry? Draw a sketch on paper. Glue the image on the back of the glass. Take PVA glue and draw an outline for it. When the glue is slightly set, it should be sprinkled with sea salt. If you want to get a color picture, you will need to pre-color the salt with gouache. If you do not have salt in your household, you can use fine sand instead. But still, from a technical point of view, salt decor is safer for the window. When you wash off the image, the salt will dissolve, and small particles of sand will scratch the mirror surface of the glass.
Plasticine
Want to keep your child busy, but don’t know how to do it? Let your child decorate with plasticine glass. This technique of decorating glass is not very popular. Many parents are afraid that the child will be cut by the sharp edge of the foundation for creativity. To prevent the child from getting injured, immediately carry out safety measures with the baby, as well as carefully monitor the work process of your child. How to decorate plasticine glass? You can pre-draw an image, or you can not do this. In the first case, you will need to put a sketch under the glass, and in the second you should start fantasizing. The process will look like this: you need to tear off a small piece of plasticine, roll a ball out of it, and then smear it on the glass. But you do not need to rub plasticine too much to make a smear.
Liquid glass
Wondering how to decorate a glass plate? Then pay attention to the liquid glass technique. For work you will need a beautiful decorative material. It can be shells, beads, beautiful pebbles, small toys or any other decorative elements. From the collected material at the bottom of the plate you need to lay out the composition. If you want your product to have a background, then the bottom of the container must be pre-coated with acrylic. When the composition is ready, it should be carefully filled with a layer of liquid glass. It remains to wait for the moment when the glass hardens and the product is ready.