Cottage, garden, open garden and a small garden on its windowsill - any work with the soil takes time, and each plant, unless, of course, is a weed, needs careful care. A special role for the existence of all living things is played by water. And cultural plantations also urgently need timely watering.
Save time
Many plantings should be watered often, but little by little. And if there is no time for this, or if you need to go away for a while, you can arrange for your green pets to drip irrigation from plastic bottles. Do-it-yourself system is very simple. There is no need for special education or special knowledge. Such a system can be used both in open ground and for indoor, flowerpot plantings. Filling containers periodically with water, you will provide the necessary flow of moisture to the roots and do not allow salting or, conversely, acidification of the soil.
Watering system technology
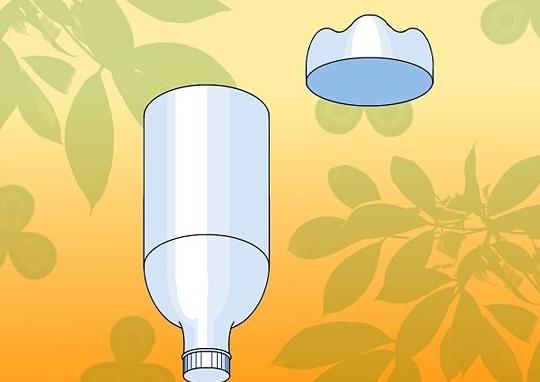
In order to organize drip irrigation from plastic bottles with your own hands, you need, first of all, these same bottles. If we are talking about flowerpots on the windowsill, you can limit yourself to one and a half - and two-liter containers. If about gardening or gardening - it is better to take more, 3 and 3.5-liter. Five-liter plastic cans are also suitable, only they will need special fastening. Now the holes. If you plan to dig into the ground with the bottom, they should be done throughout the body of the bottle - somewhere from the middle and down. For example, you want to make drip irrigation from plastic bottles with your own hands for several nearby rose bushes growing nearby. In this case, place the container between them, and make holes in the walls not on one side, but on several. Then the water from the bottles will not come to one flower, but immediately to two or three. Convenient, right? The same applies to the planting of tomatoes, cucumbers, other "residents" of gardens and vegetable gardens, growing not in a single copy, but in rows and beds, flower beds. Make punctures with an awl or a well-heated nail. Just do not need a lot of holes or too wide - the water will start to leave too quickly, which is not profitable for you. But even very small holes will not go: the earth will clog them, and the access of water to the roots will be very limited. So, with this option, the neck of the bottles is cut off so that it is convenient to pour liquid into them.
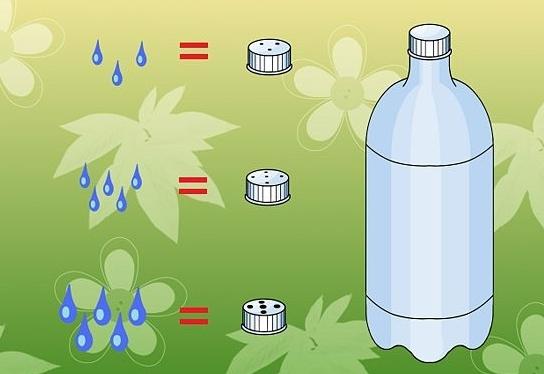
How else to make drip irrigation from plastic bottles with your own hands? Close the covers tightly and drill holes in them with the same nails or a drill. Make 3 to 4 holes. However, if you need a little water to leave, then enough is enough. 2. Such bottoms are cut off from such bottles.
Installation and fixing
When the bottles are ready, you can proceed with the direct installation of the system. Here, too, there are subtleties. If the plants are planted densely or their roots in the soil are not deep, and its upper layers should be soaked, the land irrigation system is more suitable for you. With your own hands, in this case, make canopies from a suitable material (as for a
camping pot) and with a wire fasten the bottles on them closer to the ground. Pour them with water, in which, by the way, you can mix liquid fertilizers. It will turn out both hydration and nutrition. Do the same with flowerpots on the windows, such an irrigation system will suit them. In a different way, drip irrigation from plastic bottles can be organized, as already mentioned, by about a third digging them into the ground. Just be sure to cover your makeshift wells with stones, well strengthen the earth around them so that the bottles do not fall and break your seedlings. To replenish water in improvised tanks should be every 2-3 days - depending on the intensity of its flow.
Here is such a creative approach to the irrigation system we offer you!