When it comes to repairing a room, always at first there is a fear of not knowing where to start. The process is not fast, and priorities should be set. If you follow all the technologies, you will get a great result, which will then delight you for many years. Even the initial stages are very important for the final result. Puttying the walls is a very laborious process. But to do this job with your own hands is quite realistic. How exactly - we will tell in our article.
Wall preparation
Start by preparing the walls. Please note that first you need to do all the plumbing and electrical work in the room, and then proceed to the walls. It happens that at first they prepare the walls for wallpapering, and after that they install, for example, sockets. To make a hole, you need to make a stub, then re-coat it. This is a very unpleasant moment in the repair.

Preparation begins with the walls being cleaned of old finishes. Everything is removed without a trace. All corners, as well as places under the ceiling and below where the baseboard will be, should be exactly plastered, as these are the first places that will indicate all the flaws. Walls should be fully stretched with plaster. Be sure to apply a primer in one coat. It must be deep penetration. This is necessary to get rid of dust and provide better adhesion to the putty. If this is not done, then the putty may crack or completely move off the walls. This process is important for all types of work and for wallpaper, and for painting. A well-prepared foundation is the key to quality repairs.
We understand putty
As for this material, its assortment is diverse, and for each stage of work, it is worth choosing the composition according to certain parameters. It is important to determine in advance what you need to purchase. You should choose gypsum-based materials and a white mixture. Usually manufacturers write, and the composition of the mixture, and color. For example, they write on the package “super white”. This is a gypsum based composition. Of course, it is worth giving preference to those species that have long been on the construction market. Do not think that she will still not be visible under the wallpaper. You can’t save on this. The quality of the material is important even at this initial stage. There are types of putty that can harm when pasting the walls. When wallpapering, it may not always go as it should. Sometimes it is worthwhile to correct a sheet in the process. At this moment, putty can reach for wallpaper.
Each stage of work has its own materials. This should be considered. There is a basic and finishing putty. Any species has its own limitations on the thickness of the layer. Do not confuse with plaster, which can be applied up to three centimeters. As for the base, it is applied with a layer of up to eight millimeters. The finish is usually up to five millimeters. All surfaces that require above eight millimeters need to apply plaster. Typically, the thickness of the putty on the walls increases in two stages. Two layers are applied (each three to five millimeters). As for the first, use the base. The second - finishing putty. In construction stores, you can also find a ready-made mixture for use. Usually it is more expensive. The cost varies from 260 to 350 rubles per five kilograms. It is great for the last layer. Often masters use it in preparation for painting.
Tool for work
Here's what we need:
- Roller.
- Brush.
- Bowl for roller.
- A spatula with a length of 7 centimeters.
- A spatula from 30-50 centimeters (in the absence of experience, do not take it very large).
- A bucket for kneading.
Kneading mixture
For convenience, you should first pour water, then gradually putty putty. Long and thorough stirring will greatly facilitate the work. The mixture itself should be a homogeneous consistency, not very thick in appearance. If it is too liquid (roughly like sour cream), the putty will slide off the spatula. If you knead it strongly, it will become impossible to apply it to the wall. It is best to knead in small portions. A drill with a special mixing nozzle will ease the effort. It is convenient to use a plastic bucket.
Theory of Wall Treatment
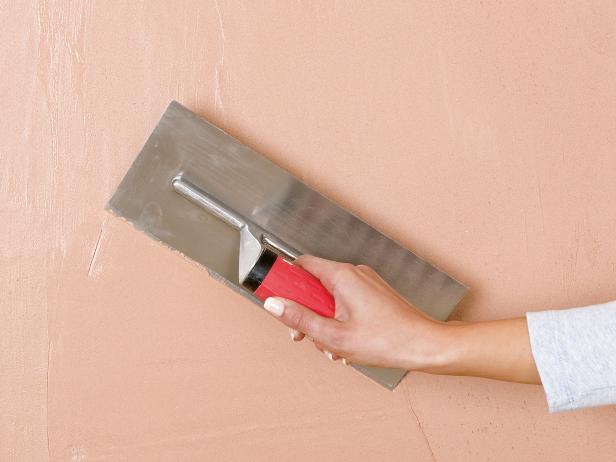
So, we are armed with tools. In the right hand we take a large spatula, in the left - a small one. With the smaller one, we take the mixture and try to evenly place it on the spatula in the right hand (we stretch from one tip of the tool to the other).
Now we apply a large spatula to the wall at an angle of 45 degrees and pull from the bottom to the top. If horizontal, from right to left. Making two or three swings, remove the excess from the working spatula. And we spend on the wall without putty. We make the same movements on the applied surface. So we remove all kinds of strips or irregularities. Similarly, we process all the walls.
About the ceiling
As for the puttying of ceilings, there are also nuances here. Consistency needs to be selected different. Do not put a lot on a spatula.
It will be difficult to apply the mixture. The support on which we stand must be reliable and comfortable. Remember that more effort will be applied than when filling the walls. The technology itself is the same as with a vertical surface, but already above your head. Usually it’s harder, so it takes longer.
Puttying the walls under the wallpaper
Can this be done on my own? Puttying the walls with your own hands under the wallpaper is not a complicated process. It is easy to master, and already on the fourth wall you can achieve good results. As a rule, these are only two layers. First, apply the base. After the finishing puttying of the walls is carried out. Since wallpapers are of different types, it happens that they are translucent. To avoid such a nuisance, two layers must be applied for this. The latter is skinned, that is, all the shortcomings of the putty are removed (strips from the spatula, growths, etc.). It is convenient to do this with the help of a special bar, which can be purchased at a hardware store. Attention should be paid to corners and areas near plumbing pipes (it is in these places that a lot of excess material accumulates).
After sanding the walls, primer the surface. This will avoid excessive consumption of glue and conveniently wallpaper the wall. If you follow the technology of puttying the walls, then the next time during the repair you will not need to repeat the process again. It will be enough to remove the wallpaper and stick new ones. Moreover, they will be removed in one large canvas.
Puttying the walls for painting
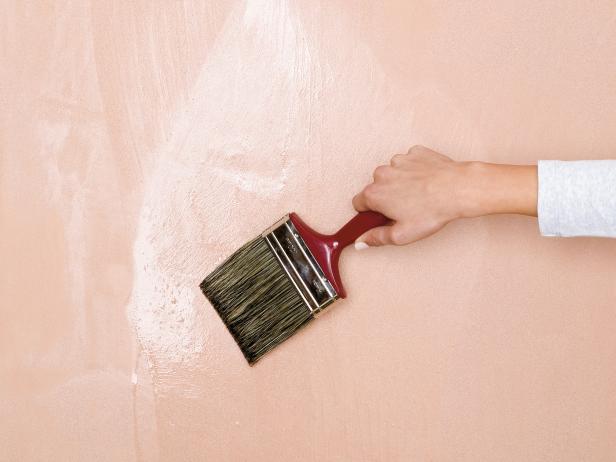
How to do this job? As for the filling of walls and ceilings for painting, here the process is more painstaking. As a rule, the material is applied in three layers. A putty already diluted from the manufacturer is perfectly suitable for painting. It fills small scratches well. The consistency is prepared so that it is easy and pleasant to work. Here, the preparation of the walls should be approached very carefully. The walls and corners should be flat, under the level. Otherwise, the paint will show all the flaws. More time needs to be devoted to sanding the walls. The skin should be fine grain, from 120 to 150. Light will help to see all the flaws. You can take a table lamp for the computer, put it close to the wall and direct it so that the light falls on the side. All flaws and imperfections will be visible. They should be repaired with a putty smear or rubbed with sandpaper.

Instead of a primer, you can use the paint itself. It is necessary to dilute the material in a proportion of one to one so that the color pigment is still present. Next, go through the first layer. Now again you need to inspect the wall visually and fix all the flaws. If you need to fix something, already in the finished putty we add a little paint itself. And we’ll fix the flaws with this mixture.
After we are convinced of the ideality of the walls, we paint until we get the color that we planned. Please note: when dry, the enamel brightens a little. At the next repair, updating the interior, you will only need to paint in a different color.
Drywall
How is plasterboard wall puttying done? Even if the surface is smooth and dust free, it is still primed. This is a required process. It is necessary to close up all the joints and places of self-tapping screws in drywall. First, glue with a serpentine. It already contains glue, so it is easy to stick around the joint. After all the seams are processed with a putty knife. The tool should be kept level to get a layer equal to the drywall sheet. In no case should there be excesses that go beyond the sheet. After drying, putty the wall completely. Drywall itself is a flat sheet. Therefore, it is enough to apply the putty once. In some countries, only grouting is practiced. Then go to the final finish. But sometimes after the finishing operation (whether it is wallpaper or painting, it does not matter) dark spots appear. To avoid such incidents, it is better to apply two layers of putty. On the walls of drywall, you can use the finishing putty in two layers. There is no need for a base layer. For such walls, only a deep penetration primer should be used.
Drywall absorbs all moisture applied to it very quickly. If this is not taken into account, then glue can dry quickly when wallpapering. Will have to apply it again and again. When painting, there is a possibility of a large consumption of the paint itself. The primer is an important step that you should not forget about.
Puttying slopes
Door or window slopes with proper design give the room a finished look. It is worth leveling them out. The window frame or door frame must be glued with masking tape.
Slopes can be shaped with putty. It is worth applying from the inner corner to the outer. The rest of the process depends on what material will be used for the final finish.
Conclusion
Repair is a difficult, but interesting business. Do not ignore the puttying of the surface, as this is the basis of the aesthetic appearance of the room. You can do it yourself with cosmetic updates. It only takes a little effort.