Despite the fact that the IDE as a parallel interface for connecting hard drives and optical drives has long been replaced by a more modern serial SATA, it still remains in demand among users and manufacturers of accessories. Storage devices of this standard are installed in millions of computers around the world, and in many countries are still on sale. And therefore, there are often situations in which there is a need to connect such a disk via an IDE cable to a computer.
Types of loops
By the number of connected devices, the cables are divided into single-component and two-component, and according to the UDMA standard into 40-core and 80-core. All the connectors on the devices and the board are universal for both those and others, the differences in pinout are reduced to the data exchange rate of the HDD or optical drive with the motherboard.
Connect to old-style motherboards
Such motherboards are most often equipped with two IDE connectors. Usually, a hard drive is connected to one, and the other is given to the drive, but when using a two-component IDE cable, the number can be increased by connecting two devices to one connector on the board, although sacrificing speed characteristics. There are also boards with only one IDE slot, which simply leaves users no other choice. This is what owners of computers with budget motherboards had to do, which is exactly what many have to do now.
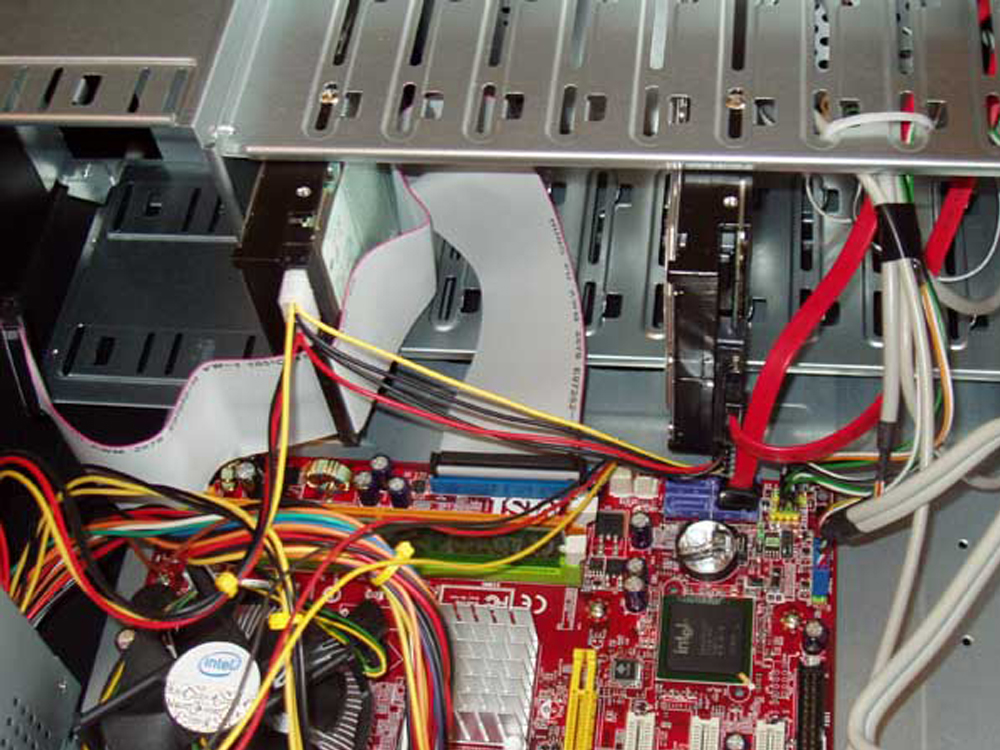
Connecting an IDE cable to an old-style board and to a hard drive or drive is carried out in several stages:
- Disconnect the system unit.
- Determine the role of the hard drive in the system. Depending on the type of hard drive in the computer, whether it is planned to make it systemic, etc., its settings are set using jumpers-jumpers that close contacts on a special platform. A designation of how and what to lock is available on each hard drive, so it will be rather difficult to make a mistake.
- Insert the IDE cable plug into the corresponding slot on the hard disk. In this case, a special limiter, as well as a guide located in the center, will not give the wrong cable.
- Similarly to the previous paragraph, install the loopback connector in the connector on the motherboard. To connect an IDE cable, as a rule, you need to make a little effort, but do not put excessive pressure: microcracks on the motherboard will not lead to anything good.
- Connect the four-wire power connector from the PSU to the power connector of the hard drive. There is no need to worry about polarity reversal here either: the connector, like the connector on the HDD, are rounded off on one side, which eliminates the possibility of error. Such an “extra” supply line must be at least one in the system unit, however, in the absence of free connectors, you must use a splitter, since there are enough such accessories in every computer store.
- Install the hard drive in a special compartment of the system unit, if you plan to use it continuously. If the connection is temporary, ensure that there is no vibration or shock.
- Start the computer, if necessary, configure the required parameters in the BIOS.
Features of using 80-core loops
When using a two-component 80-pin IDE cable (or it is more advisable to choose it) it is not out of place, although not necessary, to observe the following recommendations:
- If one device is connected, leave the middle connector free.
- Avoid, as far as possible, the "proximity" of the hard drive and the optical drive on the same cable.
- Connect the blue connector to the motherboard.
If you ignore these recommendations, nothing bad will happen: the computer will work without problems. However, their observance can give a tangible increase in the speed of data exchange, as well as facilitate the further identification of devices in BIOS.
Connecting to a new type of motherboard
Such motherboards are distinguished by the presence of a SATA controller that allows you to connect hard drives of this standard. SATA is a completely logical technological evolution of the IDE standard, which offers PC owners an increased speed of data exchange with a disk with more compact cable sizes (7 versus 40 pin IDE cable), no need for mechanical adjustment by contact closure, and a lower price for drives.
Manufacturers made the transition to a new technology gradually: the new-type motherboards were initially equipped with a PATA slot so as not to deprive users of the possibility of seamlessly connecting old HDDs, and by the time production of these boards ceased, the compatibility problem was already being solved with the help of accessories.
It is these devices that will help to connect the IDE interface disk to the motherboard, which does not have such ports. There are two varieties of them: adapters and controllers.
Using an adapter
It is a small board with an IDE connector at the end and a maximum of two SATA ports on the back. It is connected directly to the IDE-drive, so it does not take up much space inside the system unit. You do not need IDE cables either: the SATA cable connects directly to the adapter. Among the disadvantages are the low data transfer rate, the need to switch jumpers both on the disk and on the adapter, which quite often complicates the setup, as well as the need for external power (two or three pin 12V connector, connected by a cooler cable to the corresponding socket on the system board) .
Using a PCI Controller
It performs the same functions, but does not require external power, getting everything you need through a PCI connection. The IDE cable connects to the old hard drive, the SATA cable connects to the system board. A massive video card can become a problem, pretty much eating up the free space of the system unit: there may simply be no space left for the controller.
Both the one and the other adapter are bi-directional, allowing you to connect both old-style hard drives to modern motherboards, and vice versa.
It should be borne in mind that connecting boot disks on an ongoing basis will significantly reduce the speed of the system. Therefore, adapters should be used either for auxiliary disks (as a data store, for example), or as a temporary measure.
Using special boxes
Such a box, in fact, is the same adapter, designed as a container or dock with built-in power and data connectors SATA or IDE. To connect to a PC, either one of these standards or universal USB 2.0 or 3.0 can be used.