No matter how “cool” the car may be, when the Russian winter comes, I don’t want to get into the car. The cabin seems to be warm, but the seats chill not only the soul, but also a certain part of the body. There are two ways out: either sit and warm the chair with your own warmth, or set the seat heating.
Some modern models already have a heating system as standard. The rest will either have to mount the heated seats with their own hands, or contact a car service. As for the car service, questions, as a rule, do not arise. There, experts themselves know what and
how to install, and what to connect to. Another thing is self-installation.
DIY seat heater installation
First of all, you need to choose the right set of heating elements. Some motorists advise buying a set of "Emelya UK-2", which is designed for two seats. This kit has four heating elements in the kit. Therefore, for more than three thousand rubles, you can equip two seats.
Work begins with the dismantling of the seat. No, the chair itself is not required to be removed from the passenger compartment. It is enough to remove the upholstery. Installation of seat heating is done under the upholstery of the seat and back of the chair.
In order not to damage the material, the upholstery should be slightly pulled down and then to the side. Then you should unfasten the mounting clips. After this, the material must be carefully removed from the hooks. The upholstery is pulled out from under the chair, then the lower clip is detached. Now the turn of the ring. The work ahead is painstaking. The fact is that these fasteners are kept in good conscience: to unhook them, you will have to use a screwdriver and pliers.
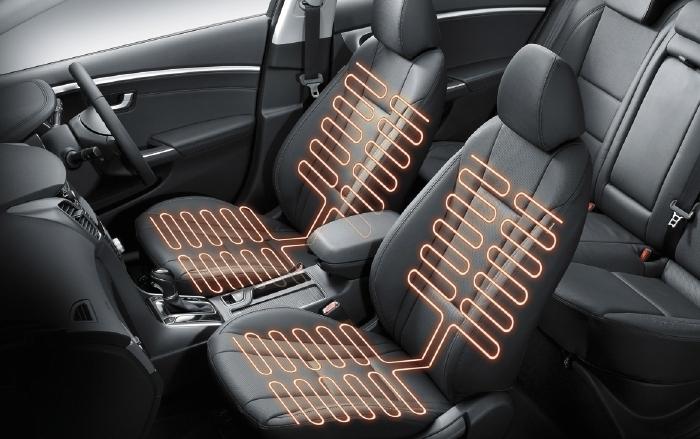
As soon as all rings are uncoupled, the casing will detach. Now the installation of heated seats begins directly. To do this, remove the kit from the package. On one side of the heating elements are self-adhesive strips. Without removing the film from them, you need to attach the elements to the seat and back. It is good to straighten and track the canvas so that it does not protrude beyond the edges of the seat. Then you can remove the protective film on the adhesive strips. With their help, the heating elements stick to the plane. For reliability, small clamps can be used to secure the bands. But it is optional.
After fixing all the heating elements, you can proceed to the electrical installation and connect the heating to the car's electrical system. The first step is to determine the place for the heating controller. It can be installed next to a 12 volt outlet. The installation of the kit is greatly facilitated by the two templates available in the kit. To connect to the network, you need to remove the center console, then connect the bracket, template and outlet into a single whole. Two neat holes are cut out according to the pattern.
Installation of seat heating involves connecting to the ignition. In this case, you can use any free terminal. And do not forget about the "mass". After connecting, a relay is installed. It can be placed next to the radio. The entire electrical installation is “hidden” under the center console, and it is fixed in place. The installation process is completed by returning to the seat upholstery.