One of the most stylish and ergonomic solutions for unusual bedrooms in private houses and apartments is the purchase of furniture such as a wardrobe bed. In its appearance, it is no different from a regular bed, but its main feature is hidden inside. The design of the wardrobe-bed has a mechanism that fastens it to the wall. Thus, with a lack of free space, you can easily fold a berth, securing it in a vertical position, and thereby significantly expand the free area. In the evening, the structure can easily be moved to a horizontal position, and thanks to a special reclining mechanism, absolutely any housewife can cope with it.
The bed, built into the closet, has exactly the same appearance as in the photo.
As you can see, the design is quite unusual.
How to make a do-it-yourself wardrobe-bed? About design
First, let's look at the configuration of this type of furniture. And it consists of only a few parts:
- The bases (berth).
- Steel frame (frame), which is fixed to the wall.
In this case, the base is attached to the bottom of the frame. This configuration in the furniture industry is also called a "coupe". It can be attached to the frame of one of the short sides. In this case, the furniture when folded will look like a cabinet. If the base of the structure is connected by a long end, then the product in this state can be used as a pedestal. However, no matter what type of wardrobe-bed it was, the main thing is that it should be firmly fixed on the wall and not “move” to a horizontal position.
About drawing
As we see, the wardrobe-bed (a photo of the scheme of this furniture can be seen just below) has a very primitive design. However, if you decide to make this product with your own hands, do not abandon the drawing. Draw a layout of all the workers and mechanisms, calculate the distances, all dimensions and make a calculation. So you will not only reduce the risks of creating a design curve (as happens in the case of creating the product according to the drawing “from the head”), but also significantly reduce the cost of materials, because you will already know the exact number of metal corners and wood boards. When buying the latter, special attention should be paid to their quality, since it is from them that the correct location of the mattress and your comfort during sleep in general will depend.
On the boards, he should lie tight. But at the same time, the mattress should be placed so that, if necessary, it can be easily removed.
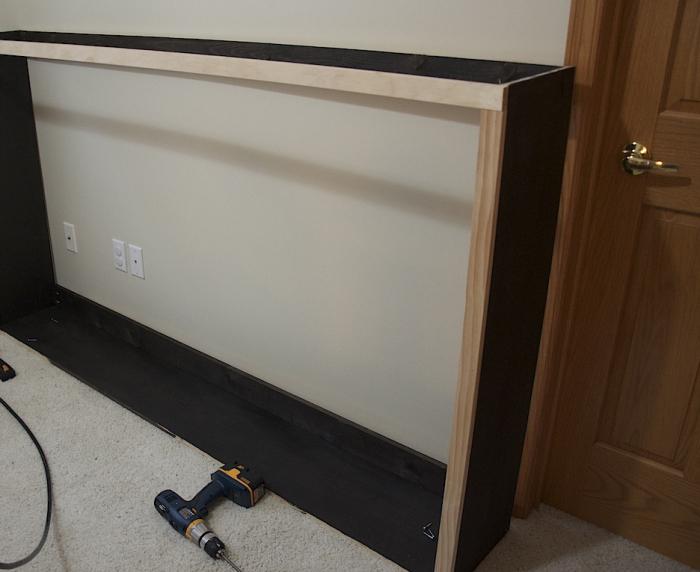
Do-it-yourself wardrobe-bed - the process of assembling the frame design
The frame is the base of the entire bed, which must withstand enormous loads and not bend under mechanical damage. In our case, it will consist of 3 sides of the same height and sides that hold the boards and mattress. One of the sides will be equipped with a lifting mechanism, respectively, it should be as strong and reliable as possible. Its height may be equal to all other sides, and may be slightly lower - there is no difference in this. How to choose a lifting gear? The wardrobe-bed, made by yourself, can be equipped with both a gas elevator and furniture hinges. The latter option can be considered if the budget for the manufacture of this design is very limited.
But before you make a wardrobe bed with your own hands, remember that all the details that will form the frame must be connected into a holistic design with wood pins. Previously, they should be coated with special glue. Also, before installing, you need to drill holes for them. The pins should not have a round, but a rectangular shape, that is, each angle in them has a slope of 90 degrees. Of course, it is impossible to guarantee a reliable connection of all parts with one glue, so when it dries, screw a few more screws into the structure. So you can finally fix all sides of the bed.
Limiters
After screwing in the screws, it is necessary to install special limiters for the mattress on the wardrobe bed with their own hands. Also, one should not forget about additional stiffeners, which will give the device greater strength. Around the perimeter should fix the ray with a cross section of 100x50 millimeters. She will serve as a limiter for the mattress. Here we fix the longitudinal crossbar. After this, it is necessary to install the transverse planks. On the latter will lie the mattress itself. The boards are installed at an equal distance from each other. The optimal distance is 50 centimeters.
Mounting location
How to make a wardrobe bed with your own hands after assembling the frame? Here you need to think about in which place it will be installed to the wall. It is best to use self-tapping screws by connecting the cabinet to the base.
You can also use special steel mounts, which are attached to the sides of the device and then mounted on the wall.
Installation of the lifting gear
As we noted above, this furniture is equipped with either gas elevators or furniture hinges. In the first case, you will need to buy 2 elevators and for each of them make the appropriate base on one side of the frame.
In the case of loops, you will also need 2 such devices. Please note - the wardrobe bed with a lifting mechanism of the "gas lift" type is designed so that it takes up most of the load and weight of the tool. Therefore, even a half-sleeper sofa can be raised with just one hand.
Facades
After that, you need to purchase and mount wooden facades in your wardrobe-bed with your own hands - planks that are attached to the long side of the device frame. Partially, these details can serve as a side. They are mounted to the base with the help of special loops, which are usually included in the set of these products.
If you used products from fresh woodland (natural pine, for example) as planks and other wooden parts in your work, then it is best to process it additionally with varnish.
Paint is optional. It is enough to buy a jar with a transparent or translucent varnish (the inscription “for wood” will be on the label) and brush over all the surface areas of wooden products. It is also worth noting that before varnishing this product should be thoroughly treated with a stain.
Foil finish
There is another alternative - gluing wood with a special film. It can be painted in chrome, wood of any ornament or plastic. Thus, you not only protect the bed from moisture, but also make its design in maximum harmony with the interior of the bedroom. By the way, even a chipboard panel pasted with such a film can look like a natural oak or cedar (of course, if you choose the appropriate sticker design).
Additionally, this bed can be used as a wardrobe when folded. To do this, you just need to equip its frame with additional shelves and drawers. This design does not harm the interior of the room, and also significantly saves free space in the house.
At this stage, the bed, built into the closet, can finally be attached to the wall and used as a full-fledged sleeping place for 1 or 2 people (depending on what frame size you have chosen).