Today's owners of luxury spacious apartments and even small apartments strive to create an exclusive design. For this, a variety of repair technologies are used. One of them, which is particularly distinguished by its historical roots and, at the same time, is new in design, is the artistic painting of the ceilings. The drawing brought to life is unique. In addition, it is the highlight that so often is not enough for a harmonious perception of design.
Plot selection
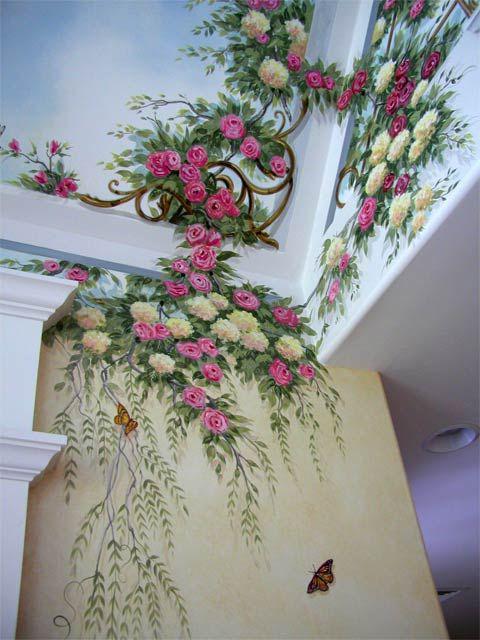
An incredibly difficult job for a beginner is to paint the ceiling with your own hands. Photo allows you to get acquainted with the beautiful creations of artists. However, even a novice master can, if he makes an effort, cope with such a task.
The initial stage in the painting is the choice of plot.
Today it is fashionable to depict on the ceiling:
- clouds, birds, stars against the sky;
- ornament elements duplicating the pattern of furniture, textiles, walls.
However, you can choose absolutely any plot. The main thing is that it is in harmony with the overall design. After all, ceiling paintings are performed for a long time. They can not be removed, like a boring picture.
An important selection criterion is the functional purpose of the room:
- Inspirational calm patterns are suitable for the bedroom.
- If you are experimenting with the ceiling in the living room, then a solemn, pompous, eventful plot is suitable.
- In the children's room, the cartoon character will look great.
- And the kitchen will be complemented by an appetizing drawing.
The choice of painting technique
Having decided on the plot, it is necessary to think over the methodology for applying the drawing. Many wonderful techniques have been developed that allow you to create exclusive ceiling paintings.
Let's get acquainted with them:
- Screen painting. This is an option designed for people who absolutely can not draw. Stencils can be purchased at the store or printed independently. If the pattern on the ceiling is duplicated, it is advisable to make a copy of such an “assistant” in advance. After all, the stencil spoils very quickly. The blank should be attached to the surface with tape. Inks are applied starting from the edge, moving towards the center. Then use the cutting method.
- Fake painting. The technique got its amazing name due to the creation of volumetric perspectives. The applied drawing imitates the continuation of space. For example, the coast of the sea or a beautiful green meadow. The image is built on strict observance of perspectives and optical illusions. Such ceiling paintings are used for small rooms. They are able to visually expand the room.
- Mural painting. The essence of the method lies in applying a picture to wet plaster. This technique avoids cracks after drying. In addition, these images are durable. They do not deteriorate from moisture and the sun.
- Fluorescent ceiling. This technique is often used to decorate restaurants and nightclubs. By combining various fluorescent elements, you can achieve magnificent combinations that will bring a sense of romance and comfort to the room.
- Acrylic painting. Such paints are durable. They are diverse and beautiful. In this case, the image dries out in almost half an hour.
- Oil painting. Unlike acrylic, these paints are able to convey the beauty and depth of art. But such a painting will dry for at least 5 days.
- Tempera painting. Paints are made up of egg yolk (glue). They dry quickly. However, a pattern made in such a technique is often covered with cracks.
If you are considering painting wooden ceilings, then it is not at all necessary to select a pattern for the entire surface. Sometimes a small image looks very harmonious and original.
Tools and materials
Now consider what you need to stock up before starting to work.
You will need:
- brush with a long handle;
- rollers, brushes;
- sandpaper (fine-grained only);
- capacity (bucket);
- water;
- metal spatulas of different sizes;
- putty (base, finish);
- primer (acrylic, deep penetration);
- plaster;
- level.
In addition, it is desirable to have a spray gun and an airbrush. They work on the principle of a spray gun and are designed for painting large areas.
Ceiling preparation
Drawing on old materials is not recommended. Very often this leads to defects in work. As a result, you have to completely redo the surface. Therefore, painting the ceiling with your own hands should begin with the preparatory stage.
To do this:
- Clean the old plaster coat with a spatula. Rinse the ceiling with a brush.
- Apply a deep penetration primer.
- Check the surface with a level. All irregularities must be repaired with plaster and putty.
- Sand the dried surface with an emery paper.
- Apply finish putty. The surface should be perfectly smooth.
- When it dries, you can apply background paint for a future masterpiece.
The preparation is over.
Mural
Now you can move on to the most interesting and creative work process. Hand-painted ceiling is a crucial moment. And quite heavy. Therefore, it is initially recommended to practice on a regular sheet of paper. And only by “stuffing your hand” can we move on to creating a masterpiece on the surface.
In order not to be distracted during work, be sure to prepare in advance everything you need: brushes, palette, paints, sponges. They must be at hand. It’s best if you have an assistant ready to give you the tool you might need.
Initially, the contours of the image should be applied to the surface.
To do this, you can use 2 methods:
- Use the sketches on which you trained. Attach the sheet to the ceiling. Pencil all lines.
- Use a slide projector. Carefully circle all the contours of the image.
Start painting large details and backgrounds. Then move on to smaller elements. If a mistake was made, then immediately remove it with a damp sponge.
Protective layer
After the decorative painting of the ceilings is completed, you can admire and enjoy the resulting masterpiece. However, so that after a while your drawing does not lose its beautiful appearance, it must be covered with a protective layer. This will protect the image from mechanical damage. In addition, the protective layer will make the picture shine with a natural shine.
However, remember that the varnish should only lie on a dried surface. You can use a spray or apply a protective layer with a brush with a short bristle. There are also a few nuances in this process. Try to apply a uniform coat of varnish. Then polish it using a dry brush.
Conclusion
Beautiful painting will please the eye for at least 10 years. And if you periodically update the varnish layer, then it will take much longer. The main thing is to protect the surface at first from dust and tobacco smoke. If you listen to such recommendations, then a wonderful masterpiece will become not only a highlight of your interior, but also a subject of pride in your friends.
Good luck and creative success.