Roller shutters are one of the varieties of blinds and look like a roll with two guides. The latter go parallel to the plates. Do-it-yourself shutters can be installed in window, garage, and also doorways.
Application of roller shutters
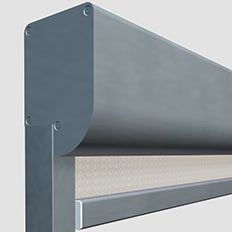
Roller shutters have long been popular with consumers. Today they are installed not only in residential buildings, but also in commercial premises. Roller shutters have a wide range of applications. They are used to protect the room from excess light, dust, noise, hacking, as well as various influences, including mechanical and chemical. Such designs are very similar to ordinary blinds, but they also have protective functions. With all this, such an addition can be an excellent decoration not only of windows, but also of doors. The shutters can be set to adjust the light intensity. If the sun's rays illuminate and heat the room too much, the structure can be lowered to a certain height, while at night it will close automatically. If you decide to install the roller shutters with your own hands, you should know that this type of design also has good thermal insulation qualities. This can be seen if you look at it in the context: the elements inside have air chambers, which are sometimes filled with foam. Both that and another perfectly detains both hot streams, and cold air that guarantees an ideal climate indoors both in the winter and in the summer. Before installing the roller shutters with your own hands, you need to familiarize yourself with all their pros and cons. Among the first, one can also highlight the fact that such designs are quite simple to install, and can also be equipped with one of several control systems. For example, manual constructions are used for private use, while constructions that are controlled by electronic systems are purchased to protect industrial and commercial premises. It is also important how the shutters look. In addition to fulfilling their basic tasks, they can improve the exterior of the house. When buying, you can choose not only the color, but also the texture of the material.
Features of installing roller shutters
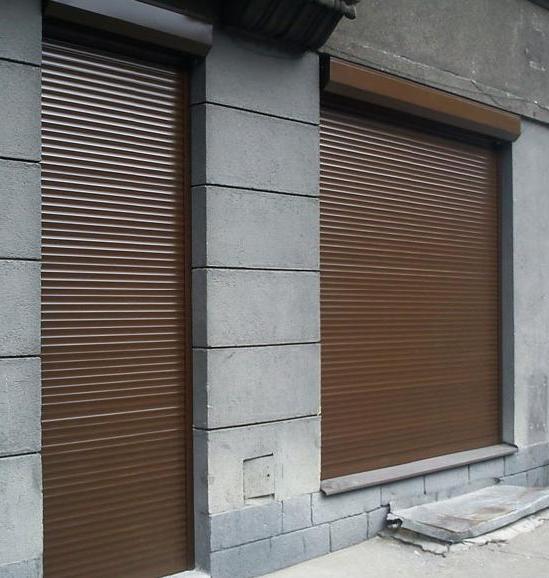
If you decide to install the roller shutters with your own hands, then you must choose one of the existing methods of installation of the structure. Thus, roller shutters can be mounted using the external method, which is also called the overhead method. This technology is most common when compared with other installation methods. In this case, the installation involves mounting on the facade of the building, and the guides are installed on the sides. Highlighting the advantages of such an installation, it can be noted that the size of the opening will be saved. This means that when the shutters are open, they will not be visible from the room. As a minus, you can name a slight ledge of the box for the outer surface of the walls. Roller shutters can be built-in. The guides are fixed inside the opening, which is closed on both sides by the width of the guides. The box will have to be mounted in the opening, which will be closed from above. If you decide to purchase a roller shutter, do-it-yourself installation can be carried out using the combined method. In this case, the guides should be fixed inside the opening, which guarantees its closure on both sides to the width of the guides. The box should be in the niche of the opening. For the installation of protective roller shutters using this technology, some rules must be observed. In some cases, there is a need for special preparation of the opening for installation of the structure. If the opening is clean, then the height of the structure should be increased by the width of the bar, this parameter is 45 millimeters. If the opening has irregularities, then not only the height, but also the width of the structure should be increased by 8 millimeters.
Roller shutter installation technology
Before starting the installation of roller shutters, it will be necessary to carry out certain preparatory work. Initially, the opening should be measured, its diagonals need to be compared in order to understand whether these parameters differ by more than 5 millimeters. It is important to analyze how correctly the slopes are located, the permissible deviation from the horizontal or vertical is 1.5 millimeters per 1 meter. There should be no chips or cracks on the surface of the slopes, and if they are plastered, the finish should not peel off.
Guide preparation
Before making the roller shutters with your own hands, it is necessary to prepare the side guides. For this, marking should be made for drilling holes. In order to ensure symmetry, they need to be laid in pairs: make holes with a pitch of 15 centimeters from the edges of the guide rails, and only then holes must be made along the entire length with an equal gap of 50 centimeters. If an installation type has been selected, the holes should be made closer to the outer edge. When carrying out these works, a drill with a diameter of 8 millimeters should be used. If the installation will be carried out using external technology, then the through hole of the tire must be made on both sides, while the upper tire must be drilled until a diameter of 11.8 millimeters is obtained. This manipulation is necessary in order to mount a decorative plug.
Box preparation
If you decide to install the roller shutters on the gate with your own hands, then the box on each side needs to be drilled so that two holes are laid through the cover, their diameter should be 4.2 millimeters. They are necessary for installing rivets after completion of work. Among other things, you need to make holes to fix the box. With surface-mounted mounting, the holes should be located at the rear, while with the built-in - at the top, the combined mounting involves making holes on both planes.
Box assembly
If you install the roller shutters with your own hands, then at the next stage you need to make markings for the holes in which the fasteners will be installed. The box is attached to the opening. With surface-mounted installation, all elements must be attached to the wall, with built-in installation, the parts are located on the side and upper slopes. Next, you need to check how vertically the guides are located, as well as whether the box is mounted correctly in relation to the horizon. Markings on slopes through drilled mounting holes should be made with a marker. On them you need to drill holes, and then drive in the dowels. The hole must be made for the drive.
Frame fixing
If you decide to install the roller shutters for the cabinet with your own hands, the technology will remain the same. The next step will be to strengthen the frame. First of all, remove the protective film, which is located on the back wall. Fixation should be carried out using a screwdriver, then you can fix the controls. If an outdoor installation is used, the controls must be indoors. Next, you can install the canvas, and then the lid of the box, which is fixed with rivets with a gun. All openings must be coated with silicone sealant and then sealed with plugs.
Repairs
If you notice a malfunction, which consists in the fact that the web is not collected uniformly (this happens, as a rule, most often), then repairing the roller shutters with your own hands can easily be done. To do this, check the guides for the presence of foreign objects. The guides may be damaged, among other things. But, as a rule, after the removal of foreign elements, the uniformity of the course returns.