Brake pads are an important component of car safety. Their proper functioning is ensured by timely replacement. Replacement does not require special skills. It is necessary to adhere to the algorithm of actions. Incorrect installation can not only damage the brake system, but also lead to an accident.
When do you need to change brake pads?
The technical condition of the car is safety, so do not neglect it and conduct an inspection as often as possible.
So, what you should pay attention to:
- How worn discs and drums.
- In which of those. condition are the pads themselves.
- What is the wear of the linings, the thickness of which should be 2 mm or more.
- Be sure to check whether the base is firmly connected to the pads.
- Visually evaluate if there are chips, dents, stripes, etc.
If during the inspection you came to the conclusion that it’s time to change the rear brake pads on the Chevrolet Lacetti, try not to tighten and proceed to repair as soon as possible.
Training
If you need a replacement, the first thing to do is choose the right ones. In order not to be mistaken, take with the same marking: B11-04-016. If you decided to change the rear brake pads in the "Lacetti", then do it better with a set: two left (external and internal) and two right (similar).
Before changing, make sure that the fluid that is in the small reservoir of the brake master cylinder is below the top mark. If it is at or close to the level, then lower the excess, because when you replace the worn parts, the liquid level in the tank will rise.
To change the worn back pads in the "Lacetti", you will need bought pads, a metal brush, grease (necessarily high temperature) and keys for 12 and 14. Perhaps there will be a need for additional improvised tools.
Getting to work
It doesn’t matter at all whether on the left or right side you start changing the rear pads in the Lacetti, the following algorithm of actions will be the same:
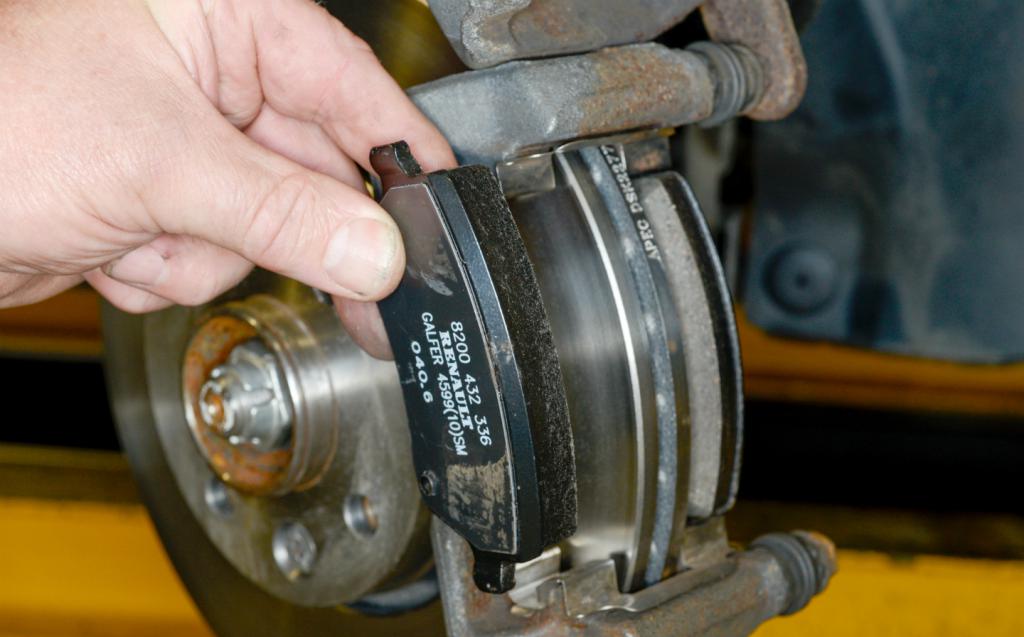
- Remove the wheel.
- Unfasten the parking brake cable from the caliper.
- Remove the two bolts that secure the caliper to the guide.
- Remove the caliper.
- Remove worn pads from the outside and inside.
- Clean the rail from rust, dirt and so on, lubricate it.
- Next, you need to decide whether to replace the disk itself. To answer this question, it is necessary to measure (at least visually) the thickness of its surface. If it is 7-8 mm or less, the disk must be replaced. If the thickness is more than 8 mm, but the visible wear is close to the acceptable mark, pierce it. To remove a disk, turn off its fixing bolt. If it doesn’t work, try knocking a bit on the head of the bolt through the extension, which will slightly precipitate the thread, and try again.
- It happens that the disk is jammed by the parking brake pads. In this case, separate them by turning the ratchets and release it. This is done through the adjustment hole of the parking brake on the front surface of the disc under the plug. If the drive does not jam, just remove it.
- If necessary, replace the brake pads of the parking brake and clean the mechanisms.
- Now we collect everything in the reverse order, of course, instead of worn parts, install new ones and repeat the already done algorithm from the end.
When performing points 3 and 4, make sure that the “fingers” do not scroll (hold them with the second key), and that the brake hose does not twist or stretch. After replacing the rear pads in the "Lacetti" on both sides, it remains to establish gaps between them and the disks. This is done with a few clicks on the brake pedal. Again, check the fluid level, add, if necessary, to the mark.
Replacement done, but that's not all
So, we independently changed the rear brake pads on the Chevrolet Lacetti, and it seems that you can already drive along the roads, but no. Drive onto a busy street early.
After you have updated the pads, there is a high probability of a decrease in braking performance, as the old discs are slightly worn out and the new pads only touch their edges. Therefore, before you start to fully operate the car, let the parts get used to - they should start to rest against each other with the entire surface. To do this, simply select a safe place and, having gained a low speed, slowly brake several times (calculate the distance to the nearest objects with a margin, since the brakes after the update may not be very effective).
If everything is in order, you can start operating the car, not forgetting that the first 150-200 km you need to try not to overheat the weakly rubbed parts with sharp braking, as this can lead to the burning of linings and reduce the service life or effectiveness of new parts.
Installation Tips
Now anyone can easily replace the pads. A few tips from experienced auto mechanics will simplify the work.
- Lubricate the seats in the guide with waterproof grease.
- To exclude the fastening bolt itself, treat it with a thread lock (anaerobic).
- In the process, check whether the caliper moves easily. If not, grease it.
- Lubricate or change the “finger” protective covers, if they have hardened, damaged or changed their shape.
Now you know how to replace the rear pads in the Lacetti on your own. If nevertheless this causes difficulty, it is better to contact the service - confidence in safety on the road is more important than any money.