Not only animals, plants and people receive the attention of artists. Some are not at all opposed to portraying some cute (or not so) insect, for example, a butterfly, a spider or a grasshopper. And this article will be devoted to how to draw a bee. Despite the fact that this insect painfully stings, it is very useful, fluffy and beautiful, therefore it is quite worthy to be captured on a sheet of paper. And for starters, let's take a closer look at the bee. FROM
artistic point of view, it consists of three main parts: the head, chest and abdomen. Therefore, making a preliminary sketch, we outline them in the form of geometric shapes - circles and ovals. The bee’s abdomen is more oblong, therefore we outline it in the form of an ellipse. To its top we draw a circle - the chest of a bee. A little higher we outline the head in the form of a semicircle.
The next step in learning how to draw a bee is to sketch its legs. In total, the insect has six. Since we draw an ordinary, working insect, the location of its limbs will be as follows: two hind legs and two middle legs are laid back, and the front pair is forward. The drone and the queen bee’s legs are slightly different, but this is a topic for another article.
Now we are going to draw an ordinary bee, so we understand further. All legs of this insect are located on the lower part of its chest and have their own structure. But we will not go deep into bee anatomy. We only note that the legs consist of five parts, and this must be taken into account in the figure. With a more detailed study of the abdomen, it is worth paying attention that it consists of six so-called rings (segments). Therefore, they can be outlined, that is, in smooth, curved lines, to divide this part of the body of the insect into six parts.
The next step in learning how to draw a bee is to sketch the wings. We will depict them in a straightened form. It’s better not to press on the pencil, because the wings are almost transparent. There are two pairs in total: large front and small rear. They are “attached” to the edges of the back of the bee. Since we draw the insect in the “top view” perspective, it is worth considering that the spread wings will partially hide the legs. But since the wings are almost transparent, the legs will shine through them.
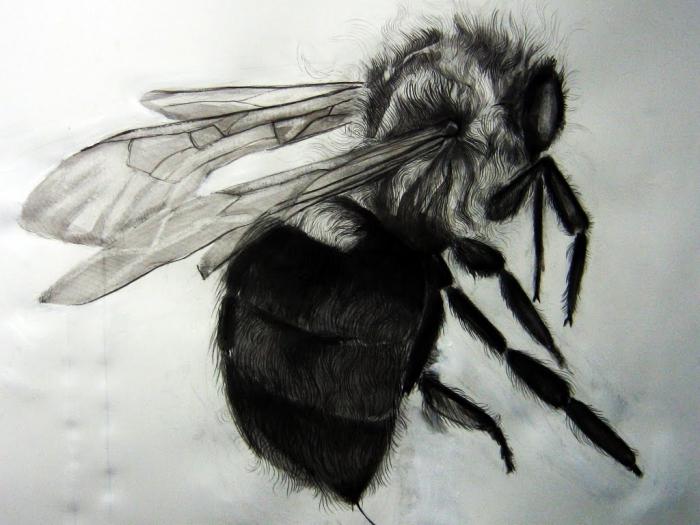
In the continuation of the lesson on how to draw a bee, let us return to the head of the insect and depict large round eyes on both sides, and between them are antennae. The proboscis from this angle will not be visible, so leave it alone. The sketch is ready. It remains only to detail the drawing, having worked out the contours of the body, legs, and wings. It would be nice to emphasize the volume of the picture using hatching. The shaggy chest of the bee has a yellowish-orange color, so we leave this part light, only slightly emphasizing the fluffiness. The rest of the insect body must be darkened, but taking into account the chiaroscuro. Wings need to be hatched only slightly and depict veins on them. Do not forget that the legs are visible through them, so we slightly obscure the wings in these places. You can add glare to your eyes. That's all, now you know how to draw a bee. The attached pictures will help you better understand how this is done.