To date, there are many ways to decorate the ceiling. One of the most common is surface finish with plastic. Due to the affordable price category of the material and ease of installation, this option is not inferior to its other decoration methods. In the article, we will consider how to sheathe ceilings with plastic panels.
Material characteristics
Plastic finishing panels for the most part are two thin, connected plates of a certain width with stiffeners located between them. They combine the external and internal sides and make the structure tougher. On the side along the entire length there are elements for joining parts with each other, their device is based on the principle of "tongue-and-groove". They are designed for ease of installation and strong retention of the panels together in the same plane.
General Information:
- PVC panels are used for walls and ceilings. Their length varies from 24 cm to 6 m, and their width is from 10 to 50 cm. The thickness is usually 5-12 mm.
- Their surface can be very different: glossy or matte, white or multi-colored, smooth or textured. Very often wood panels are used.
- For the perfect finish of the ceiling with plastic panels, it is necessary to use special fittings, which allows you to hide joints and transitions, arrange external and internal corners.
- The material from which PVC panels are made is checked for quality standards and is completely safe for use in residential premises.
- The surface of the material is lightweight and easy to clean and maintain. It can be washed with a damp cloth or dry cleaned.
- With proper care and respect, the life of the panels is 10-12 years, while the external qualities are preserved.
- Any person can perform the installation with minimal skills in working with construction tools, it is not necessary to involve professional masters in the process.
- Affordable price allows you to replace one or more panels in case of unsuccessful installation.
- If for some reason the surface of some elements is damaged, they are replaced without damage to other parts.
Criterias of choice
Before lining ceilings with plastic panels, you need to determine the quantity and type of material. Professionals advise to pay attention to such criteria:
- The size of the panels (length, width, thickness). If we talk about the first parameter, then it is calculated in such a way that as little as possible remains. For example, if the length of the room is 2.40 m, then you should choose an element measuring 2.50 or 5.0 meters. The calculation of the width follows a similar principle: so that as a result there are fewer scraps and for ease of installation. Thickness depends on the place of paneling: for walls, it should be more.
- Price-quality ratio". Since the assortment in construction stores is huge, often people are faced with the problem of choice. Cheap material is characterized by low performance.
Good products can be identified by the following indicators:
- Appearance. The panel should be flat, without roughness and scuffs. Stiffening ribs should not appear on either side, the pattern should be clear and uniform.
- In a high-quality material, the wall thickness should be at least 1.5 mm, the same applies to stiffeners - the thicker they are, the more stable the material. When pressed, the panel should not be deformed, which indicates its high level of wear resistance.
- Tactile surface should be uniform, without deflections, waves and grooves.
- If possible, it is advisable to try to connect the two parts together. Ideally, they will easily dock, there will be no gaps between them, the spike will completely go into the groove without any external signs of docking.
- Another nuance in checking the quality of building materials is flexibility. It is necessary to bend and unbend a small corner protruding beyond the boundaries of the mounting strip. If after such a manipulation there are no visible traces on the surface of the plastic, it means that during the production high-quality material was used and the manufacturing technologies were followed.
It is also worth paying attention to in which room the PVC will be mounted. If the question arises as to which ceiling is better in the kitchen, then the answer is clear. It should be smooth, without relief. That is, PVC plastic is best suited here, since plaque is easily removed from it.
How to make a calculation?
To make the ceiling with plastic panels with your own hands, it is important to choose the right amount of material. To calculate, you should follow the step by step instructions:
- Calculate surface area and single panel.
- After that, by simple calculations find the ratio of the first value to the second. The answer will be a piece quantity of PVC material.
- To account for possible waste, 15% is added to the final result and rounded up.
- To calculate the length of the hardware profile, it is necessary to add two lengths and two surface widths, and then also add 15% to the result.
To determine the required amount of material for the execution of the crate for plastic panels, the calculation is as follows:
- The length of the frame elements is calculated according to the same principle as the similar parameter of the hardware profile.
- After that, the surface dimensions are divided into identical segments from 40 to 60 cm long. Guide crates will pass through these marks. They are needed to determine the amount of required timber or metal profile. Its length will correspond to the length or width of the room, depending on how the installation will occur - across or longitudinally to the surface. This is especially important when designing the ceiling in the hallway and bathroom. Indeed, in these rooms, panels can be laid in both directions.
If the crate is made of timber, its cross-section should not be less than 2 × 5 cm. It is also necessary to purchase screws with a wide hat. Their panels will be attached to the profile or timber. The calculation here is approximately as follows: 1 screw per 50 cm.
What is necessary for work?
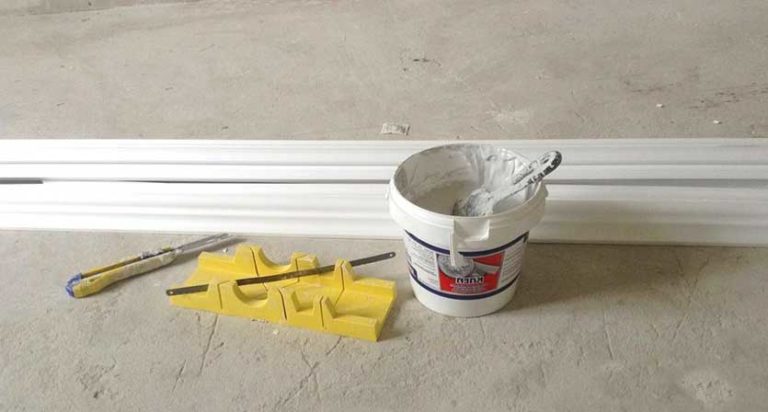
In order not to be distracted every time in search of the necessary tool, before you sheathe the ceiling with plastic panels with your own hands, you need to prepare in advance the following:
- First of all, it is directly the PVC panels in the right amount, taking into account the waste.
- In order for the surface to be flat, of course, you will need a hydraulic level.
- Ceiling skirting for PVC panels.
- Bar or profile. If insulation is planned, the width of these materials is taken into account based on the thickness of the mats. When choosing a metal profile, you will also have to prepare suspensions.
- For fastening and drilling holes do not do without a punch, screwdriver and dowels.
- It is good if the master will have a special device for the correct trimming of the corner of the ceiling baseboard.
- You will also need a square, a pencil and a grinder.
Surface preparation, marking
Before installing plastic panels on the ceiling, it is important to carry out the preparatory work correctly:
- First of all, it is necessary to carry out an external inspection of the surface. Then you need to get rid of the old coating. To do this, you can use a brush for metal. If the ceiling was previously whitewashed, then before removing this layer it is treated with a paste or primer. So there will be less chalk pouring.
- After that, the coating is inspected for peeling of the plaster, if it has been applied. If any, they are cleared. A hammer and a chisel or a wide spatula are useful here.
- Then the surface is treated with antiseptics, they are in any construction department. It may seem to many that there is no reason to do this. But such measures will never be superfluous, especially since such solutions do not differ in high cost. But if the fungus still shows up to get rid of it, you will have to completely disassemble the plastic panels and redo the work.
- After complete drying of the surface, they begin to apply the primer. Here you will need a sprayer or brush.
- Next, set the level to mark the desired mounting height of the panels.
- The hydraulic level is best suited for this work, it will not be difficult to find it on sale, and if desired, you can make it yourself. Thanks to such a device, the work will be much more accurate.
- When choosing the height or width of the installation plane, an important nuance should be taken into account. If it is planned to make insulation, a gap of a few centimeters should remain between this material and the finishing panels. This is due to the fact that during deformation of the insulation mats lose their quality.
- After all the marks are applied, they are connected in one line. This can be done with the help of a nylon thread, which simply beats off around the perimeter. The markup is ready.
Frame installation
Those who perform such work on their own for the first time are wondering how to fix plastic panels to the ceiling. Most often, surface finishing with these parts is carried out by mounting to the frame. It is made using metal rails or from wood. When choosing the second option, the bars must be treated with an antiseptic before use to extend their life. This is especially important if the bathroom is being repaired with plastic panels. This is a humid place, therefore, treatment with moisture protective agents must be carried out necessarily.
The sequence of steps for installing the frame is as follows:
- Profile or wood is cut to the desired length. According to the mark, proceed to fastening. If the surface is made of wood, installation is carried out using self-tapping screws. If it is concrete, the holes are made with a perforator, and fastenings are carried out using dowels.
- The lining has its own weight, respectively, and the frame must be strong and reliable. Do not use wall plugs left over from any sets. Fixing materials must be matched to a specific design. Only then will the fixation turn out to be rigid and of high quality.
- The next step is to mark the transverse stripes. It is important to consider the following: panel mounting is done strictly perpendicularly, so you need to choose the right installation direction. The distance between the wooden rails must be at least 50 cm. A calculation is made. The edges of the panel must be placed on a rigid surface of the frame.
- Then the line is pulled along the diagonal of the planes. She will determine the height of the mount. This method is highly accurate. Otherwise, if the frame was uneven, the panels will repeat this relief.
- The profile is cut in accordance with the size and fixed in a predetermined manner.
- You can use gaskets to adjust the height. Joints close to the wall and to each other are not recommended. From this, when expanding the material, the coating can lead.
Then a layer of waterproofing is applied. The material is cut according to the calculated dimensions made in advance and fixed with a construction stapler. It is worth noting that the butt joint in this case is not done, but is overlapped. After that, the insulation is laid. Place it tightly, but evenly. Using plastic fungi, the material is fixed. At the same time, at least five pieces should be spent on one mat.
Wiring
The next step is the installation of electrical wires. Wiring is an important process. Especially you need to pay attention to this when thinking over the design of the ceiling in the hallway. After all, here, as a rule, are the main nodes of the wires. If there is no special knowledge, you need to entrust the matter to a professional. Lighting should be taken care of in advance to hide the wires behind the plastic panels. You also need to think about which light sources will be used.
Work sequence:
- First of all, they select a place to place a junction box. It should be in an accessible place so that it can be opened in case of a malfunction.
- The section of the groove for the wiring is calculated with special care, but it should not be taken close to it. The clearance should be increased by 30%.
- With the help of the terminals they make connections, thanks to this they will be reliable. Twisting is prohibited, it is fraught with danger of fire. Having completed the necessary manipulations, they proceed to the wiring fasteners.
- Then they connect the lights and check if the light is distributed correctly throughout the room. If necessary, at this stage you can still redo it.
How to sheathe ceilings with plastic panels
When all the preparatory work is completed, proceed with the installation of the finishing material. This work is not complicated, but requires special attention:
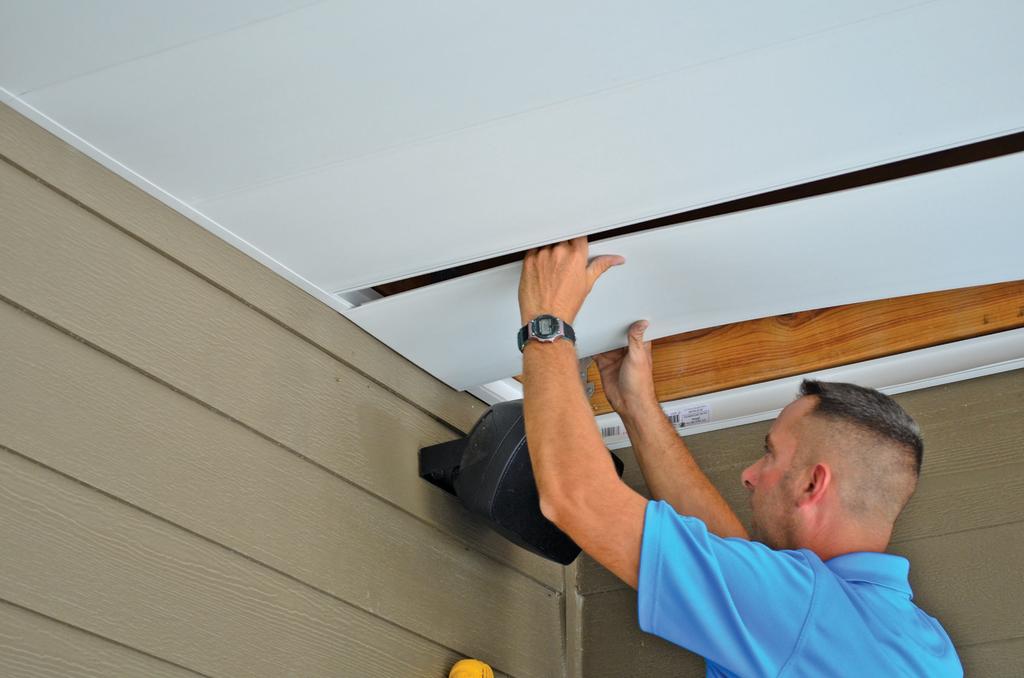
- Installation begins from the window of the room, from the corner. This is due to the fact that the lighting here is the brightest and all errors will be visible to the naked eye.
- For fastening, climers are best suited. They are made of metal with a further chromium coating. Due to this, they are more resistant to high levels of humidity. Connections with the help of such hardware are reliable and durable.
- Panels must be properly distributed before installation. Often they are not fully included, therefore it is desirable to form a pattern at an early stage of sheathing.
- Details are fastened with self-tapping screws, while the installation of the first is of fundamental importance, since they are equal on it, performing installation of all subsequent ones. Laying is done parallel to the wall, otherwise it is likely to get the wrong configuration.
- Each subsequent part is installed strictly in the groove of the previous one. The joints must be tight.
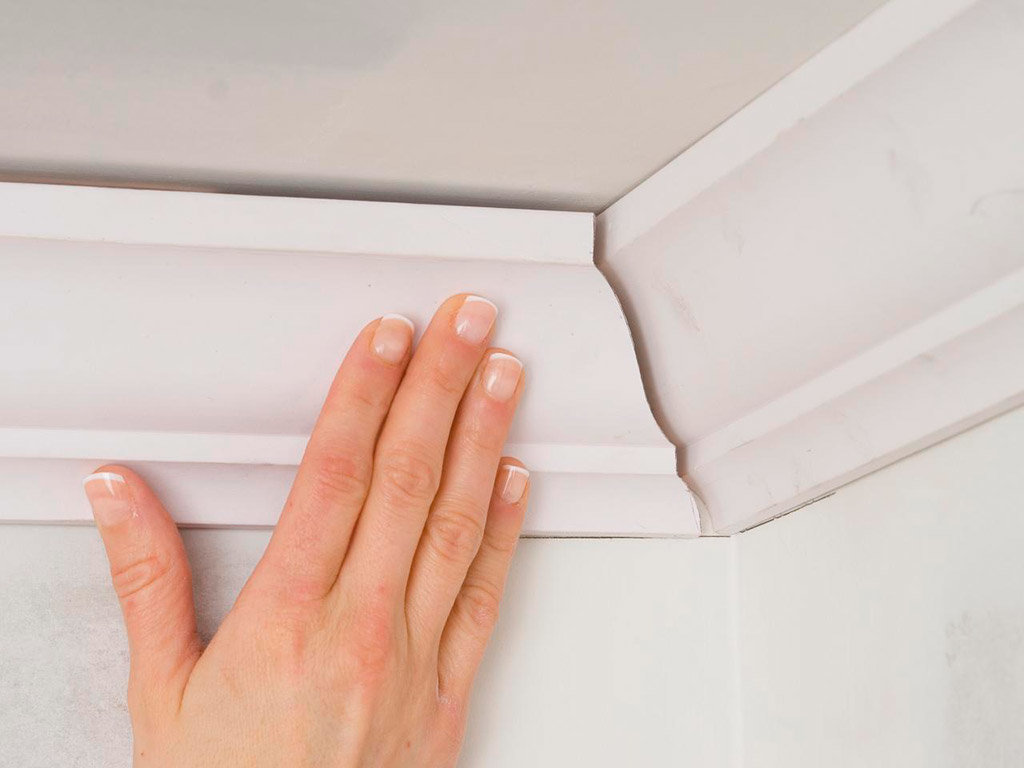
- Then measure the desired length and form the corners of the ceiling plinth. This is easy to do with a classic miter box. If it is not, you will have to apply ingenuity and knowledge of geometry.
- Next, the ceiling skirting board for PVC panels is glued.
Pros and Cons of Material
The indisputable advantages of plastic panels are:
- Affordable price and a wide range of sizes and shapes.
- Among the presented specimens there are moisture resistant models. This is especially important when repairing plastic panels in the bathroom, kitchen or balcony, where the humidity is high.
- Resistance to external influences and temperature changes.
- Unpretentiousness in leaving. In order to refresh the surface, just wipe it with a damp cloth without using abrasive products.
- Possibility of use as an inexpensive soundproof or aesthetic coating.
- Easy to install, does not require professional skills.
- Finishing does not take a lot of time.
- Thanks to its versatility, it allows you to translate any design idea into reality.
- The material is safe, durable, plastic. Allows you to work even in hard to reach places.
It will be fair to note the shortcomings of this material:
- the first couple of days after installation, an unpleasant odor in the room is possible;
- with a sharp temperature difference there is a probability of deformation of the coating;
- not resistant to mechanical stress;
- artificial material.
Types of paneling
One of the most common mounting methods is frame mount. This method is optimal for facing uneven surfaces. The basis of the frame is a crate. Thanks to this design, installation can be carried out in any room.
The suspension frame requires great accuracy and accuracy. Most often, such cladding is used in rooms with high humidity and poorly heated rooms. Otherwise, the panels will quickly deform or fall away in vain. For the manufacture of a suspended frame, suspensions and a metal profile are used, less often a bar.
The simplest, but not the most reliable, is the sheathing of the surface by the frameless method. That is, the glue is applied directly to the panel, and it is attached to the prepared and cleaned surface. The main disadvantage of this method is the inability to install spotlights, LED strips and other elements. Often this method is used to mount the ceiling from plastic panels in the toilet.
Possible installation errors
Often, novice wizards make mistakes during installation. To avoid them, you should familiarize yourself with the most typical of them:
- Unpleasant odor soon after sheathing.This is due to the appearance of fungus or mold under the PVC panels. Therefore, before installation, it is recommended to treat the surface with an antiseptic solution.
- If the frameless method is used, do not glue the panels onto concrete. A ventilated space should remain between the surfaces.
- Wiring must be done before mounting the PVC plates themselves.
Before buying a bar to perform the crate, you should carefully consider everything. Sometimes this translates into high costs. The use of wood in rooms with high humidity is not desirable.
In the article, we examined how to sheathe ceilings with plastic panels. The final result is affected by the quality of the selected material and the installation works themselves, therefore, each stage should be treated with responsibility.