Among ordinary users, there are not many who know that the installed network equipment (network cards on computers and routers) allows you to create “bridge” connections. What it is, what it is for, and how to configure it, it will be further considered. And to begin with, what is the point in creating and configuring such a connection.
What is a network bridge, and what is it for?
As you know, two types of connections can be used to create network connections and Internet access - wired and wireless. The first type provides more stable communication for each terminal connected to the network. But the second involves connecting several machines at once by combining computers into a network via Wi-Fi (you can even create a virtual network via the Internet).
Network Bridge, in fact, is a tool that allows you to combine both connections into a single whole. What is it for? Suppose a user computer is connected to one network through an Ethernet network card, and to the second via Wi-Fi. It’s clear that the networks do not touch each other (in a wired network, if you try to identify a terminal with a wireless connection, you can only see a router). When creating a bridge, this problem is completely eliminated, plus - it improves connection stability.
The same applies to cases where a single-port modem is used as network equipment, to which only one computer can be connected. What to do with other terminals? In this case, they must be connected through the main computer, which will act as the host machine. Below we will consider the actions performed for two computers. If there are more of them, accordingly, you will need to configure on all client machines.
Creating a bridge on the host terminal
Now let's move on to practical actions. Immediately I want to please all users who are not particularly versed in network settings, that there is nothing particularly complicated here, and the creation and configuration of a network bridge is done within a couple of minutes. If two computers are used, they must be connected with a crossover cable to the RJ-45 connectors that plug into the network cards.
So, in Windows, the network bridge can be configured through the standard section of networks and the Internet (the "network management center"), which is located in the "Control Panel". It is necessary to click on the hyperlink to change the adapter properties, after which the window will display two types of connections, which were mentioned above.
Now both icons must be selected (for example, by a regular click while holding the Shift key) and through the RMB select the "Bridge Settings" item.
In just a second, the Network Bridge icon will appear in network connections. In theory, on the client machine, an icon with a plug will appear in the system tray , but only if the system automatically assigns parameters. Otherwise, a cross will appear on the bridge icon, which indicates that the network bridge will need to be manually configured.
Address Verification
The bridge was created and, in theory, works, but computers still cannot interact with each other. On the host terminal, invoke the command line and enter the ipconfig / all command. A window with a bunch of information will appear.
In the presented parameters, find and write down the IP and DNS addresses. It is not necessary to remember the default gateway, since it always has the same value (255.255.255.0).
IPv4 Settings on the Client Machine
In the next step, to configure the network bridge on the client terminal, you must configure the IPv4 protocol options.
To do this, through the connection properties, enter the protocol parameters and write down the static IP that you learned on the main machine, increasing the last digit or number by one. In other words, if there was, for example, a deuce in the address at the end, write a triple.
DNS options
Network devices using bridges will not work without specifying DNS server addresses.
If automatic reception of addresses is indicated, deactivate it and for the preferred server, write down the combination received on the host terminal, and for the alternative, the same address, but with an increase in the last number or number by one, as was done for the IP address. After completing the settings, check the box next to the item confirming the parameters at the exit and click "OK". On this, the creation of the bridge can be considered completed.
Note: note that in case of a connection failure for DNS addresses, the use of free configurations, for example, from Google is not provided, since only strictly defined combinations should be used to create such a connection.
Configuring a network bridge in a VirtualBox virtual machine
In the case of using virtual machines, creating and configuring a bridge looks even simpler. You can use several virtual adapters. In the program itself, you first need to select the created virtual machine (the menu on the left), and in the right window, click on the network section.
In the properties window, first of all, you need to specify the type of adapter (it is best to choose PCnet-Fast III, since it will have less problems with configuration). Also, without fail, you need to activate the inclusion fields of the adapter itself and the cable connection.
Now in the network connections of the “Control Panel” through RMB on a wireless connection, go to the properties and make sure that the VirtualBox Bridged Networking Driver adapter appears in the list. On the access tab, you need to activate both fields (permission to connect to the Internet and sharing control for other computers). In the warning, remember the IP address and click OK. Now, through RMB on the VirtualBox connection, select the status bar and compare the source and existing IP. If they match, then everything is done correctly and the bridge is operating normally.
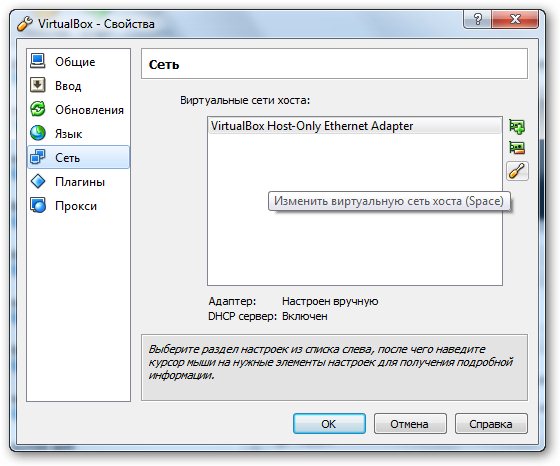
Now it is necessary in the program to go to the settings (with the virtual machine deactivated) in the adapter menu, by clicking on the button marked with a screwdriver icon, make sure again that the settings are correct. Next, with static IP on the DHCP tab, make sure that the server is disconnected. Upon completion, just in case, you can check ping by entering ping at the command prompt and using the space bar of the IP of the virtual machine. If the packet exchange has begun, then everything is in order. In theory, the address of the guest terminal in the last numbers will have a value from the range 1-254 and correspond to the real address of the network adapter.
Brief Summary
That, in fact, is all that relates to the creation and configuration of a bridge connection. As an afterword, I’d like to advise you to be as careful as you can when entering addresses, since only one incorrectly entered number will negate all your efforts. Otherwise, there should not be any special problems. If for some reason you need to get rid of the created connection, in the adapter properties section you can either deactivate it or completely delete it using the RMB menu items for this.