Particleboard flooring has fairly good strength indicators, which is why it is quite often equipped in apartments and houses not only by professionals, but also by private craftsmen. This modern coating can be used as a rough or independent flooring, which has an attractive appearance. It can be laid on any kind of surface, including old coatings, without resorting to their preliminary dismantling, which reduces the cost of coating and work.
Application features
Using this material, you can hide defects in the base, cracks, cracks and irregularities. Quite often for such work a 3-mm plate is used, which has the qualities of resistance to moisture. In the production process, it is impregnated with oil, and at the stage of installation, as a rule, they are placed on the first floors.
If you have to work with a floor that has significant irregularities, then you should buy a 6-mm plate. On sale you can find the particleboard of the desired variety, among them: soft boards, hard with a refined surface, hard with a tinted front layer, as well as material with a front layer of thin dispersion wood pulp. You can also buy solid plates of increased strength, which have a front layer in the form of a thin dispersion mass.
Why choose chipboard
Particleboard flooring has many advantages over that which is arranged using other materials. The advantages include low cost, environmental safety, as well as a dense structure, which can be obtained by hot pressing of sawdust. Among other things, the plates cope well with mechanical stresses, are distinguished by their durability and strength. If you lay the floor with this material, it will be well sound and heat insulated.
The flat surface of the material allows you to get a flat floor on which you can lay any coating. Even an inexperienced person can cope with the work, as the material is easy to lay. During manufacture, synthetic resins and antiseptics are added to the raw materials, which are designed to improve the properties of the material, because in terms of quality characteristics it is compared with natural wood.
If properly operated chipboard, then it will last a long time. Recommendations are the application of waterproof paint or water-repellent varnishes, which can also improve the appearance of the coating.
Installation of floor Chipboard: plate preparation
Before starting to cover the floor with chipboard, it is necessary to prepare the plates, which must undergo acclimatization in the room, and also find normal humidity. This will eliminate the swelling of the material during operation. For two days, the sheets are kept indoors in a calm state. If the floor surface has large differences, then you should do the flooring from the lag or fill the solution. You can check the horizontalness of the rough surface using the building level, which will help make marks at the same height along the perimeter of the walls. After the marks are joined, it becomes clear whether alignment is required on the floor.
Base preparation and sheet laying
If you decide to make the floor of the chipboard, then you should prepare the base for laying. A perfectly flat surface can be achieved with a cement and sand-based screed, which is poured to the line marked in the previous step. The surface before pouring should be cleaned and dried by pouring a 50 mm layer of sand, the prepared solution should be distributed on top. After drying, a primer or bitumen is applied to the screed, which is previously dissolved in gasoline. After waiting 8 hours, you can start laying chipboard with glue or mastic.
Over the entire surface, the screed is covered with mastic or a thin layer of glue. Plates should also be treated with adhesive. Bitumen mastic will dry out quickly enough, therefore, its application should be carried out on the laying area of one sheet. After that, the composition is aligned with a rubber ridge and the plates are fastened. After that, pressure should be exerted on the surface, which will act for some time until it dries. The coating may be operated in several days.
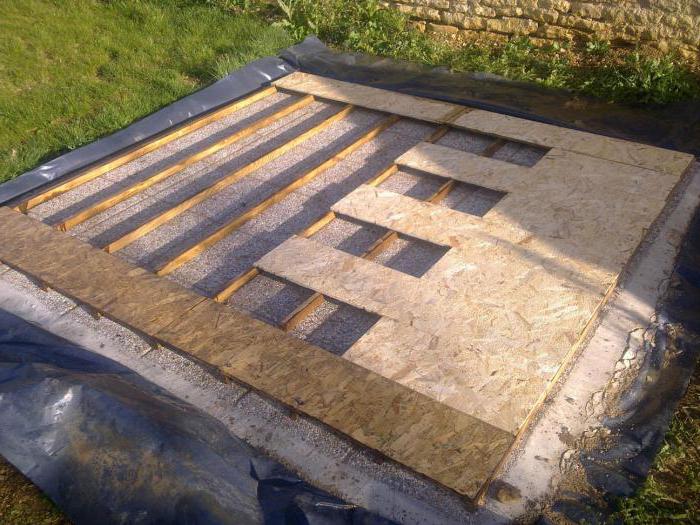
Laying chipboard on the logs
Particleboard on the floor can be laid after installing the lag system. Before this, the dimensions of the sheets should be measured to mark on the floor. Beams treated with antiseptic should be used, which were previously well dried. They are attached directly to the floor, the distance between them should not be more than 40 cm. If untreated wood is used, this can cause its decay or deformation. In this case, after 2 years of the floor will require repair. It should be noted that the width of the slabs of the material should not be greater than the width of the lags, otherwise the floor will be uneven, and large pieces of furniture will fall over.
Styling recommendations
The grooved chipboard for the floor is laid according to a certain technology. Before starting work, the material must be inspected for mold, in which case a primer and antiseptic are applied to the surface. Having retreated about 10 mm from the wall, you can begin to lay the material, this will allow you to form a temperature seam. After completion of work, it is decorated with a plinth. The plates should fit well together and not form distortions. Installation must begin from the wall, which is opposite the exit.
Plates are laid out near adjacent walls, preventing the formation of a narrow strip along them. If the chipboard is installed on glue, then on the entire surface of the sheet it should be leveled, allowing it to dry. To achieve higher strength, the floor is primed before applying glue. If there is a vertical pipeline in the room, then a circle gap should be left near it, which is poured with cement-sand mortar.
Specialist recommendations
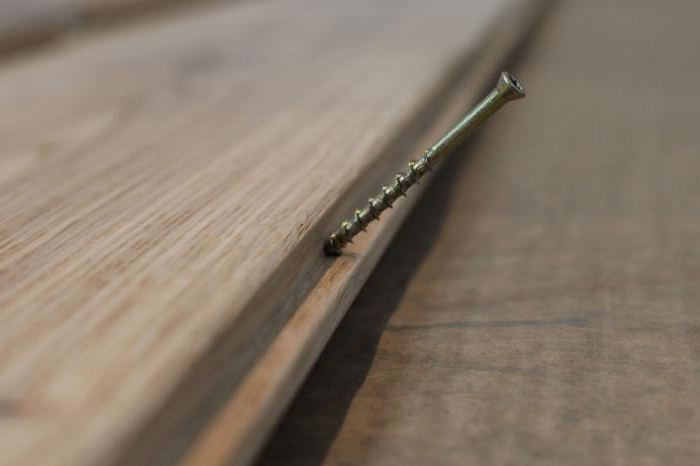
Particleboard or plywood is laid on the floor so that the joints of the plates do not fall on those places where the floor is used with the highest intensity. These include areas near the refrigerator, stove or sink. Fastening is carried out using nails, screws and self-tapping screws. If the slabs are 19 mm thick, then nails should be used. They must be driven in at an angle of 30 °, 10 cm apart from each other. The chipboard should be laid on the floor in such a way that the nail caps are tightly driven into the material and do not protrude from above. Traces of fasteners should be repaired with putty on wood, which is selected according to the color of the coating. Do not use long nails, as this can cause damage to the wires and pipes located under the base.
Joints are covered with putty to make the floor attractive. If you place the structure on the lags, this will make the floor warmer. If necessary, perform complex cutting of the slab, you must use a template prepared in advance from cardboard. If laying is carried out on a wooden base, then a bitumen primer is not used.
Final work
Quite often in homes it is used to repair chipboard, a wooden floor can be covered with this material to get a perfectly flat surface. At the final stage, the glue should be removed with a rag, close the resulting gaps with putty. Such a surface is often primed and ground, but this is not necessary if a laminate, parquet, carpet or linoleum is placed on top. If you still decide to stain, then for this you can use a paint composition or alkyd enamel, which has water-repellent characteristics.
Chipboard moisture-proof sheet pile for the floor can also be used as an independent coating, if you need a budget solution.