The floor in the apartment is the pride of the owners, as its appearance indicates the cleanliness of the room. When the floors are outdated, you no longer like it, they creak and bend, you notice scratches, stains or dents on them, you can easily exchange them for new, better looking and better ones. Today there are a huge number of types of floors, one of them is laminate.
Floor repair in the apartment
Typically, floor replacement is carried out in three stages, but the first can be skipped. So, the first stage is the dismantling of the current coating, the second is the preparation of the base, and then the leveling of the floor surface, the last stage is the flooring of the new coating.
Preparing for floor repairs
First you need to take out all the furniture. It is better not to take out the furniture in the corridor, because this will make the removal of garbage after removing the old floor, making new materials uncomfortable. Things in the corridor can also suffer if they are accidentally hit by skid skirtings or boards.
Repairing the floor in an apartment is a very clean operation, it does not create a lot of dust or dirt, such as leveling walls and redevelopment. But it is recommended to cover things that are close to the place of work.
Substrate and flooring selection
There are two main options for the base of the floor: wooden and adjustable logs. Although wooden logs are a cheaper option in terms of materials, they are more labor intensive and, most importantly, less accurate in alignment.
To increase the accuracy of floor alignment and speed up the process, self-adjusting lags are used. Although this option is somewhat more expensive.
Important criteria in choosing a new coating are price, quality, appearance, durability. Parquet is considered a classic option. Laminate on a wooden floor is easy to install, it is inexpensive, has different durability and a variety of colors. Linoleum is easy to install and maintain. The carpet is suitable for floors in bedrooms, but it is inconvenient to clean, and the tile is used in rooms where moisture resistance is important, it has a huge selection of shapes and colors.
Repair of wooden floors
Repairing wooden floors is not as complicated as it seems at first. Their standard flaws are cracks, creaking and “playing” of boards. Such defects are easy to repair and the coating can last even longer.
Consider other existing repair options. In fact, there are only three alternatives: adjustable floors, cement and dry screed. These types of repairs can also be done on their own, but this can already be attributed to major repairs. After all, you have to dismantle the current wooden floor, remodel the foundation for a new one.
Is it worth it to resort to overhaul, only you decide. Note that when the boards are not broken and not rotten, and among the main defects can be called a creak, crevices and a "game" of boards, then you can make a simplified repair. You can still strengthen and level the old wooden floor, and then without any problems put a new coating.
The main defects of wooden floors, their repair
Consider the defects of the wooden floor carefully.
Rotten or broken boards should be replaced. To do this, remove the problem board, instead, put a new one of the same thickness.
The creaking of the floor is usually caused by the fact that the boards gradually dry up, therefore, the connection of the boards with the lags is weakened. As a result, the board will rub against other boards and nails, which, on the contrary, should be fixed, so the floor starts to creak unpleasantly. You can get rid of this defect as follows: you need to find out the exact location of the problem, fix the problem boards using self-tapping screws. If the old nail sways, it will come out of the board over time, which means that it should be removed, otherwise it can be left.
Another defect is the "game" of sex. It is impossible to lay a new coating on such a basis, because it will soon fail. This is why this defect must be fixed immediately. There are two reasons for this behavior of the sexes: these are loose logs or rotten boards. In the first case, you can make a simple repair, namely, replace damaged boards. In another case, you need to strengthen the old lags. Under the lags there is usually a blocking plate to which we will attach the lags themselves. To determine their location, we look for places to attach the boards, and logs pass under them. Then we drill a hole through the floor boards and fix the lag with a frame anchor. So that the fasteners do not protrude above the surface, you need to drill a hole with a drill of a slightly larger diameter.
If you do not plan to lay the finish coating on the wooden floor, it is not advisable to have a nail head on the surface, so you must first remove the board, then strengthen the lag, and then put the board back in place.
How to align wooden floors with laminate flooring?
Gradually, wooden floors become so unpresentable that it’s even scary to walk on them. Then comes the idea to change coverage. This is a wonderful idea, but it is not always possible to remove all old boards, remake the screed, then put a new floor on the converted surface. In this situation, you are faced with the question: how to level wooden floors to laminate? The answer is much simpler than you think. It is possible to level the wooden floor with plywood, which will hide irregularities, eliminate the creak of the boards.
One of the most difficult ways to level the floor is scraping with a grinding or scraping machine. First you need to hammer in all the nails with which the floorboards are nailed to the lags. After all, if you miss at least one nail, the knives of the grinder run up against it, you will have to remove the knives and re-grind them, then reconfigure the grinder. In addition, a certain difficulty is the processing of the floor in the corners, in places that are adjacent to the wall.
In summer and winter, the humidity in the house is radically different, so floor boards, although processed, still exhibit some properties of wood. Over time, the new floor will be covered with tubercles and dents. How to align wooden floors under the laminate and not face a similar problem? To do this, often use flat materials, such as plywood.
Leveling the floor with plywood
The unique characteristics of the material make it a suitable option for leveling the floor. Plywood bends well, does not form cracks, its sheets are large, and this is convenient for work. It also has the same strength in all directions, does not break or break, and is convenient in transportation. Plywood has a layered structure, this makes it durable. When leveling floors, one must take into account both the thickness of the material and its grade, brand, and degree of processing.
Plywood has the following advantages:
- simple processing and installation technology;
- high-quality grinding;
- light weight;
- good strength and hardness;
- moisture resistant and water resistant;
- odorless.
Preparing for floor leveling
When you lay down the plywood and cover it with a new coating, access to communications that are under the floor will be completely absent. Therefore, when starting repair, check the serviceability of cables and pipes.
Sheets of plywood prepared for repair should be kept for several days indoors and then proceed to flooring. The thickness of plywood directly depends on the finish. Aligning the floor under the laminate, it is worth taking a material whose thickness is 10 mm.
During alignment, you must adhere to two rules:
- approximately 10 mm should be left between the material and the wall;
- between the sheets you need to leave a distance of 2 mm.
Floor Leveling Pattern
Let's start laying the plywood.
First you need to install the beacons, distributing them on the surface so that 30x30 cm squares are formed. Then lay the logs. We take strips of plywood 3 cm wide and attach to the floor using screws or adhesives. At the next stage, cut the plywood into pieces 60x60 cm. Poor-quality material must be discarded. Lay these squares so that the docking falls on the logs. Cut off excess edges. Next, fix the squares with screws. The laying is over.
Subsequent processing depends on the finish. Under the laminate on the wooden floor you have to lay the backing. After leveling with plywood, a smooth, very strong surface is obtained, ready for further use. Plywood does not require any special skills, so it can be used by beginners.
You learned how to level wooden floors to laminate flooring. But this is only the beginning of the work.
Laying laminate flooring
Laminate is a durable coating, because it does not deteriorate from water and dirt, but its weak point is the castle. Because of it, there are restrictions on the laying of the base. The main requirement for the foundation is rigidity. While walking on a laminate, which was not laid on a rigid foundation, he begins to "play." Then the main load is borne by the castle itself. It is made of sawdust, so it gradually loses strength, respectively, the connection also loses strength. It is easy to predict the following problems: the boards diverge, cracks form, moisture and dirt get into them. I have to change the laminate.
The laminate board has ridges on the side faces, and on the opposite - grooves. There are several types of structures of these elements, from simple to complex ("lock"). For the first case, you need glue, which will be smeared on the groove. For the second case, the entire installation can be done by hand.
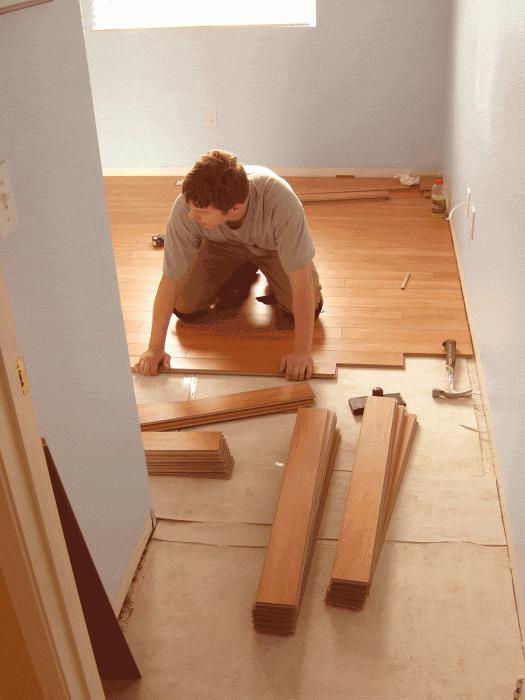
Layout Layout
Flooring sheets start from the wall opposite the door. Installation should be done perpendicular to the window, then the joints will not be noticeable. Subsequent laying of the laminate - the connection of the panels together. Be sure to insert spacer wedges between the laminate row and the wall so that the coating does not deform during use. At the end of the first row, you may need to trim the panels by turning the panel face down, taking measurements and cutting off the excess part. The piece that remains after the first row is immediately laid in the next row, thereby obtaining a “chess” pattern. Note that the second row must be folded separately from the first, and then combine it with the previous one. By a similar principle, the remaining rows are stacked. The last row is the most difficult, because the entire panel may not fit. Then you have to cut off the unnecessary part. Upon completion of laying the laminate, it is the turn to install the skirting board. According to this scheme, you can lay the laminate on the wooden floor yourself.