Modern decoration is carried out using a huge variety of popular materials. These include MDF wall panels. Such facing attracts the buyer with a beautiful appearance, environmental cleanliness and affordable cost. Cladding walls with MDF panels is a fairly simple process, which allows us to solve this problem even without the involvement of experienced craftsmen. How to do this job right? What tools do you need to have on hand? What properties does this finish have? All this will be discussed in this article.
MDF panels: what are they and where are they used
MDF panels are sheet material that is made from waste from wood processing enterprises. Its feature is that in its composition it does not contain harmful resins and varnishes. In the process of manufacturing plates, wooden fibers are subjected to high pressure and heat treatment, as a result of which they are bonded. The final product has many colors, different sizes and texture.
Like all wood-shaving products, they are afraid of changes in temperature and humidity, therefore, wall cladding with MDF panels is not performed outdoors. But as an internal finish, this material is used quite actively, due to a number of its positive characteristics.
Material advantages
The front side of the panel is coated with colored paper and laminated, as a result of which the coating is diverse and resistant to abrasion. The material is characterized by high strength and unsurpassed aesthetic performance.
Wall cladding with MDF panels (the basics of which we will discuss below) has several advantages. These include:
- Finishing speed . The cladding is assembled very quickly due to the large size and lightness of the material.
- Increased aesthetic characteristics of the room . Under the surface of the plates you can hide the wires, insulation materials and various communications.
- Ease of processing. Products are trimmed with a hand or electric saw, so cladding the walls with MDF panels with your own hands does not cause difficulties.
- Beautiful exterior . The lining forms a smooth and even coating, which can have a variety of colors and various textures.
- No requirements for the surface to be trimmed . The walls on which the panels will be mounted do not need to be aligned.
- The lightness of the material. The finished cladding does not exert a large load on the walls, since the panels are quite light. The same quality allows you to remove and replace failed elements without difficulty.
Now we turn directly to how the wall sheathing is done with MDF panels (do-it-yourselfers) and what is needed for this.
Work Tools
As mentioned earlier, the installation of such a cladding is not difficult and does not require a complex and expensive tool. Nevertheless, the set of simple devices in the process of work should be at hand of the master. These include:
- building level;
- plumb line;
- drill or perforator;
- screwdriver;
- measuring tool;
- electric jigsaw;
- a set of fasteners (screws);
- construction pencil;
- special fasteners for panels (clamps);
- plastic connecting elements (for the design of seams between different types of cladding);
- protective devices (glasses, gloves);
- locksmith square.
You can supplement this list with the basic tools available in each house. In the process of internal wall sheathing with MDF panels, an ordinary or Phillips screwdriver and pliers can also be useful. The list of necessary materials depends on what type of installation will be selected. The panels themselves are purchased according to the square of the room (with a margin of 10-15%).
Mounting Features
Using two main methods, wall sheathing with MDF panels is performed. Instruction manual according to the work states that the material is fixed on the crate, which can be made in two ways - from a metal profile or wooden planks.
Before assembling the frame, special attention should be paid to the condition of the walls. You do not need to align them, but to eliminate mold and clean off the old falling off finish - it is simply necessary. The loose bases are strengthened with a special composition. When the surface is clean enough, it is treated with a primer, after which they begin to assemble the crate.
When choosing material for the frame, it should be remembered that the installation of wooden elements will be much simpler, but in damp rooms such a design will not last long. Before starting the inner wall cladding with MDF panels (with your own hands), this design must be treated with compounds from rot and mold.
To assemble the metal frame, you will need a little more fixing screws and hardware. For such purposes, CD and UD profiles having a U-shape are used.
Wall covering with MDF panels: installation of insulation
It is not necessary to install insulation material (under the panels). But its presence will noticeably warm the room and prevent the accumulation of condensate under the lining. The expediency of this process is determined by the owner of the room.
As a heater in such situations, polystyrene foam is most often used. It is attached to the base with mounting foam. You can use mineral wool. It is fixed to the walls with self-tapping screws and coated with vapor barrier materials. After installing the insulation, they begin to install the lattice base for the panels.
It should be noted right away that in some cases the panels can be mounted directly on the walls. Such work is carried out in situations where the room is very small, and every centimeter counts. In this case, the walls are pre-aligned, and the panels are mounted on liquid nails. This method of fixing the cladding is extremely rare, so we will pay more attention to the installation of the lathing.
Mounting a wooden frame
If the wall sheathing with MDF panels is carried out using wooden battens, the technology for mounting the frame is as follows:
- Installation of vertical rails . Wooden racks are located in all corners of the room, as well as on both sides of the window and doorways. The correctness of their installation is checked using a plumb line.
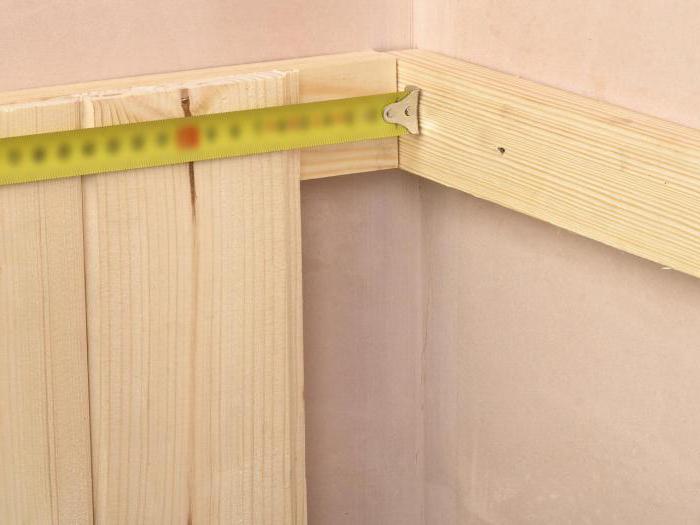
- Fixation of vertical elements . On the surface of each wooden plank installed in the corner, holes for fasteners are marked. Marks are made in increments of 50-70 cm. Holes are drilled both in the bar itself and in the base.
- Installation of horizontal elements . On top of the installed rails horizontal strips are fixed. They are attached in increments that are equal to the distance between the uprights. With the help of slats, slopes and horizontal planes of door and window openings are formed, for subsequent wall sheathing with MDF panels. In these places, the step of the strips may not correspond to the previously set.
Mounting the frame from a metal profile
Now we will consider how the metal crate is mounted before the wall sheathing with MDF panels. The step-by-step instruction of this process is similar to the rules for assembling a wood frame.
Here also in the corners of the room are installed vertical bars. The screws are screwed at a distance of 50-70 cm. The width of the fastener completely depends on the quality of the base. If the wall is strong, then the diameter of the self-tapping screw can be minimal. The length of the fasteners should be selected so that it is 30-70 centimeters deepened into the base. Between each other profiles are fastened with small screws.
Cross bars are installed in the same way. Excess parts of the profile are cut off by a grinder or circular saw.
Technology of installation of MDF panels
When the preparatory work is completed and all the trash is taken out of the room, you can proceed to wall cladding with MDF panels. Do-it-yourself installation is very simple if no mistakes were made in the previous steps.
For proper work, it is enough to follow the following recommendations:
- Installation must begin from the corner of the room. After making the necessary measurements, cut off the MDF panel of the desired length. It is necessary to cut off the comb from it, for a tight fit to the corner. This work must be done with an electric jigsaw or a hand saw.
- Please note that the size of the lining strip should be 5-7 mm smaller than the height of the room. This is necessary so that the finish does not distort (in case of differences in the humidity level in the room).
- The first element is installed in the corner, and on the other side, the clamp is fixed. Its fastening is carried out using small studs or screws. It is very important that there is one clamp on one element of the crate. Otherwise, the finish will not hold firmly. If nails are used instead of special fasteners, they just need to be driven into the crate through the groove of the panel.
- Next, a second panel is installed. It is inserted into the groove of the previous finishing element and the connection is checked for density along the entire length of the joint. If the work is done correctly, then install the fasteners through the grooves of the second panel. With this method, the entire wall is sheathed to the corner.
- To equip sections of the adjoining walls, a corner from MDF of the appropriate size is cut out, bent to the right side and smeared with mounting adhesive from the back. In a bent form, he is pressed against the wall. Thus, all the corners in the room are finished.
At the final stage, they begin to install the floor plinth. Here you can use both wooden and plastic products. The color and texture of the element are selected depending on the style of room design.
Arrangement of slopes from MDF
Wall cladding with MDF panels (a photo of which you will find in our article) cannot be completed without arranging slopes. Moreover, very often door openings are finished with just this material, despite the fact that another cladding is located on the walls. Since this topic is very relevant today, we decided not to leave this process unattended and consider in detail the procedure for performing these works.
The technology for arranging slopes from MDF is as follows:
- First you need to determine the type of arrangement of the panels. They can be fixed both along and across the opening. First of all, the slope width affects this. Too narrow a base to shear across will be very difficult and impractical.
- Next, the surface is leveled. This is done using plaster mortar. If the base is severely curved, it is best to additionally install beacons. They are made from a composition for plastering walls. The mixture is applied to the surface with a spatula, and its excess is removed by rule or level.
- After the surface has dried (after 2-3 days), it is treated with a primer and antiseptic additives. This is done because the slopes of the front doors and windows are often exposed to moisture, which is fraught with the development of mold.
- If there are any defects on the surface of the slope (mounting foam, irregularities), then they must be removed. When fixing the panel, it is necessary to ensure the most tight fit of the material to the base.
- Then proceed to cutting the panels of the desired size. Before fixing, all elements must be attached to the area being trimmed so that the cladding does not protrude beyond the plane of the wall. Cutting is done with a hacksaw.
- A special adhesive is applied to the back of the cladding. For this purpose, you can use liquid nails and polyurethane foam. The composition is applied in zigzag patterns, which ensures its uniform distribution between the wall and the panel.
- After installing the panel, the correctness of its location is checked by the level. It is very important that no mistakes are made at this stage. In the presence of defects, the lining may skew, which will lead to its complete failure. You can move and align the panels until the glue has seized. Unwanted gaps between the door and the slope are filled with silicone sealant.
To summarize
So we examined how the wall sheathing is performed with MDF panels (instructions). With your own hands, it’s not difficult to complete these works, as you can see by reading the detailed technology.
In areas of complex configuration (such as corners and slopes), this finish is quite simple. A large assortment of corners and skirting boards greatly simplifies the arrangement of such zones, since the material bends well and adheres tightly to the base.
From the foregoing, it follows that the decoration of slopes from MDF panels is an excellent opportunity to quickly and inexpensively transform any room. Moreover, all the work from start to finish can be done independently. All you need for this is a detailed instruction and a few tools.
That’s all with us. We wish you a good mood and easy repair. We hope our article will help you with this!