Suspension is that part of the car that most often undergoes wear on our roads. Bushes, stabilizer bushings, levers and shock absorbers are usually associated with the chassis. But today we are not talking about them. In this article, we will pay attention to the wheel bearing. This is an integral element in every car, regardless of what type of suspension it is used on. What are the symptoms of this part malfunctioning and how are the wheel bearings replaced? We will find out all this right now.
Signs
How to determine if a car needs a hub bearing replacement? Everything is very simple. It is necessary to make a small test drive on the road with long bends. Accelerating to a speed of 40 or more kilometers per hour, when entering a turn you will notice a characteristic hum (like an electric train), which is heard in one of the parts of the cabin. How to determine exactly on which side the bearing is worn? If the hum comes from the right side when turning the steering wheel to the left, it means that the bearing of the right wheel has become unusable. The higher the load on this element (and when turning it increases several times), the more this part will buzz. Thus, it is possible to determine whether a VAZ car needs a hub bearing replacement without diagnostic stands.
Please note that if a failure is detected, do not hesitate to fix the problem. A crumbling bearing can simply jam in one moment. At speed, the wheel locks tightly, and the driver suddenly loses control.
Instruments
To successfully replace the hub bearing, we need to prepare:
- Jack and wheel wrench.
- New bearing. Please note: if your car is equipped with ABS, then the element must be designed to work with ABS. Do not put other bearings. This is often found on budget foreign cars. They are not always equipped with an ABS system, which is why the bearings are different (for example, “Ford Focus”).
- New nut and circlips.
- Puller.
- Screwdriver
- Round-nose pliers (can be useful to remove the stopper).
- Greasing ("Litol-24").
- A vise and a pipe length of one meter (will serve as a lever).
Work should be carried out in an indoor and well-lit room.
About puller
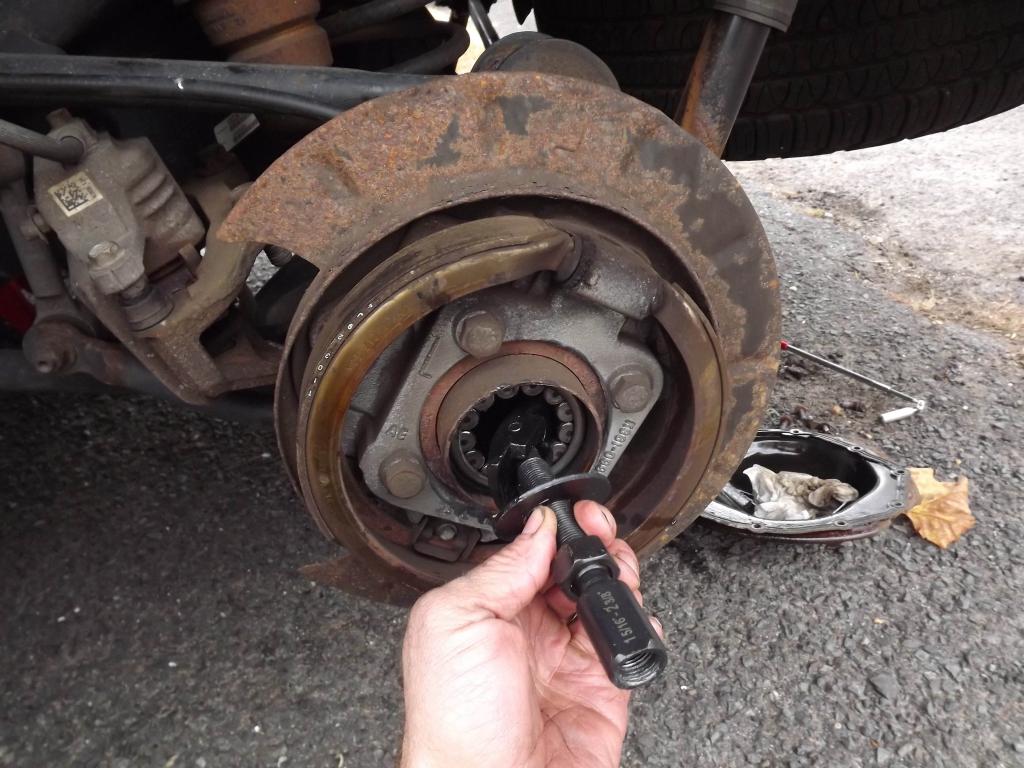
Before starting work, you should consider how best to remove this element. Experts recommend performing this operation with a puller. Often, these devices are universal and suitable for different brands of cars. The cost of such a tool is relatively small (up to a thousand rubles), but it will greatly facilitate the work. Using a puller, you can carefully dismantle the bearing without damaging critical components in the machine. You should not use brute force in your work, much less use a hammer with a punch.
The puller is based on a steel rod, which is connected to several metal legs (usually two or three) for gripping. Feet can be extended to take out an element. Such pullers are mechanical, but at professional service stations more advanced hydraulic analogues are used. Also note that replacing the front hub and rear bearing has its own differences. Therefore, we consider each side individually.
Front Wheel Bearing Replacement
So, let's get to work. The operation should be performed on a flat, hard and dry surface.
At the same time, the car itself must be on the hand brake and in gear (for reliability you can put wheel chocks). After that, using a slotted screwdriver, remove the bearing cap. Next, we tear off the hub nut, but do not completely unscrew it.
What needs to be done next?
Since we need to access the hub, we tear off the disk bolts. Next, jack up the front of the car on the right side and take out the wheel. After that, unscrew the hub wheel nut completely. Then the previously acquired puller is used. We fix it in place with its paws and begin to gently press out the old bearing. It is important to inspect the seat after dismantling it. Often the result of bearing wear is the presence of water and dirt, which causes increased wear and corrosion. In order for the new element to last as long as possible, the seat should be completely cleaned of these components. Any solvent and even gasoline will help us here. Next, apply new grease to the area and install the bearing in the hub with a vise. It is important to prevent distortion. The element should stand as straight as possible. At the end, the bearing is fixed on the axis with a thrust washer and nut. To avoid play, tighten the hub nut. But be careful - you need to tighten with a certain effort. This is best done with a torque wrench. The tightening torque for each vehicle is individual and is specified in the instruction manual.
At the end of the work, we replace the wheel and make a test run. It is important to listen to the operation of the bearing. It should not emit noises and vibrations. If all is well, the work can be considered successfully completed.
Rear hub bearing replacement
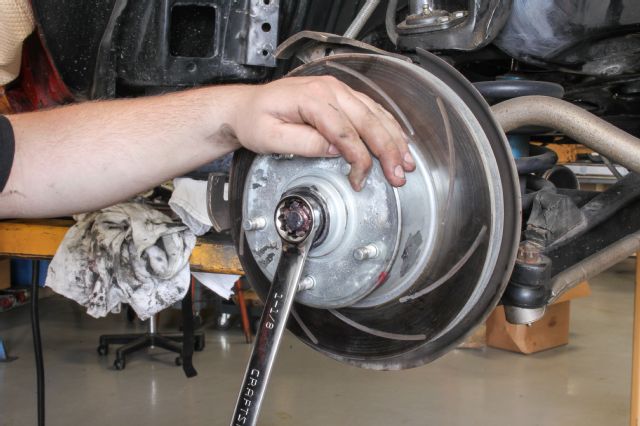
As experience shows, this operation is performed a little easier than in the case of the front. So how is the rear hub bearing replaced ? At the first stage, we need to loosen the hub nut. Similarly, we install the car in first gear (but we do not apply the handbrake). Then we put the car on a jack, having previously torn off the bolts on the disk itself. Then we take the wheel out and use a slotted screwdriver to remove the protective cap.
Then, using the hexagon, unscrew the pins that hold the brake drum. Remove the cover. Pads themselves are not necessary to dismantle. If the pins do not loosen, you can use the grease "liquid key". Next, unscrew the hub nut and remove the washer. Then we take the puller in our hands. Focusing, we install the device on the axis. With the help of paws we catch on the back of the hub. Next, tighten the threaded connection with a key. Thus, the hub can be easily removed and a bearing ring with a cage and balls will remain inside. Pull off the inner ring from the axle shaft with a bearing. Next, we press out the old parts, first removing the stopper with pliers.
How to take out the old element?
At the next stage, we remove the protective casing and clamp the hub in a vice. Gently knock down the lid. The outer cage can be pressed out by picking up the head of the desired diameter (usually about 60 millimeters). In order for the bearing to come out on the other hand, spacers can be additionally used.
Installation
How is the hub bearing replaced next? At the very beginning of work, it is important to clean the seat. As with replacing the front wheel hub bearing, you can use gasoline or white spirit here. Having completely cleaned the area of dirt, rust and dust, we proceed to press fitting.
It is important to observe the smoothness of the effort and to ensure that the element sits without distortions. Tighten the part in tees and extrude until it stops until the element completely enters the body. For convenience, you can use the old bearing race. It is ideally suited for its inner diameter and will not allow distortions.
After that, install the hub in the reverse order, tighten the nut, put the drum and the wheel in place. Do not forget to install a protective cap. This is an important element that protects the bearing from contact with destructive components such as water and dust. After replacing the hub bearing, it is recommended to make a test drive, preferably at a speed of more than 60 kilometers per hour. So we will determine how smoothly the bearing has entered the housing and whether there are any extraneous vibrations.
Recommendations
When replacing the front hub bearing (whether it is a VAZ or a foreign car, it does not matter), it is important to observe the correct tightening of the nut. As we said earlier, this can be done with a torque wrench. However, not everyone has it. How then to be? There is an exit.
In the absence of such a key, it is necessary to tighten the nut all the way. And then it needs to be loosened by 60 degrees. After replacing the front wheel hub bearing, rotate the wheel and check for excess noise or rattle. If there are any signs, recommends loosening the nut. But you need to loosen so as to eliminate the play of the wheel itself. Otherwise, at speed, it can cause crazy vibrations that are transmitted to the steering wheel and to the entire body. But a slight backlash is still allowed. Why? It's simple: if the bearing is tightly tightened, it will overheat. Because of this, the lubricant inside it is heated. As a result, the bearing is no longer lubricated and prematurely fails. Also, experts recommend putting the protective cap on the sealant.