The most important part in manufacturing is making a do-it-yourself blueprint for a dump on an ATV. Installation and assembly of the device is quite simple, the main thing is not to make a mistake when drawing up the scheme.
General description of the mechanism
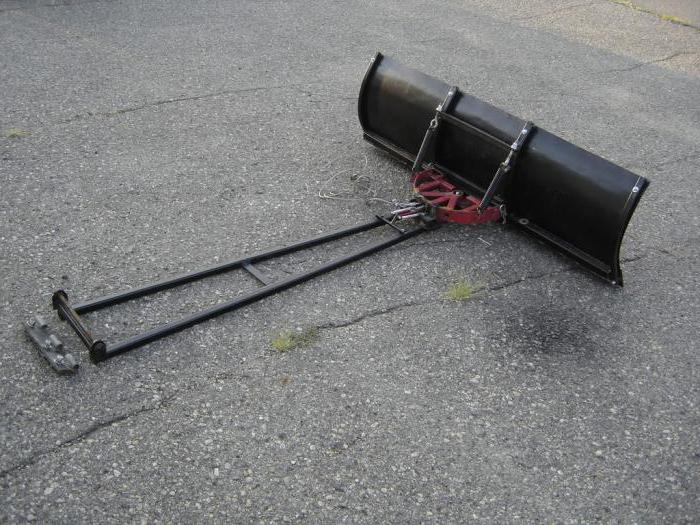
The design of any blade will consist of three main components. The first part is the snow shovel itself, the second element is the device that will be responsible for changing the angle of the shovel, the last necessary thing is the coupling assembly that is installed on the frame, it is the main component connecting the shovel and the ATV. In order to successfully assemble such a device, it is necessary to draw up a clear drawing for the blade of the ATV with your own hands.
In order to maximize the service life of such a structure, a shock-absorbing device is most often attached to it. The suspension and the snow shovel will constantly collide with obstacles, and therefore a shock absorber is necessary to level out vibration and collision force as much as possible.
Blade for ATV
ATVs have two very important parameters - this is high draft power, as well as good maneuverability. There are powerful lugs. These three properties together make the device an almost perfect fighter with snow.
So, regardless of whether the structure is manufactured independently or if it is already ready, it is important to decide on 4 points.
- Model installation kit. If you choose a purchased option, then you need to be based on the model of the existing ATV, since this device for installing the blade will be attached to the frame of the machine. If it is assembled by hand, then it is necessary to draw up the correct drawing of the blade for an ATV with your own hands under the existing model. Build on the characteristics of the unit.
- Next, the selection is made of a finished subframe or material for it.
- Selection of a dump (shovel) for snow removal.
- The choice of the lifting mechanism for the blade.
DIY assembly
In order to make this device, you will need the following materials:
- welding machine;
- angle grinder;
- drill and tape measure.
There are many options for assembling and installing such a device, we will consider one specific one as an example.
- Naturally, the first thing to do is to draw a drawing with your own hands for the blade of the ATV, according to which the assembly will be carried out.
- Now you can start working with the material. The first thing you need is metal. Well, if the farm has an empty and unnecessary metal barrel of 200 liters. This capacity is cut into three parts. This will be the future shovel for snow removal.
- You will also need the ability to work with a welding machine, since you need to weld two workpieces together along a contour. The width of the resulting web should be about 3 mm. This will be enough for a homemade dump on an ATV.
- The third step is to reinforce the bottom of the structure with a knife. For these purposes, you will need a strip of metal with a thickness of 5 mm, and its length should correspond to the width of the scraper. After that, you need to drill a hole with a diameter of 6-7 mm. The distance between the holes should be from 11 to 13 cm. In this way, a place is prepared for mounting a safety strip of rubber material.
Addition
It is worth noting that in the manufacture of a snow blade for an ATV, trying to assemble a subframe and a mounting frame with your own hands is a bad idea. Self-assembly of these parts is too complicated. In addition, the adhesion of the blade and the ATV itself will depend on them. It is strongly recommended that you purchase these two designs in the store, as self-production will take a huge amount of time, which will take to accurately measure each part. Also, to "make friends" between a blade and a homemade frame will be very difficult.
Blade Installation
In addition, the dump for snow on an ATV needs to be assembled, it must also be correctly installed. It is important to note here that the installation can be of two types - central or frontal. The front installation implies traction with the front frame, it is intended for those machines that have a fairly small ground clearance. The central connection is characterized by the fact that the rigidity of the lever frame is greatly increased, and its stability during snow removal is also improved.
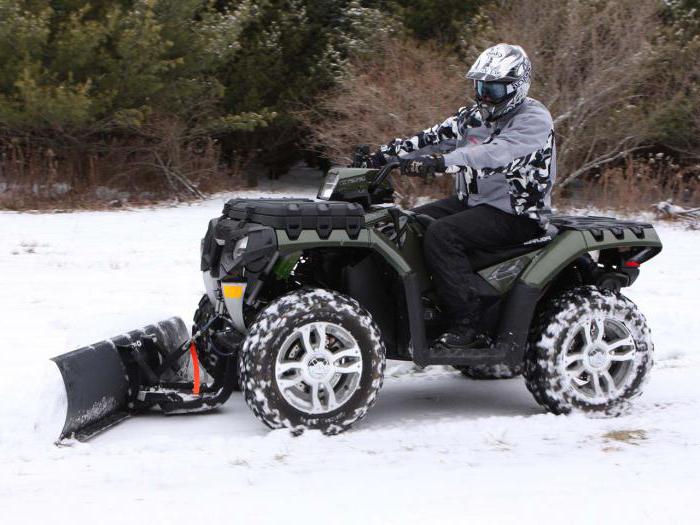
It is also worth noting that the construction of the dumps is designed in such a way as not to reduce patency and not to reduce the ride height of the unit. This is very important to consider when assembling the device yourself. It is important and correctly to calculate the capabilities of the ATV in terms of power and width of the shovel, since these two parameters are directly related. The width of the snow removal element is most often in the region from 125 to 150 cm. The more powerful the engine of the machine, the greater the width, and vice versa.
Nuances and cost
The last thing to add to the question of how to make a blade for an ATV is its application. A design with a homemade hinged shovel, can only be effectively used to remove loose snow. The height of the cover should not exceed half a meter. To use an ATV with a snow blade to remove packed snowdrifts does not work.
It is also worth paying attention to the issue of savings. Good models of factory-made snow dumps cost an average of 60,000 thousand rubles. It is worth assembling the device yourself only if the costs are less than the specified amount.