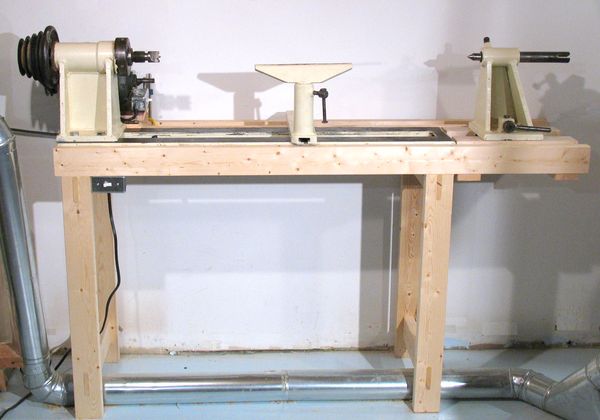
Such a device will be a great helper if you need to make something yourself. A photo of the milling table can be found in the article. There are several options for the manufacture of this equipment on its own, however, to consider all of them does not make sense, since the main function does not change.
Why is it needed?
It’s worth starting with the fact that the presence of such a thing as a milling table significantly increases labor productivity. In addition, such a device will greatly increase the efficiency of the manual router, if any. It is also worth noting that ready-made models are also sold, however, their purchase is quite disadvantageous from a financial point of view. The time required to assemble the milling table with your own hands is small, and the financial costs are negligible.
The use of such a device for processing wood can help the home foreman to produce blanks with the same quality as they do in special workshops, on professional equipment. It is also worth noting that the presence of the device will help to process not only wood. It will also become possible to process such material as particleboard, plastic, MDF and others. Making a milling table with your own hands will not only save a large amount of financial resources, but also make it possible to perform operations such as making grooves and slots, etc.
How to get started
If there is such a desire, then you can assemble such a table from a regular workbench, however, it is still recommended to use a separate special design for this. There is a reasoned explanation for this. During the operation of the milling cutter, a strong vibration is created, and therefore the bed on which the device will be fixed must have high stability and reliability in order to ensure a safe working process.
In order to fix the working device to the countertop of the milling table, it is necessary to use such a thing as a mounting plate. It should be distinguished by a high rate of strength, as well as reliability. However, if there is no such plate, then it is allowed to use certain pressure plates that will hold the cutter. As for the manufacture of the plate, the starting material can be sheet metal, durable plywood or textolite.
It is important to note that on most models of milling cutters there is a sole on which there are threaded holes, and it is they that are designed to connect the cutter, tabletop and plate to each other. However, if it happens that such holes are not found, then it is quite possible to cut them yourself, and using a special tool to cut the thread inside.
Device design
The design of the milling table is constructed in such a way that the clamping devices or the mounting plate should be located on the same level with the tabletop. To successfully assemble the item, you need to drill several holes in the plate. Some of them are used to fix the element to the tabletop, others are used to connect this part with the sole of the router. Self-tapping screws and screws are usually used for fixing. The main requirement for these elements is the presence of a countersunk head.
There are several additional elements that will improve the overall functionality of the device. Firstly, the table for the milling machine can be equipped with a button on and off the device, as well as make it in the form of a mushroom, which will increase the safety of work. Secondly, in order to simplify the work of such a home-made device, it is possible to fix a metal ruler of a suitable length on the table surface.
It is also recommended, before moving on to the practical part, to determine the location of the machine, as well as its purpose. This can be an aggregate milling cutter, which will serve as an extension of an existing machine, from its side saw part. Or maybe a small desktop machine, which is a full-fledged stationary equipment.
Simplest model
In fact, you can design a universal milling table quite quickly. In order to successfully implement the plan, even a regular desktop, as well as some materials, including a chipboard sheet, will do. All the basic guiding elements of the future design will be fixed on it. As a guide, an ordinary board with a small thickness can be used. It will also be attached to the countertop with a few bolts. Such a board will be used as a parallel emphasis for the table. If necessary, then on the opposite side, you can attach a similar board, which will serve as a limit stop.
In order to mount the cutter in the tabletop from chipboard, it is necessary to make a suitable hole in it. Two clamps will be used to fix the cutter on the table. After all these elements will be placed in their places and well fixed, we can assume that the manufacture of the simplest model of a home-made milling table is completed. To operate such a table model was more convenient, you can additionally equip it with some devices, for example, simple clamps for a milling machine.
It is, of course, worth noting that there are certain questions about the strength of such a design, but at the same time, the cost of assembling the equipment will be very low, and the simplest functionality will be enough for good processing.
Assembly of the main elements
The bed and countertop are the two main elements that are necessary when assembling reliable equipment. The basic requirements for the bed are precisely high stability and reliability, because the main part of the load falls on this particular part. If we talk about design features, then they are quite simple - this is a frame that has supports, and the tabletop is fixed on it. As a starting material for assembly, you can use wood, particleboard, MDF. You can use metal profiles if you weld them together. In order to move to the practical part, it is recommended to draw a drawing indicating the dimensions of the milling table. As for the dimensions of the machine, they will depend on what blanks are planned to be processed in the future, and therefore each master will have an individual drawing.
The lower part of the bed, which will be the front, is deepened by 100-200 mm. This is to make the operator comfortable to stand. The average dimensions for the bed are approximately the following: 900x500x1500 mm (height, depth, width). The most significant characteristic in this case will be height. According to ergonomic requirements, this parameter should be 850-900 mm. This is if it is planned to work behind such a machine while standing. However, it is recommended that you make the legs height-adjustable. This will help to compensate for possible unevenness of the floor, as well as adjust the height of the machine if necessary. You can also make a rotary table for milling equipment. To do this is quite simple and you just need to add the wheels that are fixed on the legs.
As an inexpensive and reliable source material, you can use the countertop from the kitchen table. Most often, a chipboard sheet with a thickness of 26 or 36 mm is used for its production. In addition, it is usually additionally coated with wear-resistant plastic. This coating will provide excellent glide for the workpiece, and a good chipboard thickness will drown out vibration from work. When assembling a milling table on wood with your own hands, the minimum thickness of the countertop should be 16 mm.
Work with the plate
Due to the fact that the tabletop for the device must have a high thickness, the mounting plate, on the contrary, must be thin. This ratio will help to effectively use the overhang of the cutting tool. However, it must be remembered that even with a minimum thickness, reliability and strength must be at a high level.
For this reason, this element should be made either of metal or of a material that is not inferior in strength to metal - textolite. As for the thickness of the PCB, it should be from 4 to 8 mm. From the selected raw materials, it is necessary to cut a rectangular part, in the center of which there should be a hole. The dimensions of the hole are equal to the diameter of the sole of the cutter.
The holes that will be used to fix the plate to the table should be located at all four corners. As mentioned earlier, the plate, the sole of the router and the table itself are interconnected by the holes that are available in each part.
Table assembly
How to make a milling table? Work at this stage begins with the fact that it is necessary to fix the countertop to an already finished bed. The plate is applied to the countertop exactly to the place where it should be according to the drawings. After that, the element is drawn around the contour with a pencil. This is done so that you can choose a place for the recess in the circuit for the plate. To create the desired recess, usually use a manual router with a nozzle diameter of 6-10 mm. This element should be made in such a way that when the plate lies in it, it is on the same level with the tabletop.
Since in order to make a recess for a milling table on a tree, a round cutter is used and there are no right angles, then on the plate it will be necessary to round off all right angles. Only after this part is securely fixed in the countertop, you can proceed to create a hole for the bottom of the router. It can be made using a straight cutter, the thickness of which should be greater than that of the plate.
The final stage of assembling a milling table with your own hands, a photo of which you already managed to consider, is the connection of all structural elements together. First you need to get the router on the bottom of the countertop, and then attach it to the plate. The next step is fixing the plate to the top of the countertop. For this, a self-tapping screw with a countersunk head is used, and it is immersed in pre-prepared holes. After all this is completed, you can proceed to the stage of attaching the countertop with the cutter and plate fixed to it to the base.
Top clip for device
This addition is not necessary, however, in order to make the operation of the entire milling table more convenient and safe, as well as to be able to process large workpieces, it is worthwhile to take care of the installation of the upper clamp. This device will be manufactured on the basis of a roller, and a drawing will also be required for it so as not to be mistaken during assembly.
Most often, a roller is used as the upper clip, the role of which is played by a ball bearing of the desired size. This device is mounted on a special mount that will allow the bearing to be fixed at any distance from the countertop. With the help of such a holding device with a roller, it will be possible to safely and reliably process the workpiece with almost any parameters.
Drive for equipment
Naturally, the necessary element will be the drive for the operation of the device. High performance and functionality of a home-made device is achieved only if it has an electric drive with good power. If you plan to use a wood processing machine with a shallow selection, then an electric motor with a power of 500 watts is suitable. However, there is a slight drawback, which is that such equipment can quite often be turned off.
For this reason, a powerful device is considered a good electric motor for the operation of improvised devices. In order to use home-made equipment with the same success as professional, it is recommended to choose power in the range from 1 to 2 kW. In addition, this will be enough to use any type of mill on the machine.
It is important to note here that not only power plays a key role, such a parameter as speed is also important. With a quantitative increase in this parameter, the quality of the cut will increase. It is also worth remembering that electric motors can be powered both from a 220 V network and from a voltage of 380 V. If there are no problems with connecting the first ones, then with a power supply from 380 V you will have to use a special connection scheme. Only the connection with the help of a “star” or “triangle” will enable such an engine to operate at 100% power and start smoothly. You can connect it to a conventional network, but in this case, approximately 30 to 50% of the total power of the electrical equipment is lost.
Security measures
Naturally, to work with such equipment, you need to worry about security. It is worth providing it at the assembly stage of the device itself. The first thing you need to do for this is to equip your homemade device with such a thing as a protective screen. How these screens are arranged can be seen in the photo of professional machine tools. A mandatory additional element should be a button-fungus. She is usually responsible for the emergency disconnection of equipment from the network. Such a fungus is usually located in the most easily accessible place, but the start button, on the contrary, is usually installed where the chance of its accidental pressing is practically absent.
In addition, it is recommended to take care of the presence of sufficiently good lighting in the place where the direct work will take place. If you often have to change the milling cutter, it is better to make an automatic or manual elevator that will lower and raise the milling cutter. Such an elevator makes using a makeshift machine not only more efficient, but also safer.
As for the general conclusions, it is safe to say that assembling a homemade table for a milling machine is not such a difficult task. All that is needed is to purchase all the necessary materials, to have all the necessary tools with you, to be able to use them, and to precisely follow the prepared drawings.