MikroTik routers are not in demand among Russian consumers for the reason that people experience some difficulties when setting up Mikrotik. Unfortunately, this Latvian invention is hardly amenable to any changes in its parameters. Even considering the fact that the device has long been sold in the territory of the Russian Federation, it occupies a small segment in the sales market, although its positive qualities will clearly satisfy many. The router shows a stable and well-coordinated work that attracts most owners. Moreover, a special operating system has been developed, which is necessary for excellent interaction between all parameters of the purchased router. Judging by the reviews, many customers for a year of working with a router did not even have to simply reboot the device for trouble-free functioning. From the article you can learn how to change the parameters of MikroTik. VLAN configuration is not as simple as it may seem, but it is not very difficult either.
Why are routers not so popular?
Unfortunately, the control panel of this device is quite complex, so for many "non-advanced" users, setting up the router will be a real test. That is why many people prefer routers that are much easier in this regard. Few people like to constantly call a master to their home in case of any problems. This not only takes time, but also requires certain investments. In the article, we will consider the nuances of setting up a router. It will allow with little effort, but in a short time to configure the device.
Beginning of work
You need to connect the MikroTik router to the network, turn it on, and run a console called winbox on the computer. You must go to the "Neighbors" section and find the device with which the owner plans to work. Connection may take a certain period of time. If the router is not located for too long, then it is allowed to use the "Update" function.
Next, the owner will see the poppy address of the router, it must be copied to the column "Connection with ...". There you can also notice the username and password fields. The latter must be left blank, but admin must be registered in the first. Next, click "Connect." The owner will see an information window that describes all the standard settings of MikroTik. VLAN configuration is a little later. If desired, the standard parameters can be deleted, many professionals advise doing so. This decision is due to the fact that, as a rule, the default parameters do not fit the requirements of the provider used.
If you pay attention to the ports in the settings, you will notice that the one that works directly with the router is written under the name "wan adapter".
The default settings are set to automatically receive settings from the provider. This happens when connecting like dhcp. If the provider uses a different view, then it will be necessary to change all the parameters to the necessary ones.
You must also pay attention to the address space, which automatically takes the following form: 192.168.88.0/24. It is best to edit this column, as the provider will advise. What is the reason for this? If the owner decides to change the router, then he will have to re-make all the settings, as there will immediately be problems with the network.
Reset
In order to reset all the settings, you must click on the option “Delete configuration”. After that, the MikroTik router will reboot. After a few minutes, you need to connect to it again.
If there was no opportunity or desire to delete the settings in advance, then you can roll back to the factory a little later. To accomplish this, it is necessary to select “System” in the terminal and after “Reset”. The owner will then see a special menu in which confirmation will be requested. After that, the device will reboot.
Firmware update
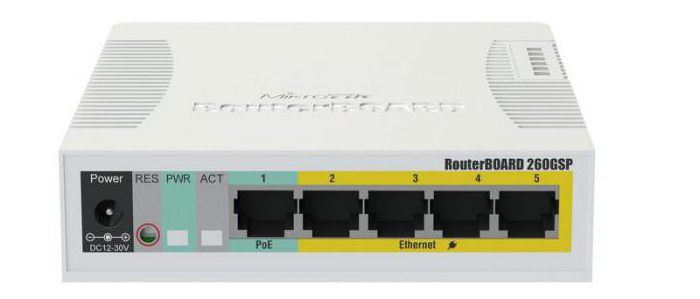
After the settings were reset to the factory settings, you need to update the firmware. In order to do this, you should go to the official website and download a specific file. For example, if we are talking about the MikroTik RB260GS router (VLAN configuration is quite easy), you need to pay attention to the mipsbe platform, you need to download the “Main package” to the computer. Using the winbox console, you should connect to the router, open two windows (with firmware and program), drag the file with the new firmware to the desired window. Next, just wait for the download and reboot the router. You will have to wait no more than 5 minutes. After you need to update the bootloader. This is done in the "System" menu, then - "Router". The owner needs to check the “Firmware” and “Firmware Upgrade” sections. If they differ, then you need to click on "Update".
If desired, you can check the software version in the "Packages" section. After the Internet is configured, the update is allowed to be carried out directly in the control panel without additional downloads for MikroTik. Configuring VLAN is really a fairly simple procedure, provided you have detailed instructions at hand.
Create switch
Routers of this manufacturer have a small feature. They do not have predefined port settings. Conventional and better known routers typically have port labels on the back. There should be written VLAN, WAN, etc. Thus, there is one port for working with the Internet, the rest are combined into a switch for more comfortable working with the device.
In the routers discussed in this article, all ports are equivalent. Any connector can be WAN type. You need to select one for the Internet, all the rest to connect to the network using a bridge. Next to them should be added to the MikroTik WiFi interface.
Next, the owner needs to choose a master port, they can be any of the available options. To do this, go to the console, which is the control panel. You need to visit the "Interface" section, in which ether2 is selected. Next - two times you need to click on this menu to enter the settings. There you need to find the "Master port". There, the owner will see a drop-down list in which the owner must select ether1. The setting should be saved for all ports except the one selected for the WAN. The letter S will appear opposite it.
Bridge Aggregation
Thus, 4 ports were combined into a switch. It remains only to connect them using the bridge for MikroTik with a WiFi interface. To do this, go to the "Bridge" menu, click the plus sign and save. All settings should be left standard.
The owner will notice that "bridge1" has appeared. Next, go to the “Ports” tab and again click on the plus symbol. Then you should select ether1 in the “Interface” and save the settings.
Next, the owner will restart the router, this is the standard procedure. You need to wait for the full download and connect. You need to go into the same section, click the plus symbol again and add wlan1 in the "Interface".
Static Address Setting
In order to configure the equipment and its static IP, you must connect to the router at the poppy address. Thanks to this, the user can assign any parameter that will provide access to the Internet. To make the settings, go to the IP section, then to “Addresses”. There you should click on the plus sign to create a MikroTik grid. VLAN configuration, as already understood, is carried out in a similar way. In "Addresses" you need to specify any subnet, you can find it from the provider. Often it has the form "192.168.9.1/24". In the "Interface" section, select bridge1. The Network field is optional, as it will be determined automatically.
Conclusion
In order to correctly configure MicroTic and have a stable Internet, you need to contact your provider. It will be difficult for a person to confuse anything, since all parameters will be predetermined in advance, and the owner will only need to enter them in manual mode. Difficulties may arise precisely at this point in the setup, however, you can always call the service center for clarification or open the instructions for the device. The main thing is to remember that the most difficult stages have already been completed.