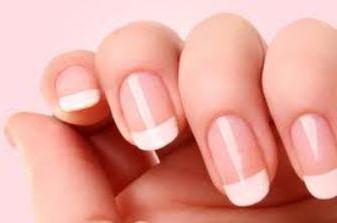
Modern fashion surprises us almost every day. The level of cosmetology services is increasing significantly, which cannot but please women. There are more and more tools and methods that allow you to take care of your own youth and beauty on your own, without visiting specialized salons. And the most striking example of such innovation can serve as a gel nail extension on the forms, a step-by-step instruction of which is described below.

Step 1. Hygienic treatment of the nail. Before building up, we don’t use all kinds of creams and oils, we don’t steam our nails, since the nail plate has the ability to expand, and when cooled it takes its initial shape, and this can lead to peeling of the gel! Therefore, it is enough to apply an antiseptic to the hands of the client and the master. Next, moisturize the cuticle, and after softening it, use the stick of an orange tree (it can be purchased in specialized stores) or a spatula to remove the cuticle. Many experts cut the cuticle with scissors, thereby making a big mistake and sometimes exposing the client to infection. If you decide to follow suit, use sharp stainless steel cuticle scissors. Cut the cuticle shallow and gradually. You need to work very carefully. At the base of the nail, remove the excess skin with a stick.
Step 2. Using a nail file, grind the edges (the length of the overgrown nail should be no more than 3 mm) and proceed to the nail plate: file the top layer of the nail (gloss) to a dull finish. Carefully pass near the side rollers of the finger. It must be remembered that a nail file can damage the skin around the nail, so work should be done carefully. Remove dust with a brush. After this procedure, we try not to touch anything. It is very important to strictly follow the rules, only in this case the gel nail extension on the upper forms will be of high quality.
Step 3. Apply a primer to the prepared nail plate. It is not necessary to use it, but it will come in handy for the penetration of the gel into the nail. To perform such a gel nail extension, the instruction advises slowly, so that each layer dries.
Step 4. In advance, discuss the length of the nail with the client. We take the form purchased in a specialized store. We substitute it under the edge of the nail. We fix it. So, we prepared the nails for applying the gel.
Step 5. Take a small amount of gel with a brush. Get flat brushes, they are easier to work with. The gel is applied with a brush to the edge of the nail plate and then distributed to the base, as if rubbing it into a natural nail. We also cover gel and mold. Then we transfer the nails to the UV lamp. Dry for 2-3 minutes. We check for strength: you can gently tap the other edge of the brush and hear a sonorous sound - the nail is dry. Then remove the sticky layer. To do this, you can use the tool to remove the sticky layer or to remove the varnish.
Step 6. Using a nail file, give the nails the desired shape. We check the length using the same form on which we applied the gel. Remove dust with a brush.
Step 7. Further actions are completely dependent on the imagination of the master, since at this stage of the work a pattern or ornament is applied to the nails. Moreover, such a gel nail extension on the forms (step-by-step instruction) allows using not only paints, but also additional decorative elements. And if after applying them you use a gel, transfer the nail immediately under the UV lamp to prevent spreading over the nail. If you use acrylic paints for an aquarium effect, wait until the paint has completely dried and proceed to the next step.
Step 8. After applying the art painting, cover the nails with the last layer of gel. Apply it gently and dry for 3-4 minutes. Remove the sticky layer and cover with a fixative.
This is how gel nail extensions on the forms take place. The step-by-step instruction offered by us will help you to successfully begin training in this art.
There are many techniques for creating the perfect manicure. Also, you can try not only gel nail extension on the forms. A step-by-step instruction may also involve the use of tips adapted to the size of the nail. You can attach them to the nail with glue for tips or acrylic.