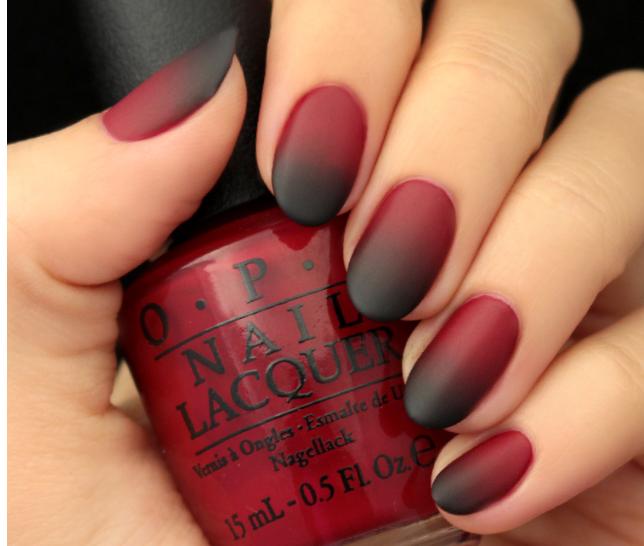
Classic red manicure is popular among the female population of the whole world. Since ancient times, people called any beautiful things or good deeds red. Such a manicure has been considered a classic for a long time, since it is this color and all its shades that attract general attention to a woman. Ask any girl what color she would like to do manicure. The answer will be unequivocal - red.
However, not all women decide to apply such a bright nail art, considering it too provocative and extravagant, although it is possible to choose more calm shades for indecisive and shy ladies.
If you are happy to make a classic red manicure, then you are a successful and strong woman, firmly confident in her irresistibility, bold and knowing her worth. In the article we will introduce you to the varieties of this nail art, how you can diversify the patterns on the nails using the latest gel varnish application techniques at hand. Photos will help you better imagine how the result of your efforts should look.
Shades of red
In nature, you can find a huge number of shades of this bright color. There are calm and delicate colors, for example, light coral and geraldine. There are a number of dull and muted colors, such as dark pink, terracotta and milling cutters. Saturated deep colors look beautiful on marigolds - burgundy, Indian red and cardinal. For fashionistas who want to attract everyone's attention, it is better to choose bright and defiant shades, such as carmine red, partridge eyes, coral.
Classic red manicure is a capacious concept that includes absolutely all varieties of colors. When buying varnish, be sure to attach a sample to your fingers to understand how nail art will correlate with skin color, outfit. You also need to know for the saturation of the selected color how many times you have to cover the nail. There are varnishes of a thick consistency, which even after a single application cover the plates qualitatively, without gaps. If the varnish is more liquid, then after drying it is necessary to apply an additional background layer. The hue may change. All these little things are thought out in advance, especially if you select the same tone of varnish and lipstick.
Golden moon manicure
A classic red manicure can be supplemented with golden arcs at the base. Hue for this combination is suitable for anyone, however, a combination of a shiny strip with a dark red or burgundy color will be more effective.
Even a novice master can do it yourself. After preliminary preparation of the nails for staining - hygienic removal of the cuticle, sawing of the edges to give the chosen shape to the plates, treatment with a degreaser and antiseptic - apply a base layer of gel polish and dry your nails under a UV lamp. 2 minutes is enough. Then the part of the nail at the base is covered with gold varnish.
It is advisable to choose a varnish saturated with sparkles, so that one application is enough. Dry the surface and then work is already done with red varnish, filling the rest of the nail. At the base, leave only a narrow golden strip of rounded shape. Masters call it the moon, as it resembles a young month in shape. It remains to fix the manicure with a top gel and finally dry the top layer of varnish under the lamp. To prevent the surface from sticking, wipe all nails with a wash.
Manicure with lines
Making a classic red manicure, you can focus on one of the nails. In our sample, this is the ring finger, on the nail of which contrasting strips of white color are drawn. It is most convenient to do this already on painted and dried nail plates with a thin brush. One of the lines is drawn wider, as rhinestones will subsequently be attached to it.
For strong fixation of small pebbles, craftsmen usually use special cosmetic glue. If you do not have one, then apply a base adhesive coat to the smooth surface of the dried strip. Dip all the rhinestones in it one by one, correct them carefully so that the strip is perfectly even, and then dry the nails under the lamp. For reliability, you can cover all the stones on top with a top gel and dry again. However, in this case, the pebbles will turn out to be slightly recessed in a transparent layer, and they will shine less. So, if you like to decorate nails with pebbles, rivets or rhinestones, then it is better to buy glue for attaching them.
Original version
Classic red manicure (photo below in the article) can be done using glossy and matte varnish. It will be interesting to look at the option in which some nails are made shiny and others are dull. However, their combination on one nail plate looks original.
Part of the nail at the base of the arc is painted with glossy gel polish, dried, and then the manicure is finished matte. The strip at the junction of different structures is covered with shiny rhinestones. This nail art looks very solemn, suitable for both the bride for the wedding and a mature woman for the anniversary.
Using multiple techniques
Recently, small powder for nails has been popular. This is acrylic powder, which the craftsmen nicknamed "sugar." To coat the nail with these smallest particles, smear its surface with a base gel. Due to the too fine structure of the particles, the powder is inconvenient to apply with improvised means, since most can be scattered along the road.
It is best to lower the nail with a sticky layer into a jar of “sugar”, the excess is poured back. You can lightly press the powder with a fingertip so that it drowned in the base. Then just dry the nail under the lamp. No additional coverage is required.
The nail on the ring finger, on which an unpainted “moon” is left at the base, whose contours are pasted over with rhinestones, also looks interesting.
Geometry style manicure.
Classic red manicure for short nails can be varied with a geometric pattern on a separate finger. Apply it according to a previously drawn sketch with thin brushes.
To prevent gel polish from spreading, after each color, dry your nails under the lamp, and then use the following. The joints between the shades of red at the end fill with thin contrasting lines of white.
3D effect
The classic red manicure for short nails (photo below) looks voluminous due to several interesting touches. After covering the nails with the main background gel polish, dry them under the lamp. Next, with a thin brush, outline around the entire perimeter of the nail with black varnish.
The 3D effect is achieved by applying white glare with small glare on one side on all nail plates. Consider this technique carefully to surprise your girlfriends with a unique masterpiece.
Stamping
Nails designed with a silicone print are very effective. On the Internet you can buy a stamping kit and try this technique on your own. A special stamping varnish is applied to the metal plate with a pattern (gel varnishes are not suitable), then the excess varnish is removed from the set with a silicone stack, the seal is dipped into the prepared place and it touches the nail.
There remains an imprint that must dry on its own. We'll have to wait, since the lamp cannot be used in such a technique. When the drawing is completely dry, cover the nail with the top and dry the top coat of varnish under the UV lamp.
In the article, we introduced readers to several interesting options for red classic manicure, with the design of individual nails in different techniques. Try, study, create for your own pleasure!