Replacing the bicycle pedals is not particularly difficult. To do this, you need a desire and a key at 15. The tool can be a spanner or end type. When choosing, it is necessary to consider the distance between the removed elements and the connecting rod. The best option is a special key, which has a smaller thickness of the faces.
Design features
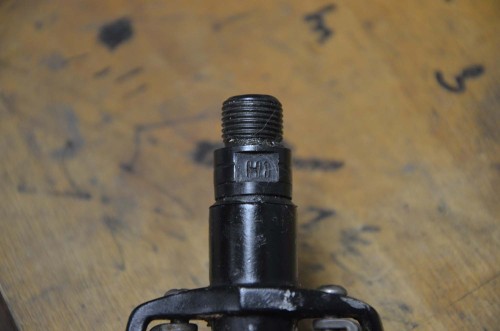
Bicycle pedals on the principle of fastening and operation resemble the front wheel hub. Naturally, instead of knitting needles, a platform is fixed on the element to accommodate the user's legs. A thread is provided on the axis for fixing to the connecting rod. To understand the features of replacing or repairing a bicycle pedal, you should consider the varieties of the main groups.
It is necessary to distinguish between the left and right pedals, as they have different threading. Manufacturers make such a difference so that the elements do not loosen during operation. Details are marked in a simple way - with the letters R (right) or L (left). Labels are applied to the end part.
Classic bike pedals
This type of element is one of the most common options, the configuration of which has been known since the days of the Soviet Union. On modern versions, improved versions are used. Similar models are reliable if made from quality components. Design:
- housings with an internal axis;
- bearings;
- a pair of pads;
- bolt fastening;
- possibly reflectors in the form of reflective strips;
- sometimes the hull is not made of metal alloy, but plastic.
These pedals can be operated on almost all types of bicycles. The use of such modifications is not practiced only on stunts and other specific bikes intended for extreme sports. This is due to the fact that when performing jumps, pedals on a speed bike experience critical loads that they can not withstand. The advantages include light weight, ease of maintenance and low cost.
Platform versions
The configuration of this type of bicycle pedals, which are used on modern models, is a single wide platform. A part is made of reinforced plastic, aluminum or a combined material. The housing is an integral part, in the inner part of which there are bearings, a threaded axis and a washer with a lock nut. Additional reflectors may be available.
The advantages of the elements of this variety are reinforced strength, which makes it possible to exploit them on mountain, road and city models. On highway modifications, these elements are not recommended to be mounted because of their large mass. Among other disadvantages - high price and massiveness.
Contact pedals
These products are used as parts for mountain and highway "bicycles". Some craftsmen also mount them on hybrid versions. The system differs from the above analogues by the presence of a special mechanism responsible for the reliable fixation of characteristic shoes. The design makes it possible not only to move the pedal along the trajectory, but also to pull it up, which significantly increases the driving efficiency, reducing the cost of physical forces.
The complicated configuration, in turn, leads to higher cost of the product, as well as additional costs for the purchase of special shoes. Next, we consider methods for replacing, disassembling and lubricating the elements in question.
How to pedal a bike?
To dismantle the indicated elements for repair or replacement is very simple. Please note that the right and left parts are unscrewed in different directions (the first is clockwise, the second is against).
To dismantle the pedals is accessible using an adjustable wrench or other suitable wrench. Since the clearance between the connecting rods is 12 millimeters or less, the length and thickness of the tool faces must be considered.
Disassembly
How to disassemble the bicycle pedal after removing it? This operation consists of several stages:
- Remove the cap on the end of the element. To do this, it is poked with a sharp object, such as a screwdriver.
- Unscrew the control nut with a ring wrench, remove the intermediate washer.
- Gently unscrew the cone of the bearing block, making sure that the balls do not crumble. After shooting the part from the axis, it is advisable not to turn the pedal over while holding it in order to prevent the axis from falling out of the housing.
- Ball bearings are removed, set aside. It is better to recount them so that there are no misunderstandings during assembly.
- Pull out the body axis. The operation is carried out on a table or other surface, as the balls of the second bearing may spill out.
- Then they take out the elements and recount. They should coincide in quantity with the first analogue. It is not necessary to mix and interchange parts, since during the operation they have become frayed together.
- They clean devices from old grease, including cones, seats, axle and everything else. The process is carried out using a clean rag or "vedeshki".
- All elements are inspected for cracks and other breakdowns. In the case of over-tightening the locks and not enough oil, the bearing housing can be extremely developed.
Maintenance and lubrication
The bicycle pedal sleeve can be greased without complete disassembly. To do this, use special oils ("Litol", CIFTIM or their analogues). For the cold season, Litol-24 is the best choice, preserving its properties at low temperatures.
Process steps:
- The bike is placed on its side so that the end of the lubricated part is facing straight up.
- Remove the protective plug using a screwdriver or similar tool.
- Gently pour oil (about two milliliters) by turning the element.
- The cap is put in place, quickly turn the pedal for a few seconds. In this case, the bike is not lifted.
- Then the bike is put on wheels, a pedal is rotated several times, which should turn easily.
On this, the lubrication process without complete disassembly is considered complete. It is worth noting that this is a temporary measure, since oil will leak out during operation. If possible, it is advisable to replace the grease with disassembling the element as described above. The assembly process is discussed below.
Assembly
After disassembling and replacing grease, as well as defective elements, proceed to assembly of the part. It is executed in the following sequence:
- A reasonable amount of grease is applied to the seat of the second bearing. A characteristic indicator is the ability of the balls to adhere to it without falling out of the bowl.
- Put the insides of the second bearing into the bowl. For convenience, you can use tweezers. Pre balls are recounted. It is important not to confuse them with the elements of the first bearing.
- Carefully set the axle so as not to displace the balls. After placing the part in its place, make sure that it does not fall back.
- Apply grease to the seat of the first bearing, put balls on the bowl.
- A cone is screwed onto the axis, followed by adjusting the tightening. In the process of pulling parts, check for the absence of transverse and longitudinal play. They should not be, but the pedal should rotate easily.
- Put on the washer, tighten the lock nut, install the protective plug.
On this assembly is considered complete. The right element in the connecting rod is twisted clockwise, the left - against.
Recommendations
How to change the pedals on the bike is described above. Keep in mind some of the nuances. Since the system is operated under conditions of significant mechanical stress and weathering, problems can occur when unscrewing the elements. Two methods are used to solve them.
In the first case, the component is soaked in a solvent or kerosene in order to achieve maximum cleaning from clogged dirt and rust. In the second embodiment, the connecting rod and axle are heated. This deformation allows you to release the threaded connection and to dismantle the axis. When installing and tightening the axle, be careful not to damage the threads. This becomes a significant problem with repeated removal.