The art of compiling and depicting still lifes requires the artist to be sufficient perseverance and certain knowledge. However, all masters recommend starting with drawing ordinary ... apples. This can be done quite simply and quickly and at the same time "fill your hand" for more complex work. How to draw an apple with a pencil or paints? Find out about it right now!
First of all, it should be said that it is possible to proceed to drawing still lifes only after studying the rules of chiaroscuro and training in the image of basic figures. These are the basics of drawing, without which it is almost impossible to develop in this direction. In this case, first of all, we need the ability to draw a ball - the shape of the apple most closely resembles this particular figure. In this article, we will look at how to draw an apple with a pencil and paints.
Pencil drawing
To understand how to draw an apple, it is best to start with a drawing with a simple pencil. This will allow you to feel the shape of the fruit, convey its volume.
1. Indicate on the sheet the place where your apple will be located. Remember that a real fruit cannot have a perfect shape, so a few “humps”, curved lines, etc. should be added to an ordinary ball.
2. Outline the spine. Immediately determine which side of the light is falling.
3. First of all, we study the darkest places (the opposite end of the apple, the notches near the root, etc.).
4. Next, work on partial shade. This is the area below the apple and the space near the shadow. Shadow and partial shade occupy about 1/3 of the figure on average.
5. Denote the bottom edge of the fruit and outline with a soft pencil (4B) the shadow on the plane cast by the apple. The shadow also gradually changes: near the apple itself, it will be most saturated, and gradually dissipate with distance.
6. The main tone should not be too bright. We convey it with light strokes. The “ribs” of an apple are denoted by thin strips a tone darker than the surrounding plane. For example, if the bend is in the penumbra zone, you must designate it using a shade of shadow.
7. Slightly darken the area near the edge of the apple and emphasize its lower part.
8. Make all the colors richer. If you need to draw a wall behind an apple, the outline of the fruit must be darkened. Gradually, as on the table, the shadow should dissipate. Be sure to leave at the point where light hits the apple at an angle of 90 degrees, the so-called highlight - a small bright spot, a reflection.
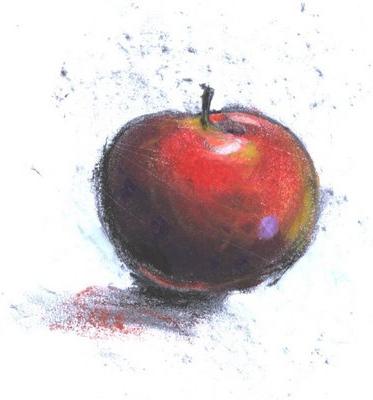
And if you add colors?
Many will be interested to learn how to draw an apple with paints. The arrangement of light and dark areas and the drawing order in this case will be approximately the same. However, there are a number of nuances that should be considered:
- To make the picture truly picturesque, do not limit yourself to the colors that you see. For example, if the apple is completely green, you can use not only different shades of saturation, but also mix the main color with yellow, bluish, even red.
- Do not be “afraid” of the paint. Take a look at your “nature” - a real apple: nature hasn’t stinted on colors. So you should not. The pattern should look as if you can bite it with your teeth and feel the sweet apple taste.
- Another rule is how to draw an apple with paints - do not leave the highlight completely white. This should be the lightest shade of the main tone (for example, if the apple is red, you can use soft pink or pink-yellow color).
- No abrupt transitions! But the “blur” the whole picture is not worth it. Shades should be clearly visible, but as if "flowing" one into another. And to achieve this it is worth not rubbing the borders with a wet brush, but successfully applying different colors to each other.
As you can see, drawing an apple is very easy! I hope you find this article helpful.