What if you do not know how to draw with a pencil or with a computer mouse, but you want to create a digital drawing? Today, many people are interested in the question of how to make a photo as drawn. The answer to it is quite simple: all that is needed is to carefully study the material provided in this article and put the acquired knowledge into practice.
Talk about art
In the old days, to capture the moment, it was necessary to have artistic talent and study for a long time, but in our time there is such a thing as photography, so it’s not necessary to be able to draw. Thanks to modern technology, we can instantly create our own small works of art. Well, the presence of various graphic editors opens up a wide range of opportunities for creativity by drawing and processing photographs and applying a variety of effects.
How can I draw a photo?
There are several different ways to turn a photo into a real drawing. The easiest is to convert photos directly to your online browser. It is clear that all the settings available there are common and cannot be adjusted to each photo. The second, more productive way is to use programs specially created for such purposes. On the Internet there are a large number of different editors aimed specifically at turning the picture into a kind of drawing. The number of available settings will be more, and you can achieve an acceptable result. The best way is to use a graphics editor such as PhotoShop (hereinafter referred to as "Photoshop"). In this case, photo editing takes place under your personal control, which means that the final work will be optimal.
Of course, you will get the most impressive result by ordering a portrait or landscape from the artist, but our goal is to familiarize yourself with the work of the editor, so that everyone can easily understand how to take a photo as drawn. So we leave the work with a brush to the artists, and we’ll figure out the principle of Photoshop’s work. There is nothing complicated in the task at hand: if you carefully read the instructions and step by step perform all these steps, then everything will work out easily. The end result will be pleasing to the eye, and you can learn something new.
How to make a photo drawn in pencil in Photoshop?
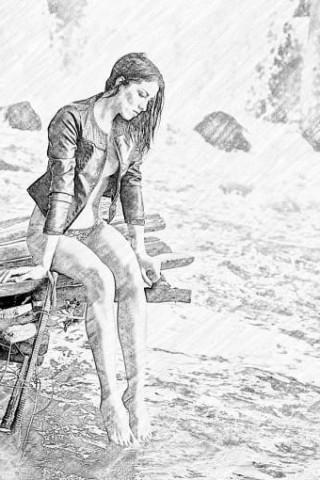
There are many possibilities to draw a picture from a photograph using Photoshop tools. To begin, consider the simplest way, after which the photo turns into a black and white pencil drawing.
- Open the desired image in the Photoshop editor.
- On the right is the Layers panel, which so far only displays one layer of our photo - the Background. We copy it either using the right mouse button - “Create a duplicate layer”, or simply dragging it down to the “Create a new layer” icon. A Background Copy appears in the list of layers.
- Now you need to bleach the new layer using the top menu "Image - Correction - Bleach." We get a black and white photo.
- After we repeat the copying and again through the top menu we perform one more operation “Image - Correction - Inversion”. It will turn our colors - it will change black to white and vice versa.
- On the same layer in the left panel, open the list of blending modes and select “Linear Clarifier”. The whole picture will turn white, and you can proceed to the next step.
- At this stage, we directly approach the creation of the pencil effect. Why in the top menu we use "Filter - Other - Minimum". Then, on a white background after the previous step, the desired result appears - a pencil drawing. In the filtering settings window, which opens immediately after applying "Filter - Other - Minimum" in the "Radius" field, set 1, but we can experiment. The larger the radius, the stronger the pattern will resemble the photo again. Therefore, size 1 is considered optimal, but it is allowed to slightly increase it - it depends on the photo, and this can be determined by eye. The drawing is ready.
- If the result is not clear enough, you can play with the blending modes after applying the filter "Minimum". For example, "Lightening the foundation." A successful regime can be found experimentally.
- Also, an interesting effect will turn out if you make the middle layer invisible in the left panel (click on the "eye" next to the name of the layer). Then the resulting pattern will be colored.
- To save this or that result, upon reaching the desired in the upper menu, select “File - Save As ...” and save the image where convenient.
Work with paints
How to make a photo as painted by paints? Using a special filter developed by Adobe, which is freely available on the Internet - Pixel Bender. In the Ps6 version, it is already preinstalled, and in the Russian version it is called "Oil Paint" and is located in the upper menu in the "Filter" column.
This effect looks especially good in photographs of some places: old buildings, landscapes and still lifes. It can also be applied to photographs of a person, but the result may be mixed.
Using this editing method is even easier than the previous one: you simply open the desired photo, then go to the top menu “Filter - Oil Paint ...”, after which an additional filter window opens, in which you, changing the settings, immediately see the future result. Two main parameters are changed - brush properties and lighting. The final picture is very beautiful, and most importantly, it seems that it is really painted with brushes and paints.
And finally
As mentioned above, there are many options for how to make a photo as drawn, how to create a truly memorable picture using photo processing. You can achieve the effect of the cartoon, caricature, comic book, picture, sketch. The list goes on as long as your imagination is enough. The possibilities in the environment of graphic editors are almost endless - you just need not to be afraid to learn. Install PhotoShop, start with a simple one, gradually increasing your skills, and you will achieve excellent results!