Home-made baked goods are very much appreciated. So, freshly baked bread, exuding a unique aroma, by its very appearance stimulates appetite. Modern housewives return to tradition and prefer to cook homemade bread in the oven on dry yeast.
The benefits of home-made bread
Production technology for baking bakery products often involves the addition of all kinds of preservatives. The in-store product contains dextrose, soy flour, vegetable fat, vinegar, wheat protein, emulsifiers and nutritional supplements. This allows the manufacturer to improve the appearance and taste of the finished product, extend its shelf life. The use of low-grade grains is also possible. These factors significantly reduce the beneficial qualities of purchased bread.
Homemade cakes have an unrivaled flavor. It is inexpensive and useful. Everyone can master the skill of making bread. Having gained some skills in working with the dough, you can constantly delight your household with the most delicious and healthy bread. You can also experiment with various recipes by adding interesting ingredients.
What is needed for making delicious homemade bread?
In the old days, bread was baked in an oven. Today, many housewives have bread machines and slow cookers in which you can quickly cook it. Now we will learn how to cook delicious bread, even without such special equipment, using a conventional electric or gas oven.
Every housewife has devices for baking bread at home. Otherwise, they can always be purchased at any supermarket. In order to implement a recipe for delicious bread in the oven, you will need the following kitchen utensils:
- a large bowl in which it will be convenient to knead the dough;
- a wooden spoon or a special spatula for kneading dough;
- baking dish (with thick walls and high sides);
- cling film to cover the dough (you can use a cloth or a small towel).
The main ingredient for cooking is yeast. The result of our efforts depends on their quality. The use of yeast makes the dough fermentation process fast and stable.
Types of Dry Yeast
Dry yeast (granular) can be of two types:
- Active or pairwise. They look like small balls. Yeast must be diluted in water, whey, milk until completely dissolved or a “cap” is obtained from the foam.
- Unpaired. They have the appearance of a light brown powder. This product is used for baking quick bread. Yeast is simply mixed with flour and other ingredients.
Rye bread
There are many recipes for homemade bread on dry yeast, which even a beginner can quickly cook. One of the most useful is considered rye, because it contains a lot of useful substances. In comparison with wheat flour, rye flour contains more of such valuable trace elements as potassium, magnesium and iron.
For cooking, you will need the following components:
- dry yeast - 2 teaspoons;
- rye flour - 5 glasses;
- water - 400 ml;
- salt - 2 teaspoons;
- refined sunflower oil.
Recipe step by step
Consider cooking the food in stages:
- Sift flour with a sieve.
- Add water, yeast and salt. It turned out dough on dry yeast for bread.
- Knead the dough thoroughly and, covering it with cling film, send to the refrigerator for 15 hours. The dough should increase about one and a half times.
- Remove the dough from the refrigerator and place it on a table sprinkled with flour.
- Spread the dough by overlapping it on four sides. It should be a cake of five layers.
- Sprinkle the dough lightly with flour and leave it to stand on the table, covering with a towel.
- Lubricate the baking dish with vegetable oil and place it for 5 minutes in the oven preheated to 250 ° C.
- Gently move the dough into a powdery form. Put it in the oven.
- Bake for 40 minutes. Homemade bread in the oven on dry yeast is ready!
White bread
To make wheat bread using dry yeast in the oven, you will need simple ingredients. It:
- wheat flour - 600 g;
- water - 400 ml;
- dry yeast - 1.5 teaspoons;
- sugar - 1 tablespoon;
- salt - 1 teaspoon;
- vegetable oil - 2 tablespoons.
Recipe step by step
The recipe for delicious bread in the oven includes the following steps:
- Pour water into a bowl, dissolve yeast and sugar in it. Add salt and sifted flour.
- Using a spoon, mix thoroughly. Flour must absorb all the water. Leave the dough for 5 minutes.
- Pour in vegetable oil and continue kneading. When the dough becomes elastic and stops sticking, leave it in a warm place for 4 minutes. Now, again, you should hug him. Then let go again. Knead the dough again.
- Send the ball to the baking dish. Leave him come up one last time.
- When the dough is doubled, coat it with egg yolk or milk.
- Send the future bread to be baked for 50 minutes in an oven preheated to 180 ° C.
Features of cooking dough
Experienced housewives are advised to take the dough very seriously:
- Water for steamer should be taken heated to 35-40 ° C. To withstand temperature is an important condition. In cold water, yeast bacteria will not multiply, and in too hot, they will die.
- Do not add all the flour at once. First, dissolve dry yeast, salt, sugar, and a few tablespoons of flour in water. Stir the mass with a whisk until the lumps disappear completely. The solution should have a consistency of liquid sour cream.
- Add the remaining flour to the water, but not vice versa. This will allow you to adjust it to the amount of liquid and not increase the volume of the finished dough, additionally adding water.
- Dry yeast dough does not like drafts and loud sounds.
- The appearance of the sponge will be indicated by its appearance: it should significantly increase in volume and become covered with bubbles.
How to knead the dough?
This question often arises among beginners. After all, they cook homemade bread in the oven on dry yeast for the first time. Therefore, we will dwell on this stage of preparation in more detail.
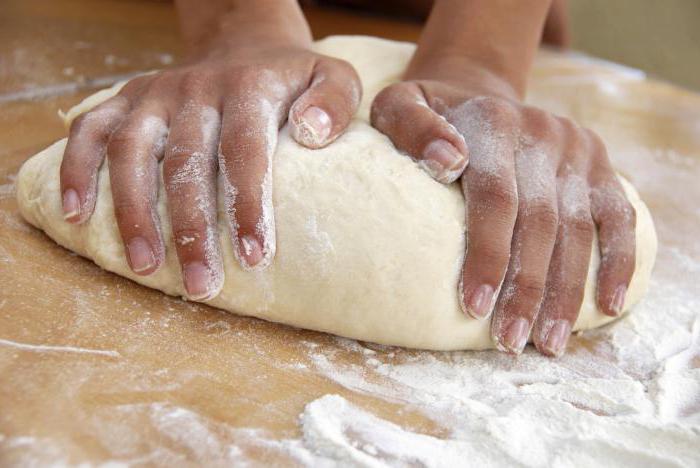
- Wash your hands before kneading dough. Kneading involves working with bare hands. Before touching the dough, remove all jewelry from your fingers.
- Gather the dough in a pile. When you first touch it, it will have a fairly sticky consistency that will be difficult to put together. Work with the mass, pressing and gradually create a spherical shape. This should be done until the dough becomes homogeneous and stops sticking to your hands. If the stickiness remains, sprinkle flour on the mass, gently stirring it.
- Kneading. Lightly push the dough forward, resting your palms on it. Beat until it starts to spring. Usually enough for 10 minutes. The kneading process should be rhythmic, not too slow. The dough after this treatment will completely get rid of lumps and stickiness. Its surface will become smooth, shiny, and the texture will become resilient.
- The form of the test. Now you should check if the dough holds the shape. Roll it into a ball and leave it on your desktop. The form of the test after such manipulations should remain unchanged. Poke it with your finger. If the dough is ready, then it will return to the shape of a ball.
Which baking will turn out depends on the batch. With the right actions, the cooked bread will be soft, find a beautiful crisp. If the dough was not kneaded thoroughly, then the product will become flat with a stiff, dense texture.
Cooking secrets
Useful tips to make delicious bread.
- Sift the flour through a sieve before kneading the dough. This will fill it with oxygen and give the test a porous structure. Baking will turn out magnificent and easy.
- In order not to get lumps in the dough, all the ingredients should be added to the flour.
- At the initial stage, the dough must be kneaded in a bowl with a spoon. When it begins to separate from the container, kneading should be done by hand. Put the mass on a table previously sprinkled with flour.
- To make the dough “fit”, that is, to increase in volume, cover it with a towel and place it in a warm place. This process can be significantly accelerated if several straws are inserted into future bread.
- Do not place the dough in a draft.
- The dough will increase in volume several times if you remove the air bubbles, a little washing with your hands.
- After the dough is laid out in a baking dish, put it in a warm place for 20 minutes. The product will become even more magnificent.
- To place future bread is necessary in the oven, preheated to the required temperature.
- A regular toothpick will help determine the readiness. If it remains clean after piercing the product, then it is ready.
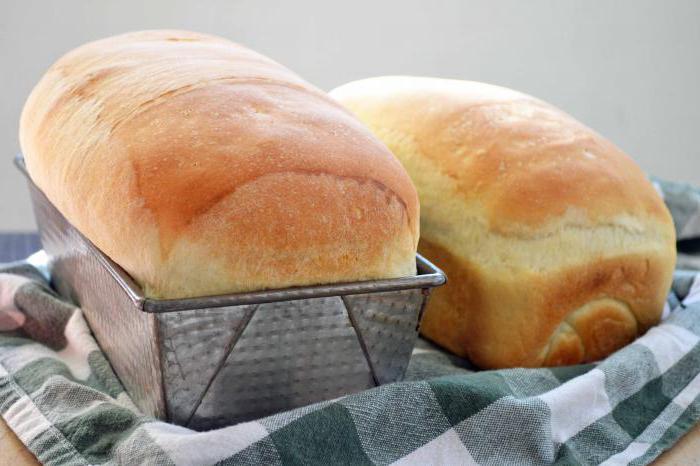
No one can resist the fluffy, delicate crumb of bread with a thin golden crust. It is impossible to overestimate the taste and aroma of baking. Dry yeast homemade bread is cooked quickly in the oven, and the result exceeds all expectations.