How nice to be an artist! After all, he can capture the beauty of the world around us in watercolor landscapes, pastel drawings, and oil painting is generally some kind of miracle! Sometimes you look at a picture and you want to step over the border of a baguette and disappear into a beautiful world painted on canvas by a talented artist’s brush. Do you also want to become one of the chosen lucky ones who can freely own a brush and paints? If you are not afraid of difficulties, but determination and love of drawing overwhelm your heart and soul, then go ahead! We are confident that with your determination you will soon become a true master.
Oil painting - where to start
Starting is always difficult. Drawing on canvas with oil paints is a matter requiring a lot of knowledge, skills. Of course, it’s best to start getting involved in art as early as possible. Unfortunately, not all parents were taken to an art school as a child.
But in our time there are art studios for people of all ages, where everyone can study oil painting. The master class in such schools is usually conducted by experienced teachers and artists who are well versed in the subject and can fully reveal all the secrets of mastery. If, for some reason, you cannot or do not want to visit such an institution, then this does not matter. In the end, a stubborn and purposeful person can independently learn to paint oil paintings. And for starters, you will need to go to the store and buy everything you need for painting there.
What materials will be needed to work
Oil painting is a matter that requires not only talent and skill, but also significant financial costs, because in order to paint a picture, you need a lot of everything. Here is a list of what you will need to work:
1. Special oil paints in tubes.
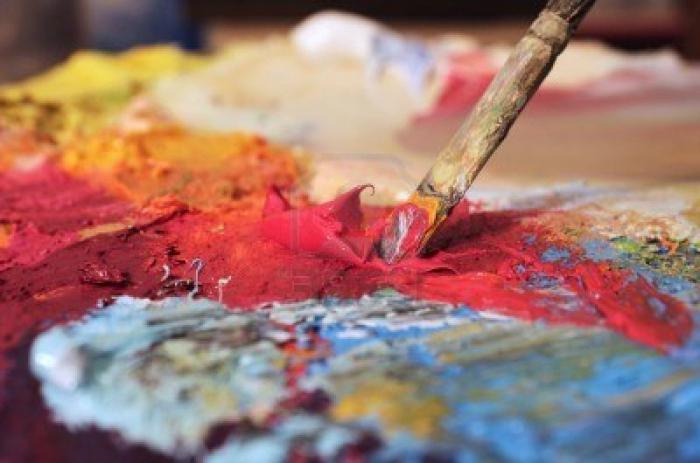
2. Brushes of different sizes from natural bristles (flat) and core brush (round) for the final decoration of your painting.
3. Sketchbook.
4. Thinner for oil paints.
5. Coal for applying preliminary drawing on canvas or a simple soft pencil.
6. Subframe. It can be ordered in a baguette workshop or bought ready-made in a store.
7. Primed canvas.
Well, now you are almost fully equipped and you can begin the creative process. But first, listen to our short story on the properties of oil paints.
More about oil paints
Beautiful oil painting is breathtaking. But have you ever thought about how much time a master spends on an easel? Much depends on the quality of the paints that the artist uses. Now it’s hard for us to imagine this, but once painters had no idea about oil paints. They were invented only in the 15th century by the Flemings, and the secret of their manufacture was kept in strictest secrecy for a long time. Can you imagine how lucky we are ?! In our time, such paints can be bought completely freely, and of the highest quality!
You need to know that most of all when working, white is consumed. Therefore, if you buy paints in a set, then buy a few more tubes of lead or titanium white to them. Also, you can not use ready-made store kits, but collect your own palette. Just do not try to immediately buy as many flowers as possible. Take only the basic ones: white, black paint (it is best to buy burnt bone), ocher (yellow and red), cadmium red, or cinnabar, kraplak, yellow cadmium, chrome green, ultramarine and cobalt blue, Mars brown. At first, such a set would be quite enough.
Oil painting for beginners. Work stages
The elephant, as you know, is best eaten in parts, so let's find out what stages the work on the oil painting will consist of.
1. First you need to determine the nature, ie decide what exactly you will write: still life, landscape, or maybe even sweep a portrait?
2. Suppose you have chosen a still life. As you know, it consists of several different objects, which must be carefully drawn, in addition, it is necessary to carefully consider the lighting. The play of light and shadow is a very important point, which in no case should be forgotten.
3. If the primed canvas and the stretcher exist separately so far, then you need to fix it and pull the canvas with a stapler for furniture.
4. Next, a light sketch with charcoal or pencil is made on the canvas.
5. Now it is time to make the initial undermining. Here, your task is to deal with the basic colors, shadows and light in your picture. After this step, your oil painting should dry out a bit. You can return to work on it the next day.
6. After the sketch has dried, you can proceed with further creativity. The time has come to refine the contours and work out the details.
7. At the final stage, the wide brushes should be set aside and pick up a round thin columnar brush. She put the smallest finishing touches on the picture.
8. Well, the work is ready. After drying the painting completely, you can cover it with a special varnish.
What is the best place to start: with a portrait, landscape or still life?
If you have never before practiced oil painting on canvas, then you should not start doing this with a portrait, because this is the most difficult. And it’s hard for an inexperienced artist to give a landscape, especially if you want to paint it from nature. The difficulty arises in many respects because the lighting in nature is constantly changing, the trees are moving from the wind, and there are too many different distractions: buzzing mosquitoes and flies, annoying passers-by, etc.
Another thing is a still life (dead nature): composed of various objects, and he will stand as cute as you need. Just do not immediately try to imitate the "Small Dutch" and take on a complex composition, consisting of many objects and colors. To begin with, it is better to be content with a modest still life of two or three things.
How to use the palette
You have probably seen in various films how venerable painters beautifully hold a palette with one hand, and freely draw on the canvas with the other. You can do this too, for this there is a special hole in the palette: insert your thumb there, and the others support it from the bottom - very convenient, try it!
Paints are squeezed onto the upper left edge of the board, and its middle should remain free - on it you will mix colors. It is very important: after a painting session, do not forget to scrape off unused paint, otherwise it will dry out to the palette and will interfere with subsequent work.
Oil Painting Technique
Oil painting training may be hindered by the fact that a novice artist may have a poor understanding of the technique of such a drawing. Oil paints are very dense, and without experience it can be difficult to achieve inconspicuous tone transitions. Take a look at the reproductions of old paintings - you will not see a trace of strokes on them. If you are attracted to just such a manner, then you will need to first master the so-called glazing technique. At the same time, the paints are diluted with a solvent sufficiently liquid, but are applied with a practically dry brush to the surface of the canvas . It is difficult to explain in words, it is best to see how real artists do it.
Another technique that allows you to achieve beautiful effects in painting is shading paint with a brush on canvas. In this case, one color is fused into another. Well, of course, it’s not at all necessary to try to write without strokes. Perhaps you want to emulate Van Gogh’s paintings ...
Last admonition to a novice artist
Well, our little story about oil painting has ended. The master class turned out, albeit small, but very informative. Now it will only depend on you how soon you can please your loved ones with beautiful works. Start creating as soon as possible and don't be afraid of anything. We wish you creative success!